My friend Alan and I moved back to WWII and on to North Africa in our last game, having played the invasion of Crete previously. This scenario was the next in our continued playing through of a series of Battlefront WWII scenarios chronologically, in this case a battle that took place in the Libyan Desert in an Allied attempt to break the siege of Tobruk. Pt. 175 was nothing more than a trig point on some high ground in the middle of the desert but it was key to the Allied advance and slated to be taken by the recently arrived New Zealand 25th Battalion, 6th Brigade in a hastily planned action that would be their first and most costly action of the war. Supported by C Squadron of the 8 Royal Tank Regiment their opponents were “Afrika” Regiment 361, largely made up of former French Foreign Legion soldiers.
This was a scenario I wrote quite of few years ago (you can find it here), drawing on the rich resources available online in the New Zealand archives. We played it out using our slimmed down BFWWII rules on a 6’ X 10.5’ table in 1/72nd scale, using my WWII minis. My collection of North African armour is not extensive so you may spot a few European theatre vehicles in play, including the captured Honeys with their white stars! No judgment, please!

1. New Zealand first wave advances towards the ridge
Half of C Squadron. 8RTR along with 25th Battalion’s carrier platoon, 3 inch mortars and B and D Cos. advance unhindered across a seemingly empty desert, up the right flank towards the ridge and Pt. 175.
2. Carrier platoon leads the way
The NZ commander sends his carrier platoon and FOO, followed closely by the mortars and the battalion commander in their transport, along the edge of the rough ground bordering the escarpment. His plan of attack is to disembark the carrier platoon ahead of the ridge and use those sections to begin clearing the ridge area bordering the escarpment. With the ridge cleared he will move up his FOO and commander to spot for the 25 pdrs. and 3” mortars, the latter of which will have emplaced below the ridge to begin with.
3. Matilda first over the ridge
The 8 RTR’s infantry support tank, the slow-moving but heavily armoured Matilda, is first over the ridge. It quickly spots some uninhabited stone sangars, dummy positions, close to the ridge. The enemy has clearly chosen not to defend Pt. 175 and the ridge, but where is he??
4. Second NZ wave advances
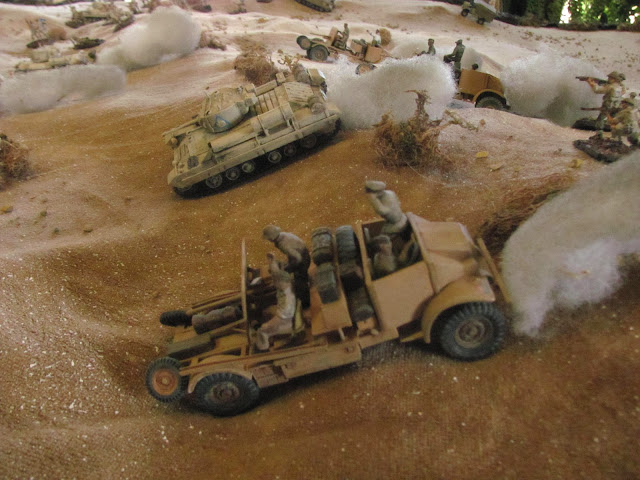
Meanwhile the second NZ wave has arrived. It advances up the left flank, led by the remainder of 8 RTR and the divisional portees mounting 2 pdrs. with C Company following.
5. Second wave advances with B Co. ahead in the distance approaching Pt. 175.
6. Carrier platoon and mortars disembark
As the 3 inch mortars emplace the carrier platoon and FOOs disembark before reaching the ridge. The carriers retreat as the rough ground, cut up with wadis and dense ground cover, makes it too hard going for vehicles.
7. German 88 opens fire
Judging the enemy to be within killing range the German 88 opens fire (although placed on the board the 88 is another 10” of board to the rear), but to no immediate effect other than causing some disorders.
8. First contact
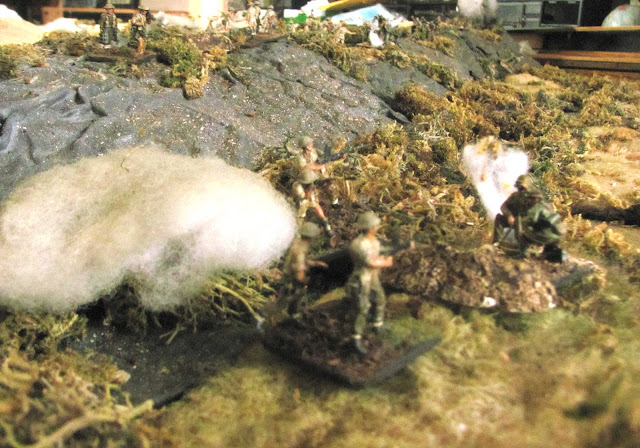
The first German defenders are spotted along the escarpment. Working in tandem with the Matilda the carrier platoon pushes them back.
9. NZ left flank encounters enemy HMG's
Around the same time the lead Valentines of 8RTR on the left encounter a couple of HMG nests forward of the Rugbet en Nbeidar, a deep wadi running at an angle back towards the enemy’s rear.
10. Portees swing into action
The portees slam on the breaks and swing around, bringing their 2 pdrs. to bear as they reverse over the ridge.
11. 25 pdrs. hit German reinforcements
The NZ 3” mortars and off board 25 pdrs. do a good job suppressing the enemy 88, mortars and other AT assets as they show themselves. The German commander, moving to a new position, is spotted by the FOO who brings down a strike that catches a fourth German company that has arrived and is moving up through the rough to support the German left.
12. D Co. supports carrier platoon in clearing right flank
D Co. joins the carrier platoon in clearing the edge of the escarpment. 25th Battalion’s commander, judging resistance here to be light, redirects B Co. to support what is shaping up to be the main event on the NZ left flank.
13. Overview left flank attack
With the Valentines and portees leading the way, the Kiwis pour over the ridge, encountering light resistance forward of the wadi. Upper right can be seen the hidden unit markers that seem to indicate that the bulk of the German forces have been keeping their heads down in the deep wadi, hoping to enfilade the enemy if it had advanced up the middle.
14. HMG's driven back
In an unfair fight the Valentines oust the HMG’s from their sangars before they can fire a shot.
15. German armour (?!) move up the wadi
German reinforcing armour trundle up the Rugbet en Nbeidar, unobserved from the ridge. It is an ad hoc group composed of a Pz. III with two recently captured Honeys, still carrying the British markings.
16. Overview
In this overview of the entire battlefield, you can see how the battle has developed into two separate actions, with C and B Cos. (now reinforced by the late-arriving A Co.) on the left approaching the wadi (top left) and the carrier platoon with D Co. working their way up the right flank along the edge of the escarpment. The German armour, unobserved, rolls up the wadi top left.
17. New Zealand mortars reposition to ridge
With the battle having moved on the NZ 3” mortars move to the ridge so they can more effectively spot enemy fire and attempt to suppress it.
18. Confusion in the ranks!
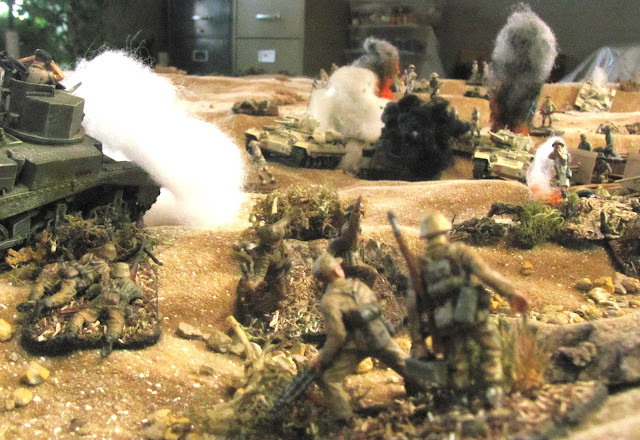
The two Honeys burst over the edge of the wadi and for a moment the NZ forces think reinforcements have arrived and hold their fire. Only when the Honeys begin firing do the Allied tanks realize their mistake. In the foreground German infantry have managed to run in and KO one of the distracted Valentines in close combat!
19. Panzer III joins the fray
With the ruse up, but bolstered by the KO of the enemy tank, the Panzer III bursts out of the wadi, intent on sewing havoc amongst the attackers.
20. Maybe a bit too enthusiastically...
But the portees and following Valentines are ready for him. The Panzer is suppressed by Boyes AT rifle fire and a lucky shot from a portee 2 pdr. finishes it off. The German tank bursts into fire.
21. Portee KO'd
One of the unarmoured and very vulnerable portees is KO’d by enemy fire (right).
22. Valentine retreats through late-arriving A Co.
German AT and indirect fire comes raining down on the British tanks. One of the Valentines, disordered, temporarily retreats over the ridge through A Co. who are just arriving to the fight.
23. German mortars below escarpment
On the NZ right German mortars emplaced below the escarpment have been causing mischief with the advance along the escarpment edge. One mortar is knocked out by return mortar fire from the NZ tubes but a second 8 cm mortar along with a 5 cm mortar, continue to lob shells from below.
24. Kiwis detached to clear out enemy mortars
The carrier platoon’s commander sends off three of his sections to descend the escarpment and clear out these pesky mortars.
25. German 50mm Pak in action
With the Valentines moving closer a German Pak38/L60, in support next to the wadi, opens fire. But after his first shot the British artillery again zeroes in on it and keeps it suppressed and ineffective, as it has done with the 88. The German commander has been discovering that he has placed his AT guns too far back and that they have been unable to give meaningful support to his beleaguered troops up to this point.
26. First Honey falls to close combat
The German armour counterattack is further blunted as one of the captured Honeys falls to a swarm of troops armed with Boyes AT rifles.
27. Wadi packed with Germans
As the edge of the wadi is breasted the attackers can now see that it is swarming with enemy troops along its entire length.
28. Hard slog to clear the wadi
It will be a hard slog to clear the wadi and NZ casualties, light to date, begin to mount as they battle their way up the ravine, supported closely by tanks and portees.
29. 88 silenced by artillery
It was just a matter of time, but finally the 88 is silenced by artillery, giving the heavily armoured Valentines and Matilda a more or less free hand to roam unhindered.
30. Remaining Honey panics
The last German tank falls back into the wadi and then panics, abandoning the German infantry to their fate.
31. Close work
It’s all hand to hand fighting as the Kiwis work their way forward along the wadi.
32. Close work on right flank as well
The reinforcing company bolsters the flagging Germans along the escarpment, but the British armour working in conjunction with boots on the ground is hard to slow down.
33. Carrier attack driven off by third German AT gun
A third German AT gun, a 2.8 cm PzBu41 opens up at close range. It KO’s one of the carriers (with the 88 gone they have now been brought up in support) and drives off two more in close combat.
34. Clearing out the bottom of the escarpment
Having descended the escarpment, elements of the carrier platoon clear out the German mortars below.
35. Germans move to intercept
In turn the German company commander tells of some of his force to descend the slope and confront this threat.
36. Germans in wadi being pushed back
Back on the NZ left the enemy continues to be pushed back. A final German AT gun, a Pak 36, opens fire from deep in the wadi, but to little effect.
37. Valentines engage German rear
Meanwhile the two Valentines supporting the NZ right, have now dashed across the open ground to try to take the enemy still holding out in the wadi from the rear flank.
38. Unfair fight
It has devolved into an unfair fight with the Valentines churning through the wadi unchallenged, overrunning the Germans in their stone sangars while the NZ infantry follow, mopping up.
39. 50mm KO'd
The last serious German AT asset is KO’d…
40. 2.8 cm knocked out in close combat
While on the NZ right the 2.8 cm meets the same fate in close combat.
41. Germans in wadi surrounded, defence collapses
One of the newly arrived Valentines knocks out the surviving Honey, briefly rallied (top), but with the German escape now blocked by tanks and the casualties for all the German companies well beyond 50%, failed maneuver rolls have them surrendering en masse.
42. Germans on right flank retreat
With the collapse of their right, the enemy along the escarpment fall back in retreat, leaving the field to the victorious Allies. But it has not been an easy victory, with all of 25th Battalion’s infantry companies suffering casualties, B Co. in particular, leading the fight up the wadi, suffering 75% casualties.


%20move%20up%20the%20wadi.jpg)


Looks like a good game. Those portees are particularly nice. Are they conversions?
ReplyDeleteThank you. The portees were custom built for me (as wargame models) by my friend Steve Guthrie, WWII modeller extraordinaire.
DeleteA really good AAR. And the table is fantastic. Is it a sand table? I've always wanted to try BFWWII, but is seemed very detailed. How did you "slim it down"?
ReplyDeleteAre your "slimmings" posted somewhere? Thanks!
Thank you! No, it's not a sand table, just a beige velour cloth sprayed with that textured faux sandstone spray paint draped over an under build of styrofoam and boards to create the escarpment. As for the rules, I have always loved BFWWII for its authentic feel, but you are right, it can be quite fiddly. Our changes are not extensive and a game still takes a fair bit of time, but in essence we got rid of suppression, simplified the call for fire rules, standardized the "to hit" tables across the board and a few other tweaks that kept what we liked about the rules without sacrificing too much. I don't have them posted but they are all on a sheet that I would be happy to email you if you send me a contact.
DeleteBill- You certainly know how to set up a desert table. Few go the trouble of modeling the dips and ridges, leaving their desert tables just ping pong table flat.
ReplyDeleteMy email is marklewski@yhaoo.com. Thanks, Mark
Great. I will tidy up my notes and send them off to you.
Delete!!! yahoo, of course
ReplyDeleteA fantastic looking game Bill and nice to see one featuring the NZ Division! I am surprised the tanks worked so well though, as it was the repeated failures of British armour to support his division that convinced their CO, General Bernard Freyburg, VC and Bar, to change one of his battalions into an armoured unit of his own!
ReplyDeleteYou are right - the tanks historically did not work so well at all! The 88 made short work of most of the squadron and the attack collapsed, requiring the support of a second NZ battalion later in the day.
DeleteReal nice game report and pictures! Thanks for sharing!
ReplyDeleteGreetings
Peter
Thanks, Peter. I'm glad you enjoyed it.
Delete