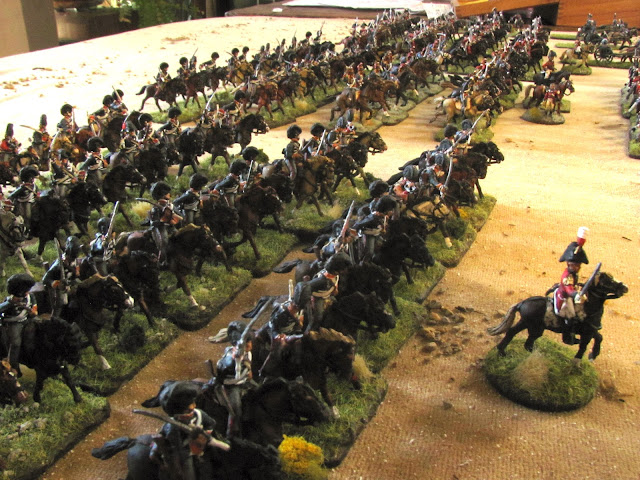
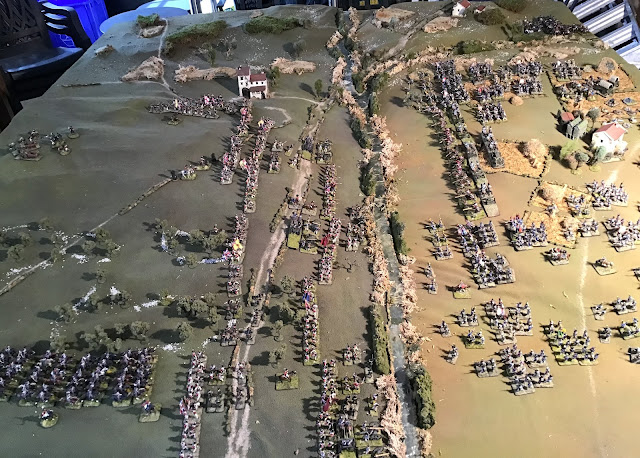
Last weekend we finally got into the main event for Talavera, the dawn attack by Perrin’s 1st Corps on the Cerro de Medellin, the lynch pin at the left end of the Anglo-Spanish line. This is the fourth of five scenarios, written by Jonathan Jones and published in his book O’er the Hills, Early Peninsular War Scenarios, that cover the two days of battle at Talavera, Spain, on July 27-28, 1809. Previously we had played the attack on forward British positions at Casa de Salinas as they retreated to Wellesley’s chosen place of battle, and the failed night attack by Ruffin’s brigades on the Cerro de Medellin during the night.
This attack was launched at first light, preceded by an intense barrage by the French guns, massed into a grand battery. Victor’s plan of battle historically was for Ruffin’s 1st Division again to take the lead, assaulting the British left while Lapisse’ 2nd Division and Latour-Maubourg’s 2nd Dragoon Division demonstrated in front of the Cerro de Medellin to pin the British in place. The second part of this plan, the pinning maneuver, for some reason, was never executed in the actual battle but this scenario provided for it to happen as intended and for that attack to possibly develop into a full assault.
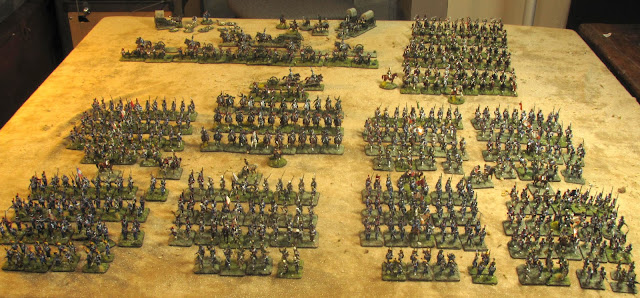
However in our replay the French players had their own plans, as you will see. We had four players at the table, with Phong and Alan again teaming up to play the French while myself and Brian ran the British/KGL. As some of you may be aware, I have been building my armies toward playing this game for quite a while now and it was very gratifying to see all those figures (I estimate about 1200) on the table at the same time. I managed to get a number of good photos so have decided to split the report into two - our full day of playing didn’t conclude the game so the outcome is still unknown!
We played using Over the Hills rules, playing it out on a 7.5” square table using my 1/72 scale toy soldiers.
 |
| The map from the campaign book showing initial deployment. |
The Battlefield
The battlefield seen from the south
The Portina stream, no great obstacle, runs up the centre of the battlefield, while the British occupy positions on the dominating Cerro de Medellin (left) with the French arrayed on and either side of the smaller Cerro de Cascajal on the right. The French grand battery runs along the lower slopes of that feature.
Front left the British horse can be seen, massed behind the British infantry lines. Opposite them on the far right and just out of the frame are an almost equal number of French dragoons.
Closer view of the battlefield
Lower left can be seen the very forward positions of the KGL right along the stream edge. They were taken by surprise by the French guns positioned so very close as the morning mist lifted and the barrage began. Donkin’s brigade is in support behind them while Tilson’s and Stewart’s brigades occupy the high ground of the Medellin. The three British batteries are distributed throughout the line in forward positions.
On the right bottom Lapisse’s 2nd Division faces off against the KGL, with Latour-Maubourg’s dragoons behind while at the top is Ruffin’s 1st Division. Beyond them and not in the frame are the 1st Corps Light Cavalry Brigade under Beaumont.
 View of the battlefield from the north
The area in the foreground was considered rough ground for this scenario to represent the many undulations and dry run offs from the flanking high ground.
The British line left flank
Tilson is arrayed at the top of the Cerro de Medellin while Stewart’s brigade (foreground) is in echelon, guarding the left flank.
The British right flank
The four KGL battalions are in line along the Portina (right) while Donkin’s brigade is in support behind. Payne’s cavalry is further back (bottom left), consisting of eight squadrons of light dragoons and four of heavies.
Wellesley on the Cerro de Medellin
From the summit Wellesley observes his troops’ positioning as the dawn breaks.
Stewart on the left
Stewart’s brigade consists of three line battalions and a small ad hoc light infantry battalion
Tilson in the centre
Tilson’s brigade is the same, three line battalions and a small ad hoc light infantry battalion.
KGL on the right with Donkin in support
The KGL are in two brigades of two line battalions and an ad hoc light battalion each. Donkin has three battalions under his command, two line and a small Rifle battalion as well as an ad hoc battalion of light infantry.
 British horse massed behind Donkin on the British right
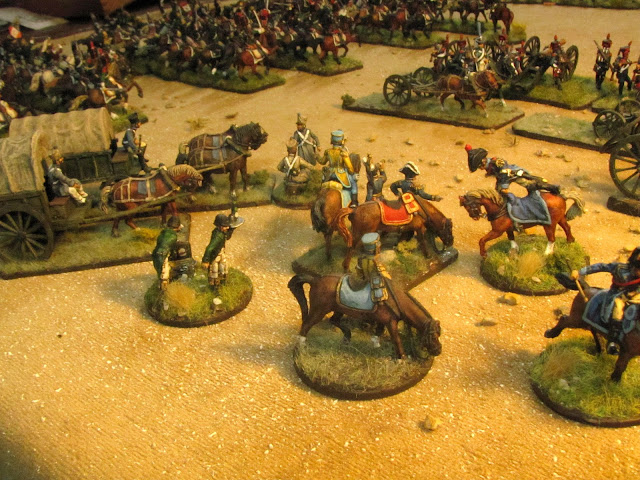
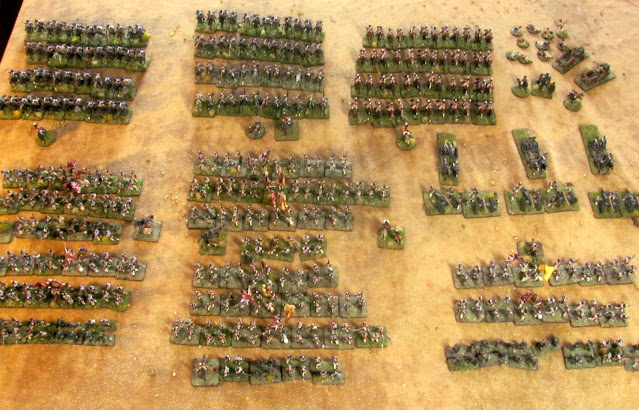
Perrin’s command headquarters
From his headquarters in the centre of his lines Perrin views his French veterans' deployment with confidence. The shopkeepers will be crushed!French lines seen from the north
Ruffin's division is in the foreground on the French right (Beaumont's light cavalry off photo bottom), with the grand battery arrayed above, right centre. Upper left is Latour-Maubourg's six regiments of dragoons while in front of these (top centre) is Lapisse's Division anchoring the left of Perrin's 1st Corps.
Latour-Maubourg’s six dragoon regiments on the French left, with Lapisse’s division in front
The dragoons are supported by a battery of horse artillery. Lapisse has 12 battalions of infantry along with four more ad hoc battalions made up of French voltigeurs under his command.
Ruffin’s division massed in column on the French right
Ruffin has nine battalions of infantry as well as three ad hoc voltigeur battalions in his division.
Beaumont's cavalry on the far right
This brigade is made up of two regiments of Hussars and one of Chausseurs de Cheval. They are supported by a battery of horse artillery.
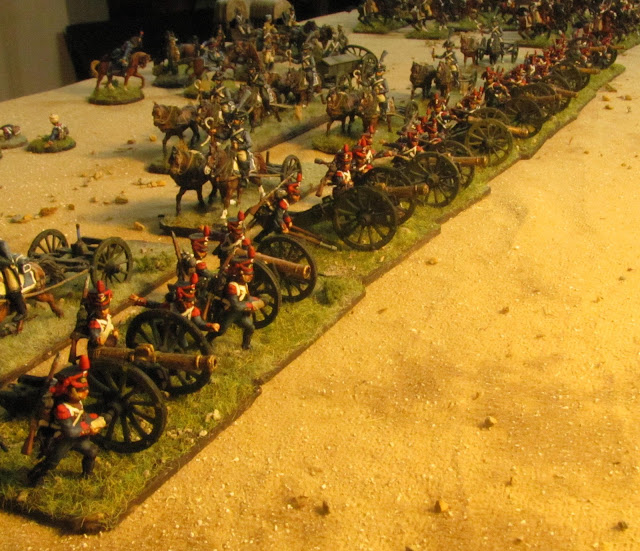
The Grand Battery
Five batteries of cannon form the grand battery in the French centre.
The Battle
The Grand Battery opens fire
At the break of dawn the massed French guns open fire. At close range along the Portina, the 5th and 7th KGL take the brunt of the fire as they doughtily stand to arms, waiting for the French attack. Rettburg’s battery, close behind, also takes fire with a few bounce throughs hitting Tilson on the summit of the Medellin.
Dragoons and Lapisse, massed on the French left
Lapisse’s Division and the dragoons watch on, waiting to move forward when the guns cease.
French left
5th and 7th KGL and Tilson’s brigade take a pounding
Grand battery in action
The bombardment goes on for the better part of an hour with the British and KGL troops taken by surprise and slow to react.
Hill receives permission to pull Tilson back to the reverse slope
Finally Hill receives permission to retreat to the reverse slope and out of the line of fire.
5th/7th KGL (Low's Brigade) broken
But it is too late for Low’s brigade. Deadly French fire drives them back on to their own supporting battery, thus blocking that battery’s ability to respond. Casualties mount and the brigade breaks and starts to stumble back towards the rear. The cheering jibing French gunners shift their barrage to the retreating Tilson and Rettberg’s guns while the British do little but wait and pray for it all to end.
Elliott's Battery begins to score some hits
On the British right Elliott’s battery finally starts to return fire. It scores some solid hits on the massed French target to its front.
Surprise French redeployment
Suddenly, through the cannon smoke, Wellesley spots an entire brigade on the French left (Lapisse’s 8th and 54th Line) form up in march columns and march off towards the French right. What are those dastardly French up to?
Battered, Rettburg's battery tries to withdraw
Taking the brunt now of the French barrage Rettburg’s battery limbers up and tries to withdraw. But a direct hit from the French blows up the caisson, breaking the entire battery.
Tilson pulls back to reverse slope
However all the attention on the British guns allows Tilson to withdraw his troops to the safety of the reverse slope, putting him at an acute angle to Stewarts’s brigade on his left.
Beaumont's horse unleashed
As the barrage ceases the French right is let loose. Beaumont’s horse on the far right surge forward.
Beaumont's horse artillery scrambles to keep pace
The rough ground makes it difficult for his supporting guns to keep up, but they make the road and continue by a more circuitous route.
French right goes on the attack (Overview)
At the same time Ruffin’s division pours down from the Cerro de Cascajal and crosses the Portina. In this photo you can see that Stewart has managed to get his light bobs into the Valdufuentes farm to be a thorn in the side of Meunier’s brigade as it climbs the Medellin (behind the farm). Lower right Beaumont’s cavalry, in open order, race across the rough ground headed for the rear of the British flank.
Following up Meunier is Barrois’ 96th and Solignac’s 8th and 54th, the latter detached from Lapisse and sent to support Ruffin’s main assault.
On top of the Cerro de Medellin (upper right) Hill’s 2nd Division, Stewart and Tilson, form up on the reverse slope behind the ridge waiting for the French onslaught.
Solignac follows up
Masses of French columns sweep down the slopes to cross the Portina. A juicy target for British guns - if they still had any on this flank!
Beaumont arrives to the rear of the British left flank
Led by the 5th Chausseurs de Cheval Beaumont’s light cavalry form up in line to the rear of the British line. The Battalion of Detachments goes into square (top left).
Anson's 23rd LDG's and 1st KGL Hussars sent to protect British left
But Wellesley has already dispatched orders to Payne, detaching Anson’s brigade of light horse (23rd LDG and 1st KGL Hussars) to hurry over in support of the British left.
Remainder of British horse form line in preparation to attack
Although things still seem quiet on the British left the remainder of the horse form up in lines readying to attack.
Latour-Maubourg's dragoons are ordered forward in response
1/48th volley and charge on the Cerro de Medellin's north slope
Battle is joined on the left as the 1/48th, taking the initiative, charge forward, hoping to scatter Meunier’s lead battalions before they can get organized. But the French columns counter charge, breaking the 1/48th and carrying on to the supporting 1/29th.
1/9th Legere capture Valdefuentes farm
At the same time two battalions of the 9th Legere form column and assault the Valdefuentes farm. After a bloody fight the French rout Stewart’s tiny battalion of light infantry from the farm and the 1/9th take possession.
1/29th sees off two of Meunier's battalions
With the farm taken, the 1/48th destroyed and French cavalry on their open flank things are not looking good for the British. But the first glimmer of hope (are you detecting the writer’s bias?) emerges as the 29th easily sees off the two battalions that had crushed the 1/48th moment before.
Routed French
Meunier’s 2/9th Legere and 1/24th Line rout towards the rear.
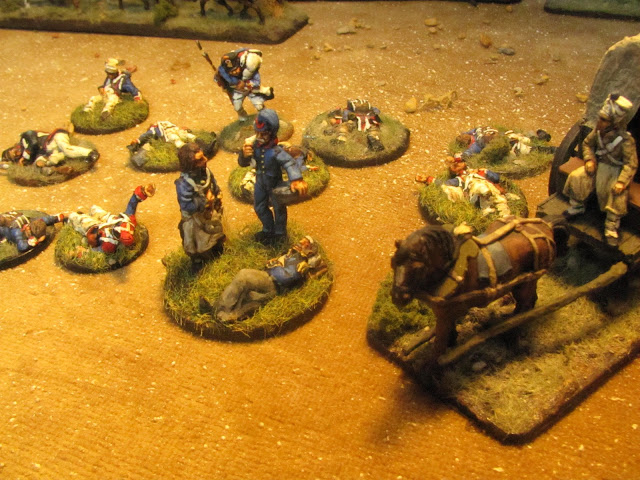
French field hospital
Although the British have definitely taken the worst of things so far, with a brigade broken and the powerful 1/48th destroyed, Meunier’s early successes have not come without a price. Casualties begin to trickle in to the French field hospital at the rear of the lines as the doctors scramble to do what they can.
Lead French Dragoons charge across the Portina
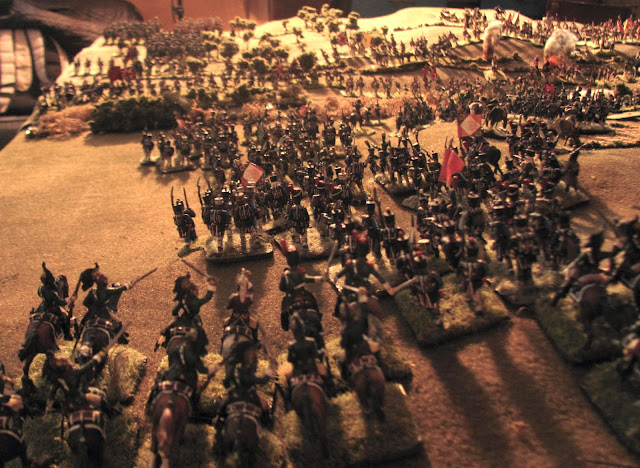
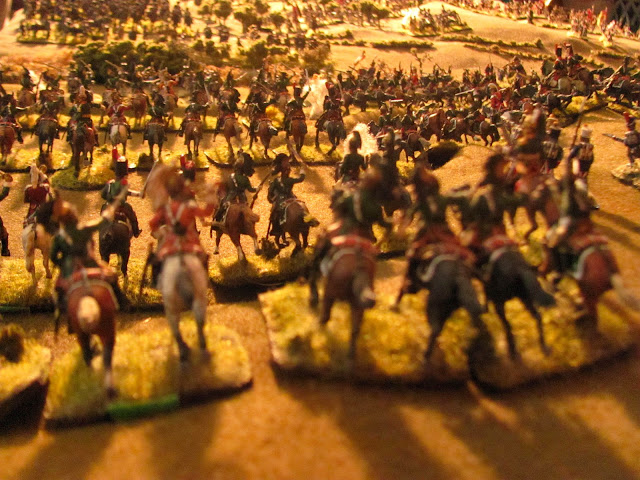
Things finally start to heat up on the British right as French dragoons splash across the Portina. They are met in a counter charge of the British 3rd Dragoon Guards, who have managed to reach the front of the British horse column after mixed orders created massive confusion, intermingling the three cavalry brigades.
Charge! Charge!
Similar order mix ups have hampered the French cavalry on this flank who are slow to get forward in support.
Solignac surges across the Portina to attack the British centre
With Ruffin clogging the French right, Perrin sends Solignac’s columns towards the centre of the British line, Tilson’s brigade at the summit of the Cerro de Medellin.
Anson arrives on British left
Just in time Anson’s light horse surge over the crest of the Medellin to confront Beaumont at the British rear. It can be seen how dire things have become for the British who, assaulted from front and side and threatened to the rear, on the arrival of Langwerth's KGL have essentially formed a giant square on the summit of the Medellin!
Overview
In this overview looking north along the Portina you can see the British and French heavy cavalry finally locking horns (bottom). On the left, above the horse Donkin’s last battalion and skirmishers are still in the olive groves as they move to join their sister battalion on the Cerro de Medellin.
Above the cannon, on the summit of the Medellin Tilson faces off against lead elements of Solignac’s brigade as his skirmishers reach the ridgeline. Behind Tilson’s lines the surviving KGL, 1st and 2nd (Low's 5th and 7th have withdrawn from the field) march over to take over Stewart’s position as his broken brigade prepares to withdraw (in front of farm). Far upper left Anson’s cavalry arrive in time to engage Beaumont’s light cavalry brigade.
Over on the right (French) side of the picture, lower right just above the dragoons, Lapisse’s first battalions start to cross the Portina behind their skirmish screen. Above them is Solignac preparing to attack the centre while Ruffin’s division (around farmhouse), with Meunier’s brigade teetering, consolidate in front of the British. The French have managed to get two batteries into play on this part of the line, one just to the left of the farmhouse (Beaumont’s horse battery) and a second to the right, unlimbered between Solignac’s and Ruffin’s forces.
Far upper right two of Meunier’s brigades are still routing.
Will Perrin succeed in driving the British off the Cerro de Medellin or will Wellesley's left wing hold fast and save the morning? Even we don't know - tune in soon (or not, it takes forever to play out this battle!!) for the next instalment of Dawn Attack at Talavera!!!
Exciting, huh?




%20broken.jpg)




.jpg)
.jpg)
.jpg)
.jpg)
%203rd%20and%204th%20Brigades.jpg)
%201st%20and%202nd%20Brigades.jpg)
.jpg)

