Monday, October 23, 2023

Operation Fustian Primosole Bridge, July 14th, 1943

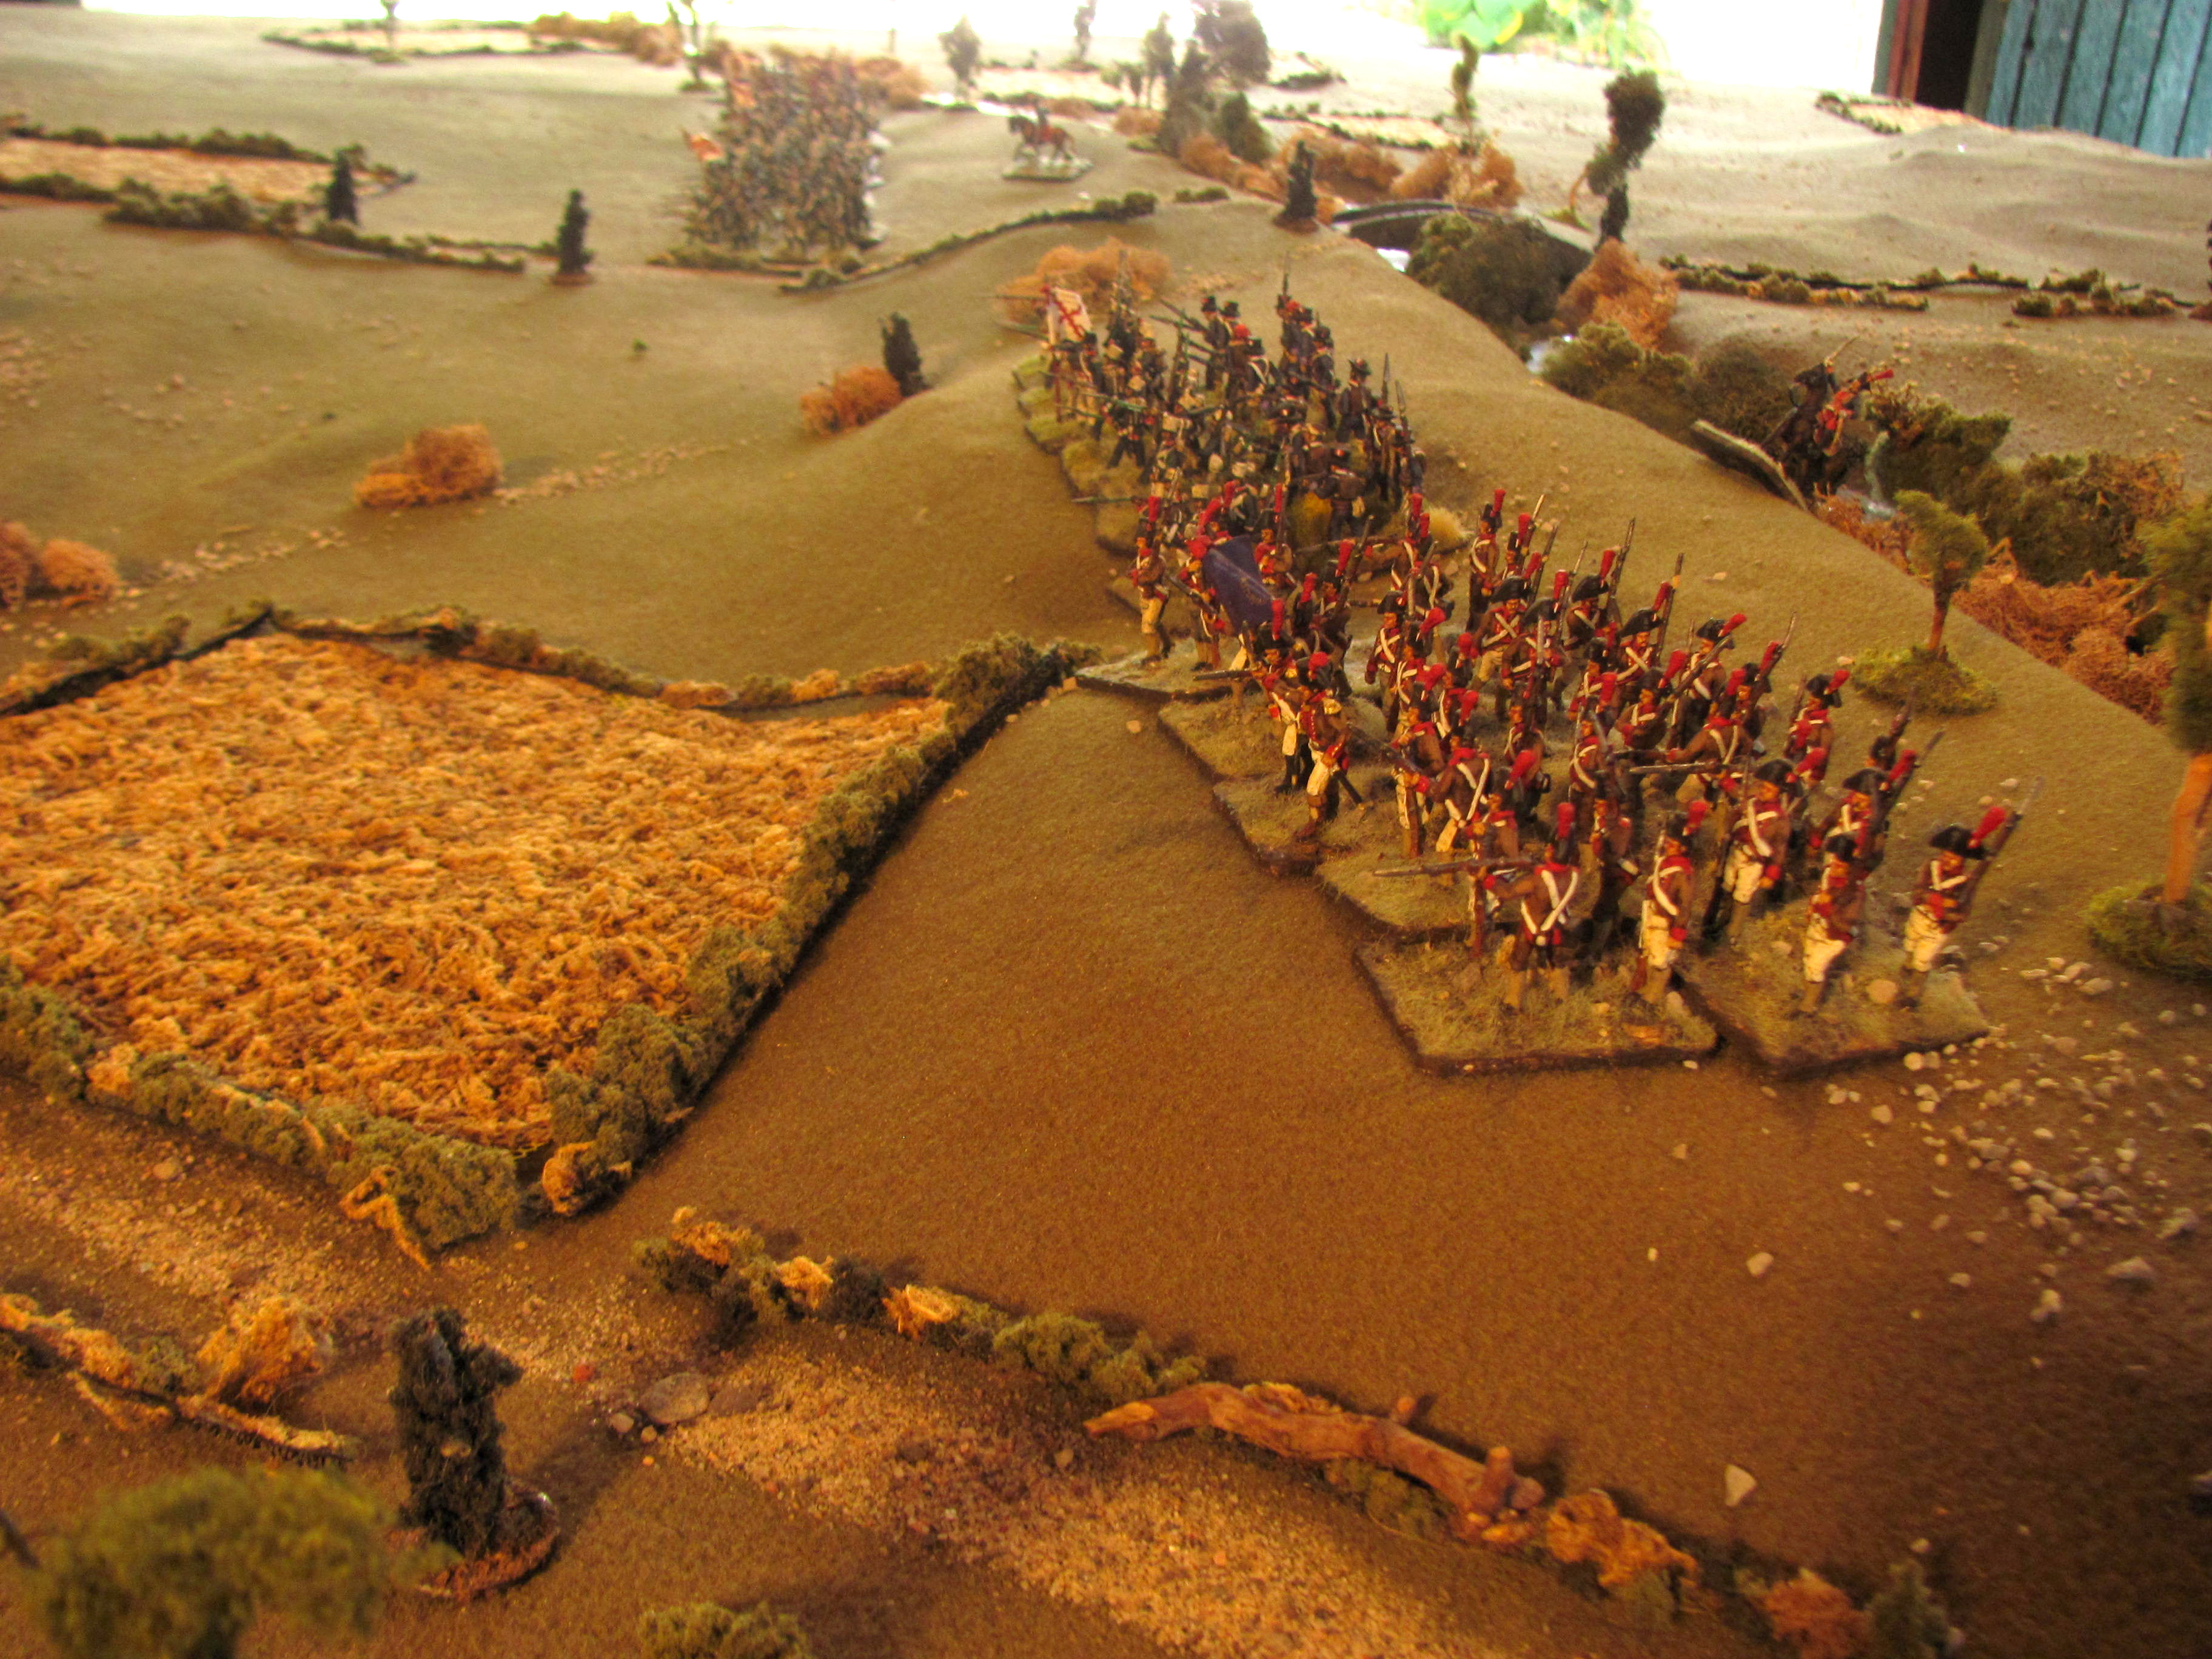
We were back to WWII again this month, moving on from our brief foray into North Africa to the long-awaited Sicilian invasion of July 1943. Three days after the launching of the invasion, the British 1st Parachute Division, in Operation Fustian, was dropped to seize Primosole Bridge over the Simeto River, in order to pave the way for the 8th Army advance. Friendly fire and a wide dispersal at the drop zone meant only a fraction of the brigade arrived to join in the fight. Unknowingly the paratroops had been dropped into an area held by the 1st Machinegun Battalion of the 1st Fallscirmjager Division, many being dropped south of the bridge and forced to engage with the dug in troops there. A small group of British managed to seize the bridge from the Italian defenders and by the following day 12 officers and 283 other ranks had gathered around the bridgehead as the Germans pulled together a hasty counterattack.

This battle was fought on a 6’ x 7.5’ board, using my 1/72 WWII toys and played with the Battlefront WWII ruleset. Alan took the Germans while I ran the British. The scenario is a replay of one that I wrote for this ruleset many years ago. It can be downloaded here: https://www.fireandfury.com/scenarios/primosole.pdf

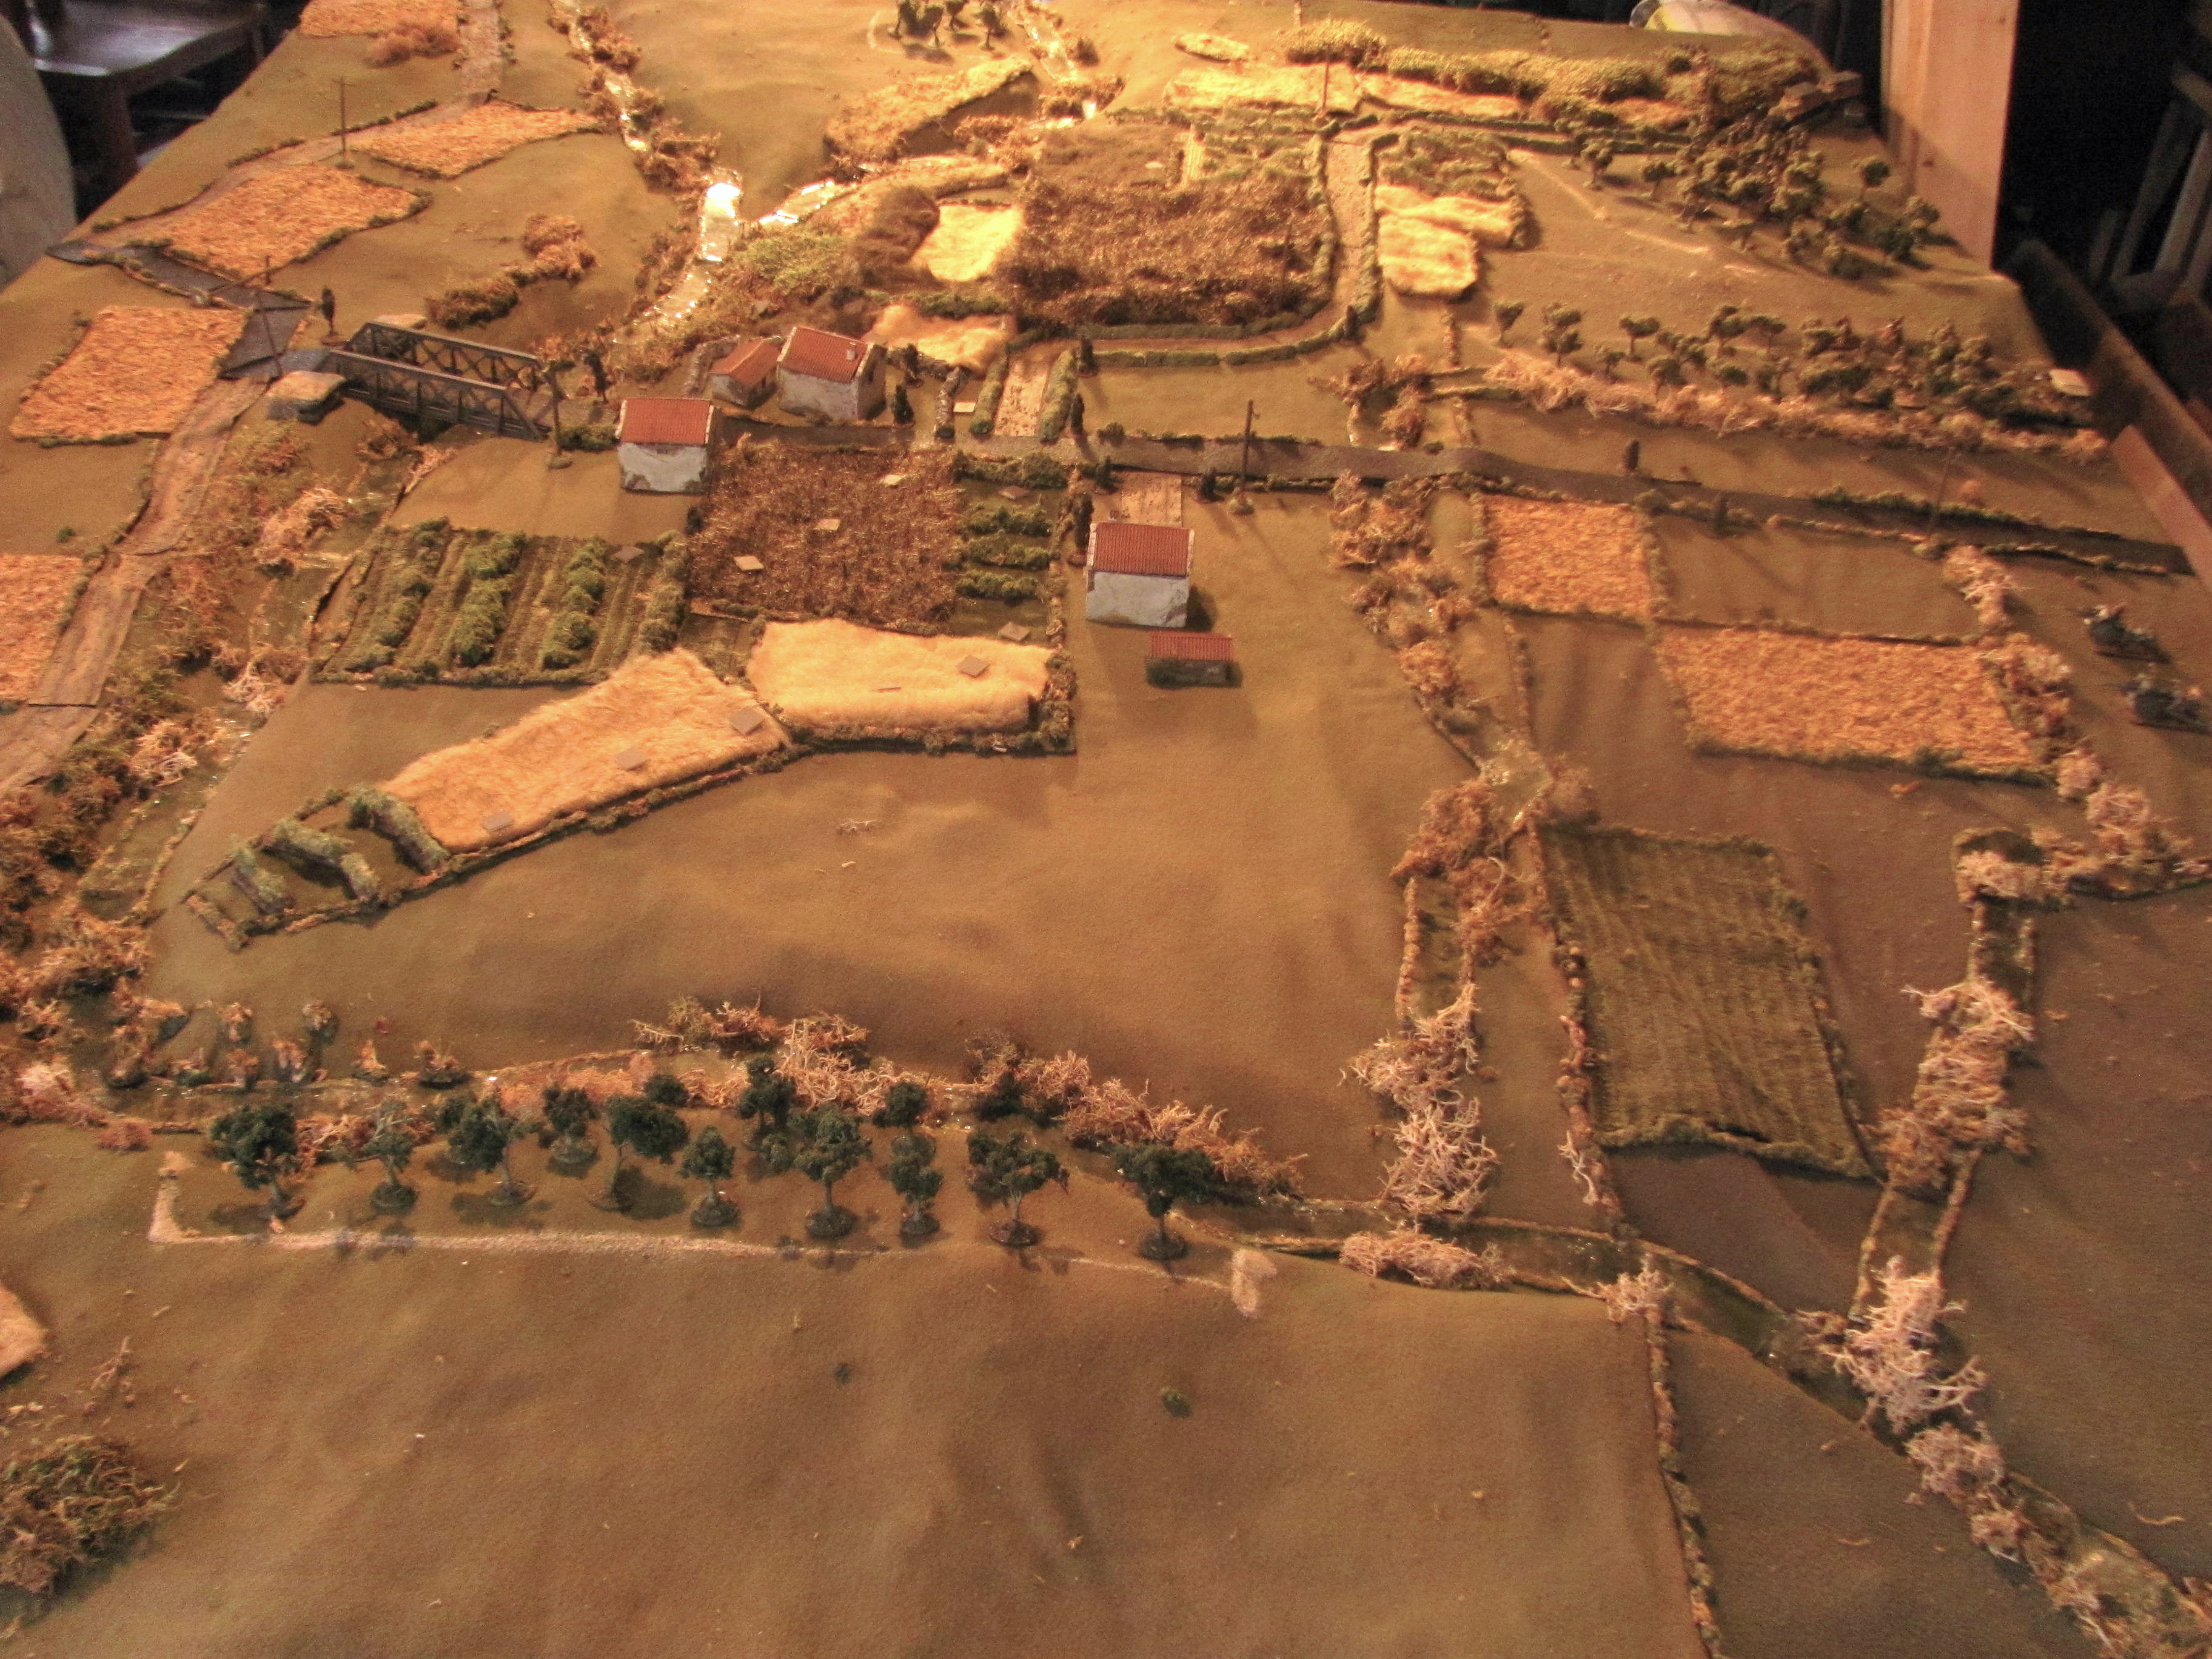
The scenario map. Purple arrows sketch the German attack, red and blue markings identify the British positions (hidden). The British had the option of starting outside of the foxholes (which they did with the group in ambush upper left) but also retain dug fox holes to fall back to.


1. The Battlefield

The Simeto River snakes across the battlefield from upper left to lower right. A few streams that feed into it provide obstacles over relatively open ground on the bottom half of the board, but the main German attack, originating top right, crosses through an area dense with tall crops, vineyards and rough ground. This gives plenty of cover for the advance but also opportunities for ambush by the British. The British paras have set up a defensive perimeter around the bridgehead left centre, with a platoon-sized contingent well forward, hidden in the vineyards.


2.  The objective

The bridge, seized the day before from Italian defenders by British paras of the First Parachute Brigade, must be held by battle’s end. Two pillboxes defend the south bank, currently unmanned as any attack is expected from the north. A cluster of farm houses north of the river provide good cover for the dug-in defenders.


3. The German 105's

A battery of German 105’s is in support of the Fallschirmjager attack (typically off board, but I had the models!). But they rarely made an appearance as a result of successive failed calls for fire! Curse of the new model.


4. Fallschirmjager enter along sunken road

With frontline troops of the 1st Fallschirmjager Division engaged elsewhere the German command is forced to pull together a hasty Kampfgruppe from HQ troops. As a result the Kp. of 1st Fallshirmjager Nachrichten Battalion (the signals company) were pressed into the attack. Here they arrive via the sunken road along with towed 88’s and support guns. A platoon of the centre company also supports this flank.


5. German centre

In the German centre a smaller ad hoc company of headquarter troops prepare to assault down the paved road, supported by an assault gun platoon and a towed 50mm gun. On platoon each of this company have been sent to the far left and right of the battlefield, the former to move around to the rear of the position and the latter to bolster the main attack on the German right.


6. On the far left

On the far left a platoon of German paras prepares to cross the Simeto.


7. Mortar strike!

As the German artillery exit the sunken road to move across the ground on the right, a mortar strike knocks out one of the 88 transports. But the crew manage to bail out and salvage the gun.


8. British paras encountered along sunken road

Well forward from the bridge a large contingent of British paras ambush from the verges of the sunken road. The Fallschirmjagers take heavy casualties as they move in to engage.


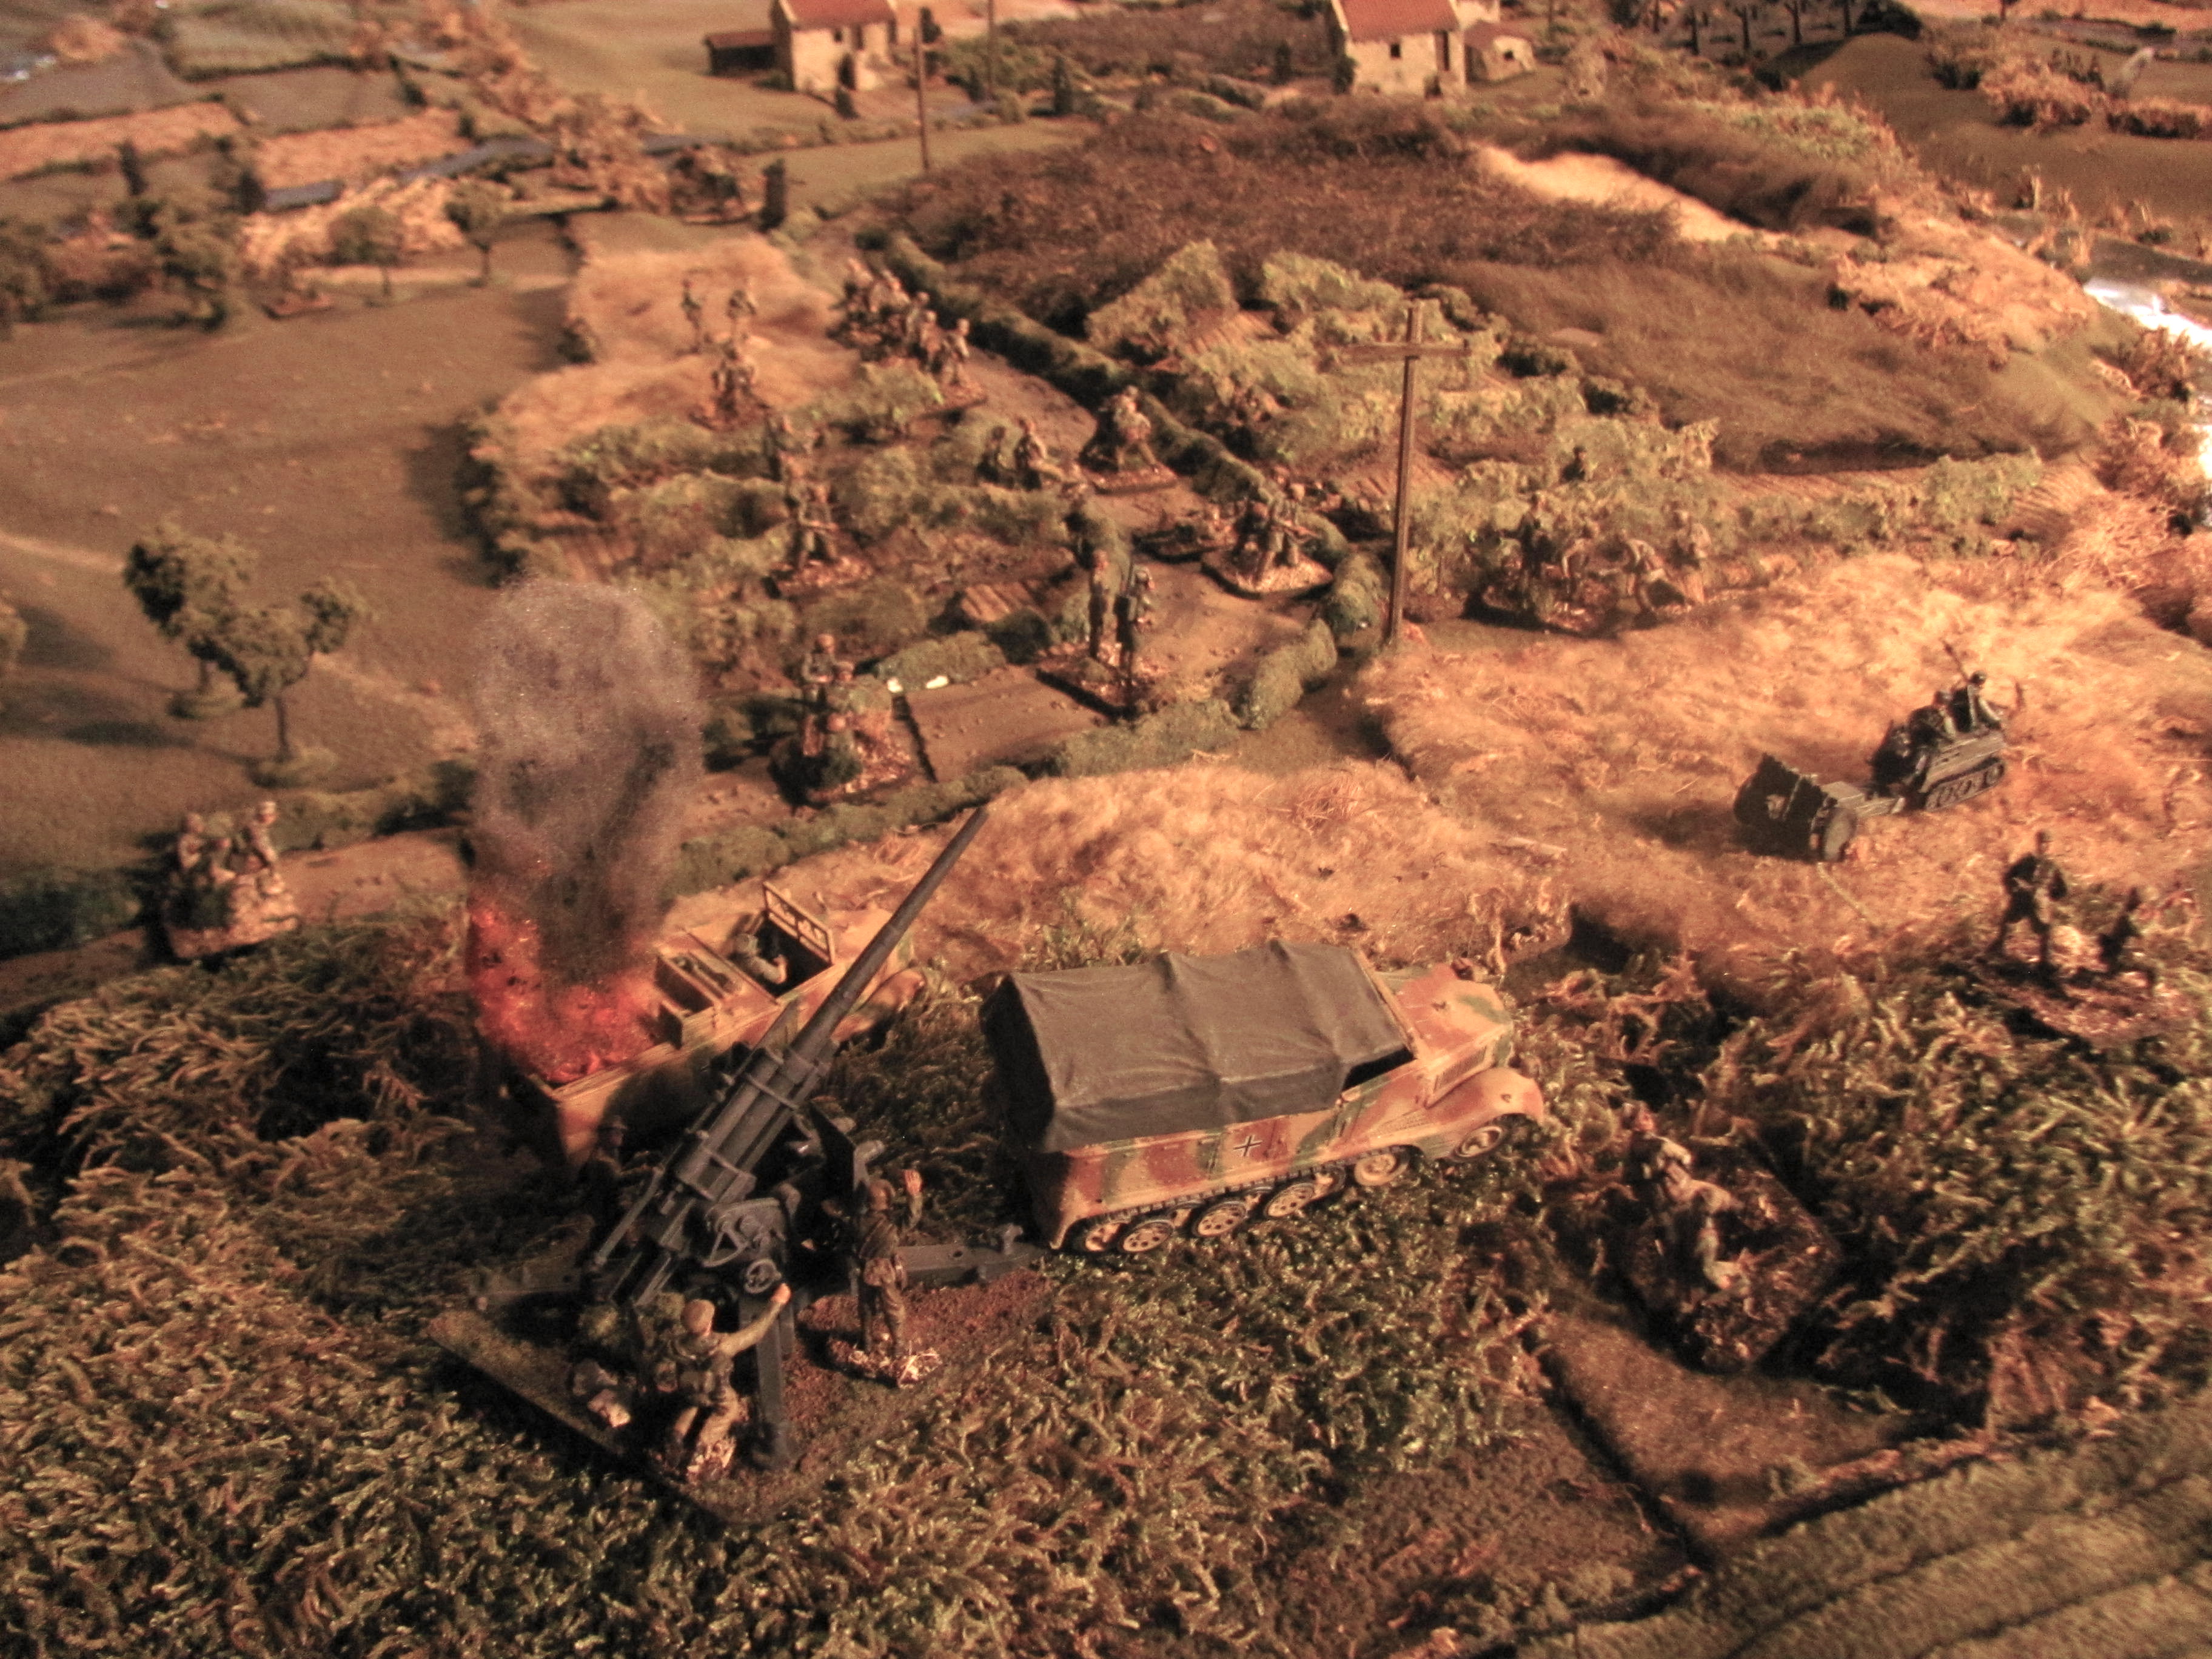
9. German guns emplace

The two 88’s and 75mm recoiless gun emplace to lend fire support.


10. British paras fall back

But damage inflicted, the paras melt back through the cover towards their main line, disappearing into the vineyards.


11. Stug KO'd!

In the centre the Germans press forward either side of the main road. But small arms fire erupts from the fields around the bridgehead, exacting a heavy toll. The Stug is brought forward in support but as it exits the road it is knocked out in enfilade by a hidden 6 pdr. 


12. 105's answer

In one of the few successful German calls for fire the 105’s put down a concentration on the area where the anti tank fire originated…


13. Knocking out the 6 pdr.!


14. Another German halftrack destroyed

However the attackers’ grief mounts as the British mortar continues to lay down deadly and accurate fire. When the lead 88’s halftrack pulls back to try to bring the second gun further forward, it too is destroyed.


15. Fighting retreat

The Germans pursue the retreating British through the tall crops and vineyards in a running battle. 


16. Fallschirmjager press in on the bridgehead

The German paras press in both by field and the sunken road. The British are caught before they can make it back to their main defensive line around the bridgehead but still manage to get the better of almost all the close combats as German casualties approach the breaking point.


17. Overview

In this overview, at the bottom the German platoon circling behind along the river have almost reached the bend. Above this but below the paved road the attack up the centre has stalled. Heavy German casualties and the loss of the Stug have caused the survivors to go to ground around the right hand farmhouse where they exchange gun fire with the dug in defenders. Compounding their troubles, the 50mm antitank gun that was supposed to be in support has become seriously bogged down in a stream bed to the rear. Seeing the enemy circling behind Brigadier Lathbury pulls some of his troops on this flank back to protect the south end of the bridge.

North of the paved road the fallschirmjager try to break through the British perimeter.


18. Mortar strike on sunken road

The enemy is seen bunching up along the sunken road and take a devastating mortar strike. 


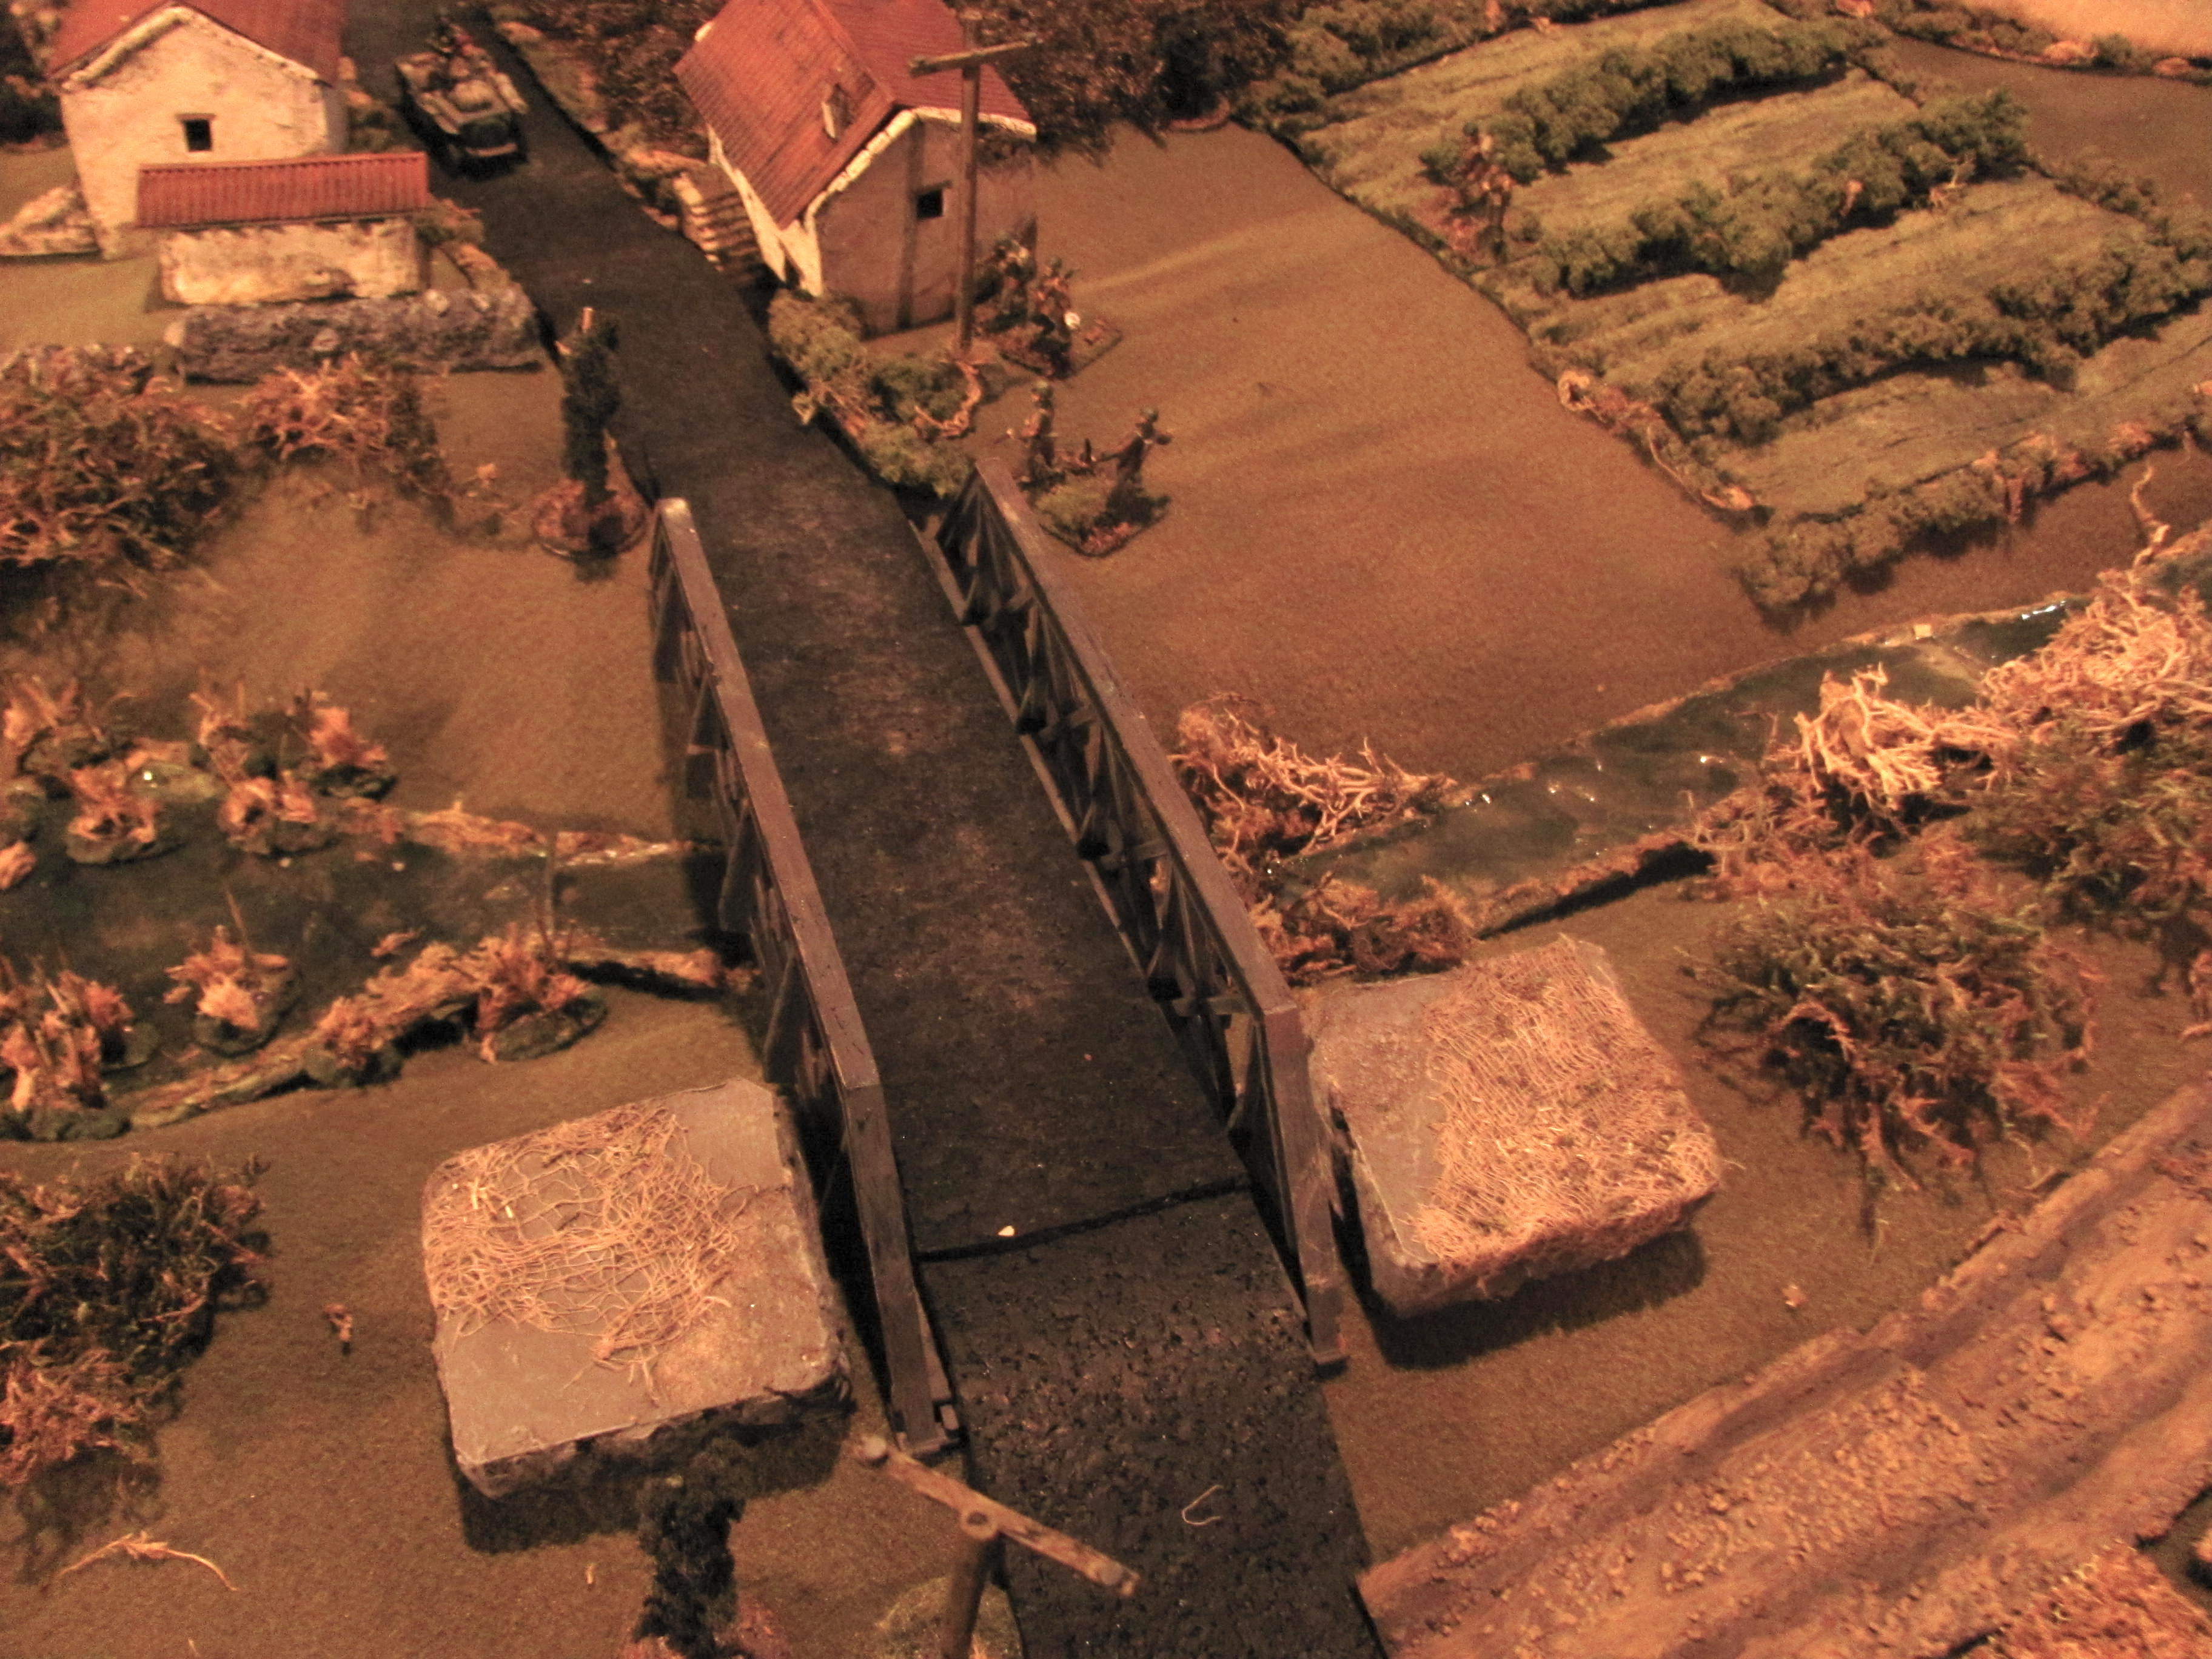
19. Paras from British right rush back to defend south end of bridge

British paras hurry back but have misjudged the approach of the enemy, as both race to seize the pillboxes on the south bank.


20. Fallschirmjager close in from south side of river


21. Goddammit, do I have to do everything myself??

Brigadier Lathbury himself, realizing that the enemy might arrive before his paras, abandons his command post to rush back with his HQ staff to man the bunker. The late arriving paras take up positions along the bridge in support.


22. German Pak38 KO'd

But all this is a side show to the main event. On the road the 50mm, finally arriving and unlimbering, is KO’d by the mortar before it can take a shot!


23. Main attack in retreat

And in the face of heavy casualties the main attack unravels. As they fall back disordered Captain Stagenberg calls off the assault.


24. A small bright spot for the Germans in a day of grief

In a very small victory, the paras push the enemy out of the south shore pillbox and seize it. But it is too little too late as no supporting attack is materializing on the north shore. Outnumbered and cut off, they surrender.


25. Game end

The game ends with a clear victory for the British. Casualties were very light compared to that inflicted on the attackers and the bridgehead is firmly in the hands of the 1st Parachute Brigade when lead elements of the 8th Army roll up from the coast.

So that is the narrative. The back story is that Alan, as the Germans, rolled as poorly as anyone I have ever seen in years of gaming!! On the other hand the dice seemed to love the British, with the mortar alone accounting for three KO’s - the two halftracks and the 50mm. The German 88’s were therefore forced to emplace at long range and did no damage, with only the 75mm getting in close - just as the entire attack broke off. And finally the Stug was KO’d on the first shot of the British 6 pdr., again before it had even spotted any of the enemy! So about as uneven a game as you can have. 

Saturday, October 14, 2023

Action at Castalla, 21 July, 1812


Alan and I moved on from our Talavera series of games to playtest a new French/Spanish scenario being worked up by my friend Brian North. This scenario, Castalla, is based on an action fought in the east of Spain between Spanish forces and part of Suchet’s army, much diminished as a result of many of its best units having been siphoned off by Napoleon for the invasion of Russia.

Wellington, now supreme commander of the Anglo/Spanish forces, had requested that the armies in the east stay active in pinning down Suchet’s forces while Wellington opened up his Salamancan campaign into Spain. However, contrary to his orders, O’Donnell, now commander of the Murcian army, decided to undertake a campaign of his own against Suchet’s thinly spread out cantonments, taking with him a British trained and equipped force under Roche (not appearing in this fight) that was really intended to sail to join Murray.

O’Donnell’s plan was ambitious and impractical, separating his forces into four columns that were to night march and rejoin to fall on the French at Castalla. The French commander, Delort, learning of the impending Spanish attack and having in advance arranged for his subordinates to support him, conducted a fighting retreat from Castalla, offering battle in an open plain across the river from Castalla where his cavalry could operate unimpeded, centering his forces on the hill known as the Cabeza de Plá.

The scenario map, showing the starting positions with reinforcement entry points marked from 1 to 4.

Our battle was fought with my 1/72nd Peninsular armies on an 8’ X 6’ table using the Over the Hills ruleset (with a few home-baked house rules). The scenario begins with a relatively small French force on the Cabeza de Plá facing the first two Spanish brigades to arrive on the field under O’Donnell. Staggered and variable times were allotted to the arrival of reinforcements for both sides which lead to a very interesting and in the end quite scattered battle, with elements arriving from different directions.

The battlefield

The Rio de Castalla intersects the battlefield, high banked and largely impassable at the top, with the terrain flattening out and the river being easily crossed after the bend. The road from Castalla intersects this left to right, wth Castalla being off board to the left and the road leading to Cabeza de Plá which is just out of the photo to the right. The game begins with O’Donnell’s two lead brigades already across the river.

French on the Cabeza de Plá

The initial French forces are just the 1st and 2nd 7th Line, a battery of 8 pdrs., Delort’s escort of a single squadron of the 24th Dragoons, and two squadrons of the 13th Cuirassiers, all deployed on the Cabeza.

Michelena's brigade on Spanish right

On the Spanish right Michelena’s brigade advances in column, consisting of the Cazadores de Velez-Malaga, Corona and the 1st de Guadix.

Miyares on the Spanish left

Miyares brigade, minus Lorca which was left as a rearguard on the road to Castalla, consists of the battalions of Bailen and Alcazar de San Juan.

Lorca by road to Castalla

Spanish commander O'Donnell with ADC's

French 8 pdrs. prepare to open fire as Spanish cross the Rio de Castalla

Michelena secures his flanks

As his brigade moves within charge distance of the French cavalry Michelena closes up his two flank battalions into closed columns, to protect Corona which shakes out into line. But this slows the Spanish advance, in the face of the enemy cannon, to a crawl.

While Miyares presses forward in columns through the olive groves

With the French horse concentrated on the far side, Miyares continues to advance in column through the olive groves on this side of the Cabeza.

French guns open fire

The French cannon open fire at long range, trying to slow the advance as Delort awaits his reinforcements.

Lorca sent to protect Spanish left

O’Donnell sends an ADC over to the Lorca militia, moving them to his far left flank to impede any French reinforcements from crossing the bridge there.

Freuller arrives with Spanish horse

Two small contingents of horse arrive from the direction of Castalla, Montesa line cavalry and the Husares de España, along with a half battery of horse artillery, giving the Spanish some much needed cavalry and cannon support. 

French cavalry reinforced and threaten Michelena

At the same time two more squadrons of the 13th Cuirassiers arrive, joining the other French cavalry to threaten Michelena’s advance.

More fire poured into the advancing Spanish

Casualties start to mount as Michelena’s brigade crawls forward in supported line.

Corona driven back!

The slow Spanish advance in the face of enemy cavalry is checked and thrown back as Corona moves into canister range.

1/7th charges 1st de Guadix

Meanwhile the 1/7th forms column and charges 1st de Guadix which is in closed column and unable to offer much defence.

And drives them back!

Spanish cavalry move to left flank

With the French horse concentrated on the Spanish right, O’Donnell sends Frueller’s horse over to his left flank with the hope of outflanking the 7th Line on the Cabeza de Plá.

Overview

At the top Corona takes a beating at close range from the French guns while in the centre 1/7th charges down from the Cabeza, trying to break de Guadix which anchors the Spanish centre. Below this Alczar moves through the olive groves, shaking out into line while Miyares’ Bailen battalion (bottom) moves up in column on the Spanish left. Off photo to the right Frueller’s horse moves rapidly around the olive groves.

1/7th drives de Guadix back a second time and routs them

A second vicious charge form the 1/7th drives back de Guadix a second time, this time routing them. 

Lorca arrives at bridge

The Lorca militia arrive at the bridge and begin to form square to deny any enemy cavalry reinforcements this crossing.

Montesa charges 24th Dragoons

Delort manages to get his single squadron of Dragoons over to his right, just in time to confront the Spanish cavalry, who have suddenly emerged on this flank. Behind them the 2/7th forms square to protect against a breakthrough. 

And is routed!

But the much smaller French force routs Montesa. It is a crucial moment, as otherwise the French would have been caught in a very tricky situation.

Corona driven back a second time by canister, breaking Michelena's brigade

Forced into close column by the loss of de Gaudix, Corona’s closed ranks are pounded by the French guns. Michelena’s brigade can sustain no more punishment and breaks, beginning its slow retreat in closed columns to the rear.

Montesa and de Gaudix routing

The Spanish attack starts to unravel, with Montesa in full rout, along with de Gauadix behind them.

Alcazar de San Juan charges the 1/7th

The Spanish finally get a break as Alcazar charges the weakened 1/7th and breaks them! But any follow up is checked by the presence of the Dragoons.

Overview

In this overview top right the battle for control of the Cabeza continues as Alcazar charges and breaks the 1/7th, but they have lost their supporting cavalry (although Frueller’s horse artillery continues to lend support). But bottom right and centre Michelena’s two remaining brigades are slowly retreating to the rear in closed columns, harassed by the 13th Cuirassiers.

Centre left Montesa, failing to rally, continues their flight to the rear with the Husares de Espaná now moving to join them as Dubessey’s Dragoons are spotted arriving (just on the edge, top left). To the dragoons right, by the bridge, Lorca ever so slowly forms up in march column to come to Miyares’ aid.

Dubessy arrives

Denied the first bridge by Lorca’s presence, Dubessy moves to cross at the centre bridge. Montesa’s flight has unfortunately brought the Spanish cavalry directly into the path of the advancing dragoons, but now wavering, Montesa is unable to move in an attempt to block the French as they cross the river. 

Husares de Espanã move to join Montesa

Frueller tries to bring his two small cavalry units together to confront Dubessy but the French horse hugely outnumber the Spanish contingent and Montesa continues to fail to rally.

Montesa broken

Dubessy charges and Montesa, unable to even countercharge, is slaughtered. 

2/7th pressed

Battered by Spanish cannon fire, the 2/7th retreats, but with French cavalry hovering Miyares is unable to press his advantage and sweep the 7th Line from the Cabeza. Their only option, now that their closed columns are being targeted by the French guns, is to retreat, join up with Lorca and hope for reinforcements.

Montijo arrives

Finally Montijo’s strong brigade arrives from the direction of Castalla in support of O’Donnell’s battered forces. 

Slow going

But it is very slow going as they are out of command range and uncertain how to proceed.

Cuirassiers charge the Spanish guns

Unaware of how precarious Miyares’ position is, two squadrons of the 13th Curiassiers bravely charge the Spanish half battery. They are driven back by canister fire, but it is the last action for these guns as the remnants of Frueller’s brigade, broken, has begun to quit the battlefield and the guns limber up in order to join them.

Spanish Husares rout

Dubessey’s dragoons rout the Husares de España, as Fueller’s brigade breaks.

Too late

As the Husares retreat across the bridge O’Donnell orders Lorca forward to bolster Miyares, who is still relatively untouched. But the orders are slow to arrive and the militia slower to shake into line and get moving.

Miyares begins to retreat

As the Spanish horse artillery limbers up and gallops off (upper right) Miyares throws in the towel and, forming squares, begins a slow retreat as well, harassed by the enemy horse. The French guns continue to pound them mercilessly.

Spanish guns overrun

The limbered Spanish horse artillery follow the fate of Montesa, running directly into the path of the 24th Dragoons where they are eliminated.

Overview

In this overview on the lower left Montijo makes his slow way forward as, to his right at the river, Michelena’s shattered brigade retreats in closed columns. Upper right centre the Spanish guns are overrun by the 24th Dragoons while Miyares’ slowly retreats in squares through the olive groves.

At the very top Lorca shapes up into march column to join the rest of Miyares brigade, but it is way too late to make a difference.

Dubessy moves to block Montijo

Delort sends orders to Dubessey to block Montijo’s advance over the river.

Lorca finally moving forward

Chaos on the banks of the Rio Castalla

It is all confusion as Montijo arrives at the river just as Michelena’s broken brigade fall back. In the face of Dubessy’s horse, Montijo begins to take up a defensive position along the river.

Santisteban arrives

Santisteban’s cavalry finally wins through the French forces left to block the Biar pass, only to arrive on the field to find the Spanish army in full retreat.

French guns pound Miyares' squares

French cannon fire finally breaks Miyares brigade

Battle's end

With the breaking of Miyares’ brigade, the Spanish are now past their halfway point in fatigue losses, but had really lost already, regardless, lacking the means to achieve their objective. The Spanish army now broken their commander (me) calls it a day and concedes defeat to the French (Alan).

In this final overview Montijo’s brigade can be seen in defensive positions along the river with Dubessy’s dragoons facing them. Lower left Michelena exits the board, upper left Santisteban’s cavalry arrive too late and upper right Miyares retreats through the olive groves. The French forces, off photo still hold the Cabeza de Plá.

It was an interesting playtest of Brian’s scenario, and with some tweaking we will probably play it again. With reinforcements entering from all directions it became a very fractured fight, but early on the Spanish came close to achieving their objective, which was to defeat the 7th Line and hold the Cabeza de Plá for a turn. Random arrival times brought Montijo late to the game and the defeat of the Spanish horse and the arrival of Dubessey’s very strong contingent of dragoons really spelt the end for the Spanish. Santisteban, arriving as early as possible, arrived too late to make any difference at all (as he did historically). On the French side the 114th failed to show up at a time when their presence was much needed, but some fantastic die rolling by Alan saved the day regardless, with legion work done by the 1/7th, Delort’s squadron of dragoons and the French artillery.