Saturday, April 30, 2022

4th Hussards


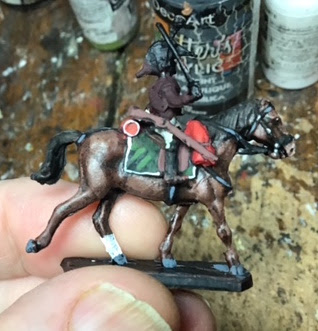
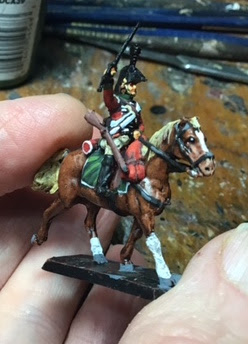
The 4th Hussars are my most recent addition to my French cavalry. Once again, these are the very beautifully sculpted Italeri figures and were finished in time to show up at our refight of the Battle of Alcaniz earlier this year and again at Maria, both times as part of Suchet's army in the east of Spain. They will join the 3rd Hussards previously painted, which can be seen here. Without a doubt, I think these figures are the most gratifying to paint of all my Napoleonic forces.

A bit of history

The 4th Hussards began life as the Hussards Colonel Général on July 31, 1783, formed from one squadron each of four existing regiments,(Bercheny, Chamborant, Conflans and Esterhazy). In 1788 it was further enlarged by drafts from other regiments and saw much action in the Wars of both the 1st and 2nd Coalitions. It was renamed the 5th Hussards (fifth in seniority) in 1791 during the reorganization of the French army and was moved up to 4th in 1793.

Vive l'Empereur! by Édouard Detaille, 1891

The 4th also saw action throughout the Napoleonic Wars (1803-1815), first in Austria, Prussia and Poland and then in Spain from 1809-1813, primarily filling the usual light cavalry role of scouting, escorting and skirmishing but also being employed at times on the battlefield. 

They returned to France and the field for both Ligny and Waterloo in the 100 Days War.


Saturday, April 16, 2022

KGL 2nd Regiment of Hussars


My very first British cavalry regiment that I painted when I began my British army a number of years ago was the 1st Regiment of Hussars, King's German Legion. These, of course, weren’t British at all, but I have always wanted to do the 2nd KGL Hussars, and finally got around to it recently.

Unlike the 1st, where I used the Italeri British Light Dragoons (originally Esci, and actually a reissue of the Crimean War  Hussars) for the 2nd I decided to convert the Italeri French Hussars. The hussar uniform was fairly consistent across nationalities, but the French bearskin really had the wrong profile for the KGL’s, which was much taller. In addition, the 2nd KGL bearskin seems to have differed from the 1st in that it had a visor attached (although there is some debate as to whether it was a fur cap or shako).

So off with their heads and then a swap with some French grenadier bearskins (from HaT light infantry Carabineirs) which I built up a bit and added red sacks to. Finally I added some visors to each and they were ready to go!

A bit of history


Following Napoleon’s occupation of Hanover (a British electorate) many of the officers and soldiers fled to Britain. There they were formed into the King’s German Legion in 1805 which eventually grew to be 14,000 strong and included both infantry and cavalry.

The KGL cavalry were considered some of the best in the British army and the 1st and 2nd Hussars fought with Wellesley’s forces throughout much of the Peninsular War. The KGL was disbanded in 1816 as the re-established Electorate of Hanover had raised its own army in the meantime. Many of the officers and soldiers of the KGL were then incorporated into that force.

The 2nd Hussars were one of three Hussar regiments raised by the KGL. Like the light cavalry, they were responsible for all reconnaissance and outpost duties, duties they performed with such distinction in comparison with their British counterparts that they were almost exclusively given that role.


https://www.napoleon-series.org/military-info/organization/Britain/Cavalry/WellingtonsCavalry/c_1stKGLLightDragoons.html

http://www.kgl.de/KingsGermanLegion/legion/kavallerie/kavalleriehomeGB.htm

https://thisreilluminatedschoolofmars.wordpress.com/the-dress-of-the-kings-german-legion-1-some-primary-sources/7-2nd-hussars-1808-16/

And some more photos:


My conversions for these French Dragoons consisted of head swaps with some HaT carabineirs, after which I built up the bearskin to the proper profile and added the red bag.


Sunday, April 10, 2022

Painting my British Heavies - Part 3, Painting the riders

 Okay, I took a bit of a break from my tutorial writing, but have been encouraged to finish it off so here we go. Apologies in advance for my bad photography. I was just shooting with my iPad as I went along and a number of shots are out of focus. Here are links to the previous two tutorials I wrote, on pinning and painting horses.

I won't go into a lot of detail about brushes, washes and paints as I have covered that previously in my last post in these tutorials. My process for painting figures involves many of the techniques I use for the horses, but with less use of washes. Generally speaking I work with a darker base undercoat colour of the final colour, washes to sink into folds, the base colour and then a few highlights. It's a fairly speedy technique, designed to get the best out of my figures while aiming for a level of painting that will work well on the battlefield and allow me to finish armies rather than a few stands. Generally speaking, I can paint 24 figures in about four hours of painting, usually working in groups of eight to ten at a time.

Again, in these pictures I try to show my hodgepodge of paints used in each stage.

In this case I start off with a base coat of a dark purply red (a burgundy mixed with black). I use this a fair bit for my undercoating for anything in the red/brown spectrum, in this case the red of the dragoons' coats. You can see the trumpeter received a base coat of light beige, as did the bread sacks on the backs of the riders.

I also gave a coat of light beige to the breeches, which will eventually be white, and I painted the carbines brown.

I use my raw umber ink to give a wash to the beige bits (breeches and bread bag) to darken the folds and underpainting. I don't really need a wash on the dark purply red as it is dark enough to serve as my darkest colour.

At this point I start to paint in my mid-tones. I use an antique white on the breeches and a matte red on the coats. 

My style varies depending on the colour. In this not-great photo you can see that with the white I will paint most of the surface, just leaving the darkness in the folds. (Sometimes I will even do a light dry brush of white first, but not on these guys as they are attached to the horse which makes that difficult.) With the red, I really concentrate on the arms, shoulders and back of the coat, leaving the folds and most of the front dark and painting around rather than over, the belts and gear.
Not visible here but the bread bag at back received a mid-coat of beige on it at this point, with a few lighter beige highlights.
Finally I have mixd some pure yellow with the red to brush on the upper parts of the arms, shoulders and sometimes butt of the rider - places that would catch the light.

Yikes, a worse photo, but all I have. The trumpeter gets the same treatment as the breeches above, leaving the dark colour in the folds. The white can look a bit ragged at this stage but that is softened by a later wash of ink. (I think the yellow you see on the white is just light in the photo.)


The next step is the painting of the details - facings, collars, cuffs, epaulettes, webbing, etc. I use a pure solid Vallejo white for the braid and belts, a colour that I don't knock back with washes, as I do with the breeches (later) or the white if I was painting an all white uniform.  You can see how you don't really miss the red under the braid as the braid would be casting a lot of shadow anyway. Here you can also see how the negative space left unpainted for the folds of the coat on the arms works more organically than trying to paint that darkness after the fact. 

Here are all of the dragoons with their base colours and details applied. I like leaving faces until close to the end, for no other reason than when you add the flesh they come alive, which is always a bit magical. Like leaving the best for last on your plate!


Here he is with the flesh applied. My flesh looks a bit light here - I actually use a Vallejo medium flesh.


At this point I apply washes. The face receives a wash of raw umber and a brown red ink mix and the breeches a very, very light wash of raw umber with the smallest bit of a transparent raw sienna (a yellowy ink), that makes them look less freshly laundered and more worn. It also sets that white off against the white of the facings, braid, webbing, etc.


A few more touches at this point. I take a lighter flesh (actually Vallejo Dark Flesh, which for some reason is lighter than my medium!!) and pick out with a small brush the cheeks, chin, nose, tops of ears, back of hands and fingers. The brass chin strap (I had left the strap dark when painting the flesh to set it off from the face) gets painted.


Here is a group shot with the flesh colours and inks I applied for the above stage.


A close up of the bugler with his flesh and some of his details painted.

The final stage is really just a continuation of detailing. At this point I paint all of the blacks and then use a small brush to add a few grey highlights on the black. You can see it on the knee of the tall boot, the stirrup strap, on the edges of the bicorne and generally a highlight stroke either side of the bicorne in the centre. Scabbard and sword get painted as does the plume and the white chevrons on the sleeve with a brush I have that has about six bristles and I only use for something like this.

One final group shot showing the paints used in this final stage. The blue was for the canteen.


Saturday, April 9, 2022

Spanish Artillery Limber and Gun


I was lured into the 52nd Black Watch miniature site a couple of months ago by someone who had seen this beautiful mule teamed Spanish limber on offer there. Created by the sculptor Massimo Costa, it had all the hallmarks of his beautiful work and for me was love at first sight.
A couple of years ago I had put together three oxen-pulled limbers, utilizing the ancient Airfix French limbers I had on hand and those can be viewed here. In reality they should have been pulling the Gribeauval limber utilized by the French rather than this diminutive Airfix version, and one day I may replace them.
This Black Watch model did not disappoint and was a real pleasure to paint, especially the mules, which, with their soft grey hides and white chests and bellies were a nice break from painting horses. Here are my results - I hope you enjoy!


A bit of history
Like most European powers in the late 1700’s, Spain did not have a permanent artillery train, but rather relied on contractors who would provide drivers and animals for the army, a system Spain retained throughout the Peninsular War. The civilian drivers, not part of the army, would regularly desert with their animals, which was in stark contrast to the high level of professionalism in the Spanish artillery. 
However finding draft animals was exceedingly difficult in Spain and as a result the Spanish were often hard-pressed to provide more than one gun per 1000 men, well below the three to four required. As a result many of the draft animals were mules, or oxen for the heavier ordnance. Mules especially were well-suited to the arid Spanish climate, combining the patience, endurance and sure-footedness of the donkey with the strength and size of a horse.
In 1812 reforms to the Spanish Royal Corps of Artillery introduced a professional artillery train, who wore a grey uniform with the Tarleton helmet, pictured here.
More information about Spanish ordnance and artillery trains can be found here: https://www.napoleon-series.org/military-info/OrdnanceJournal/Issue4/SOJ_4-5-Spanish_Gribeauval.pdf