
Up until now I have been getting along with my old WWII housing stock for my Peninsular games but about a month ago decided it was time to build some specific Iberian Peninsula buildings for my Napoleonic gaming. They wouldn't be fine models, just scratch built buildings meant to look good at a certain distance on a wargame table. I have developed a process for these over the years, and its all very ad hoc, felling my way and mostly inventing as I go along.
This was partly inspired by the fact that my left eye developed some serious vision issues and it may be awhile before I can paint miniatures again. So it was mostly a project to simply keep me amused!

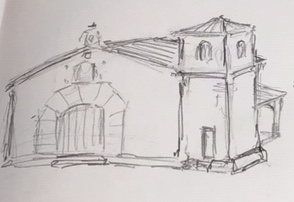
I started with a few loose sketches of what I thought I might do.

Chose this for starters.

Cut out a bunch of pieces from black foam core and pinned them together. I knew I wanted a foot print roughly 2" X 4". Trimmed up the wonky bits and sketched in features (windows, doors etc.)
Unassembled the pieces and cut out windows and doors.

Did some preliminary detailing, mostly involving ripping off layers of the paper covering the foam core, carving bricks into some of the exposed foam core, scribing lintels across doors and windows...

Glued it all back together (used pins to support some of the weaker bits)

So moving on...

Roofs made with corrugated cardboard, doors with scored cardboard, stoops added, seams patched and bits built up with modelling paste. I've thrown in a 1/72 figure for scale, showing my usual compromise between building sizes and figures for gaming purposes.

I tried making tiled chimneys this time - more Mediterranean I think.
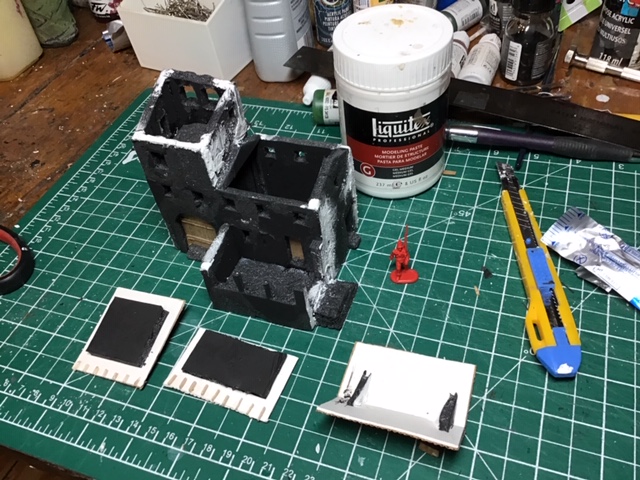
Roofs removed to show construction. I won't fasten them to allow me to pop a garrison inside the building if needed...

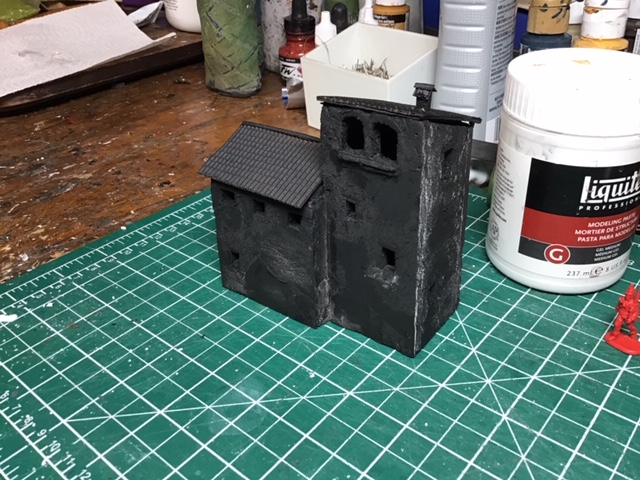
Back and front views primed and ready to paint!


Parts textured and scored.
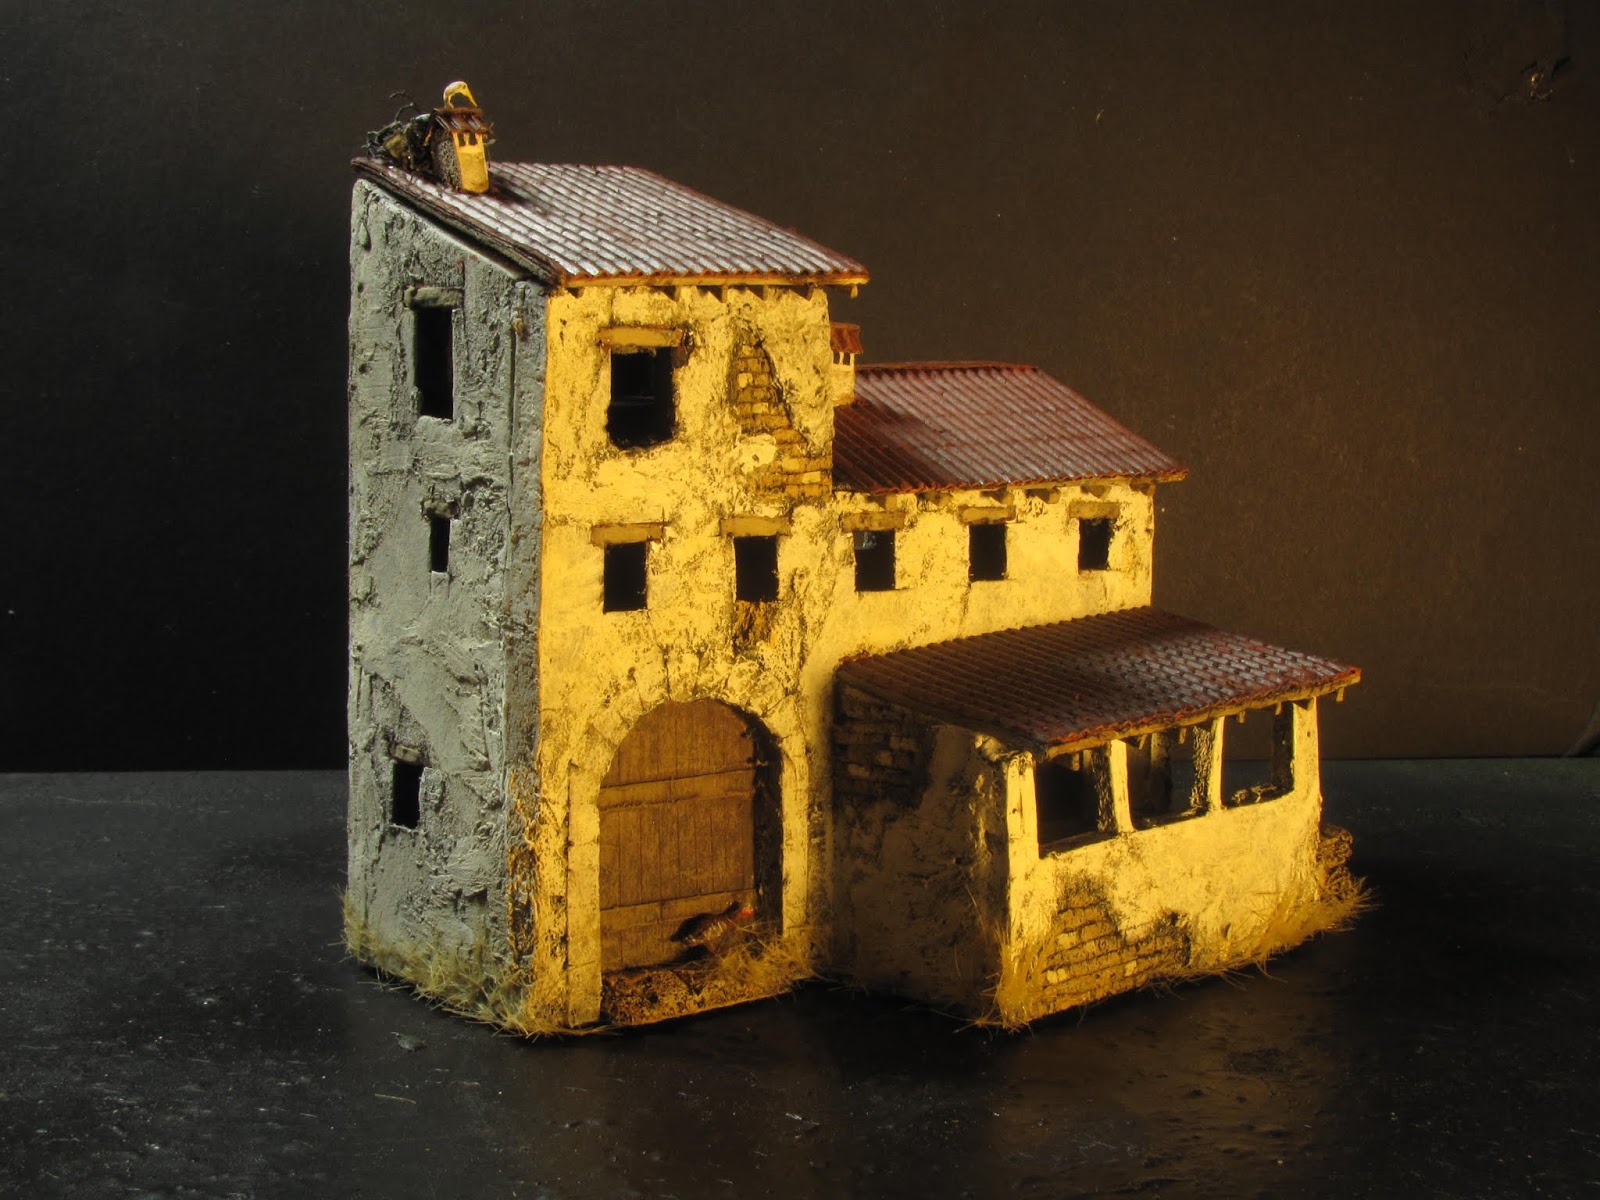
Here are pictures of the church primed and painted. No fowl this time!
I was happy enough with the outcome but happier with the stone and stucco of the previous building. I think it has something to do with the symmetry of a religious building as opposed to the funkier anything-goes design of residential buildings. But what is an Iberian village without a church??!
I couldn't for the life of me wrap my head around doing a semi-circular tiled roof on the the apse at the back so went with slate instead. A bit fussy and clunky but I think it works.

Assembled, primed and ready to go.


Front view - a bit of a gap along the roof line because, along with the tower roof, it is separate and removable. I was pleased with the cut stone on the corners, however!
Next I decided to do something a bit different than originally planned, three rural single family dwellings, so a break from my first sketches.
These are common in the north of Portugal, built along similar floor plans where the animals were housed below and the family lived above. I saw entire villages made up of this construction and was given a book on Portuguese northern folk architecture which has proven invaluable.
I took three designs based on some of the images you can see on this scanned page...
I was happy enough with the outcome but happier with the stone and stucco of the previous building. I think it has something to do with the symmetry of a religious building as opposed to the funkier anything-goes design of residential buildings. But what is an Iberian village without a church??!
I couldn't for the life of me wrap my head around doing a semi-circular tiled roof on the the apse at the back so went with slate instead. A bit fussy and clunky but I think it works.
Assembled, primed and ready to go.
Front view - a bit of a gap along the roof line because, along with the tower roof, it is separate and removable. I was pleased with the cut stone on the corners, however!
Next I decided to do something a bit different than originally planned, three rural single family dwellings, so a break from my first sketches.
These are common in the north of Portugal, built along similar floor plans where the animals were housed below and the family lived above. I saw entire villages made up of this construction and was given a book on Portuguese northern folk architecture which has proven invaluable.
I took three designs based on some of the images you can see on this scanned page...


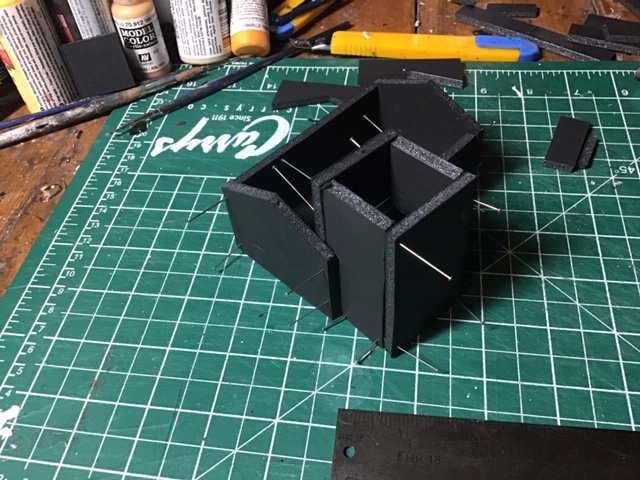
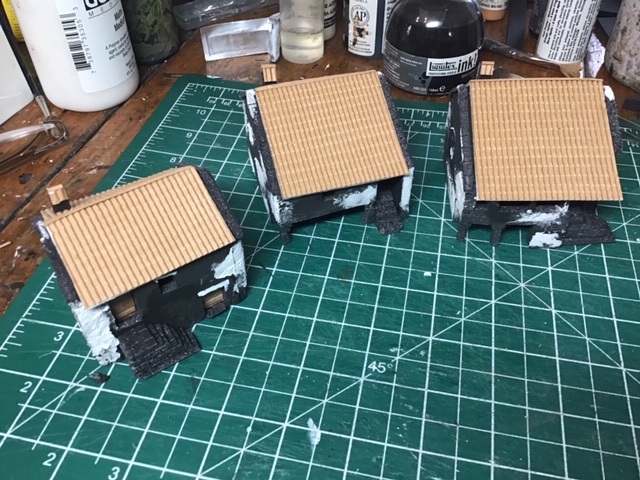
- So here are the three houses, two with porches, almost finished before I decided to lop the porches off! They just weren't working fro me, too much roof from above...
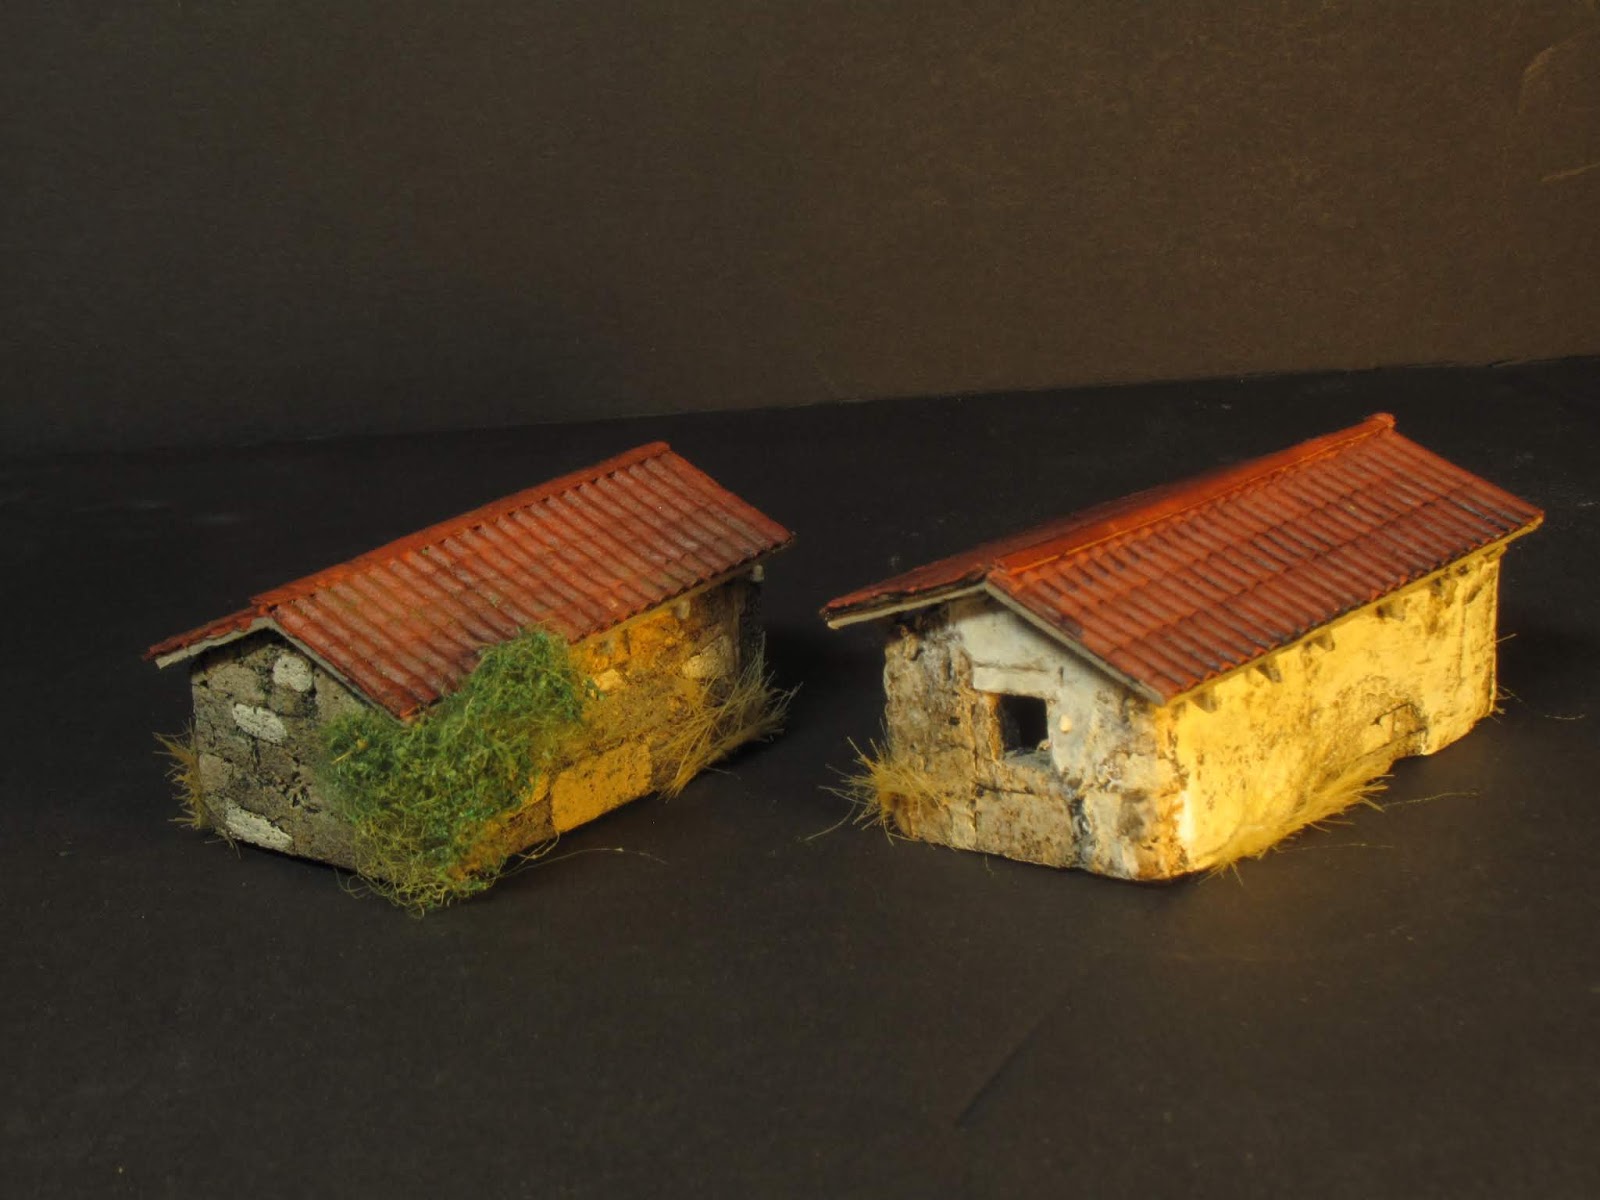
 And here are some photos of them finished. I prefer them this way, less elaborate but more identifiable as village houses, I think. I've saved the lopped off porches and roof bits and may incorporate them on a larger building.


This last one I was able to bend the foam core wall back enough to get the gap in the roof to disappear after I had photographed it. In all cases the roofs didn't fit quite as well as I had hoped, but it's the price I pay in allowing them to be removable! In reality the stone edges should overlap the tiles in construction.
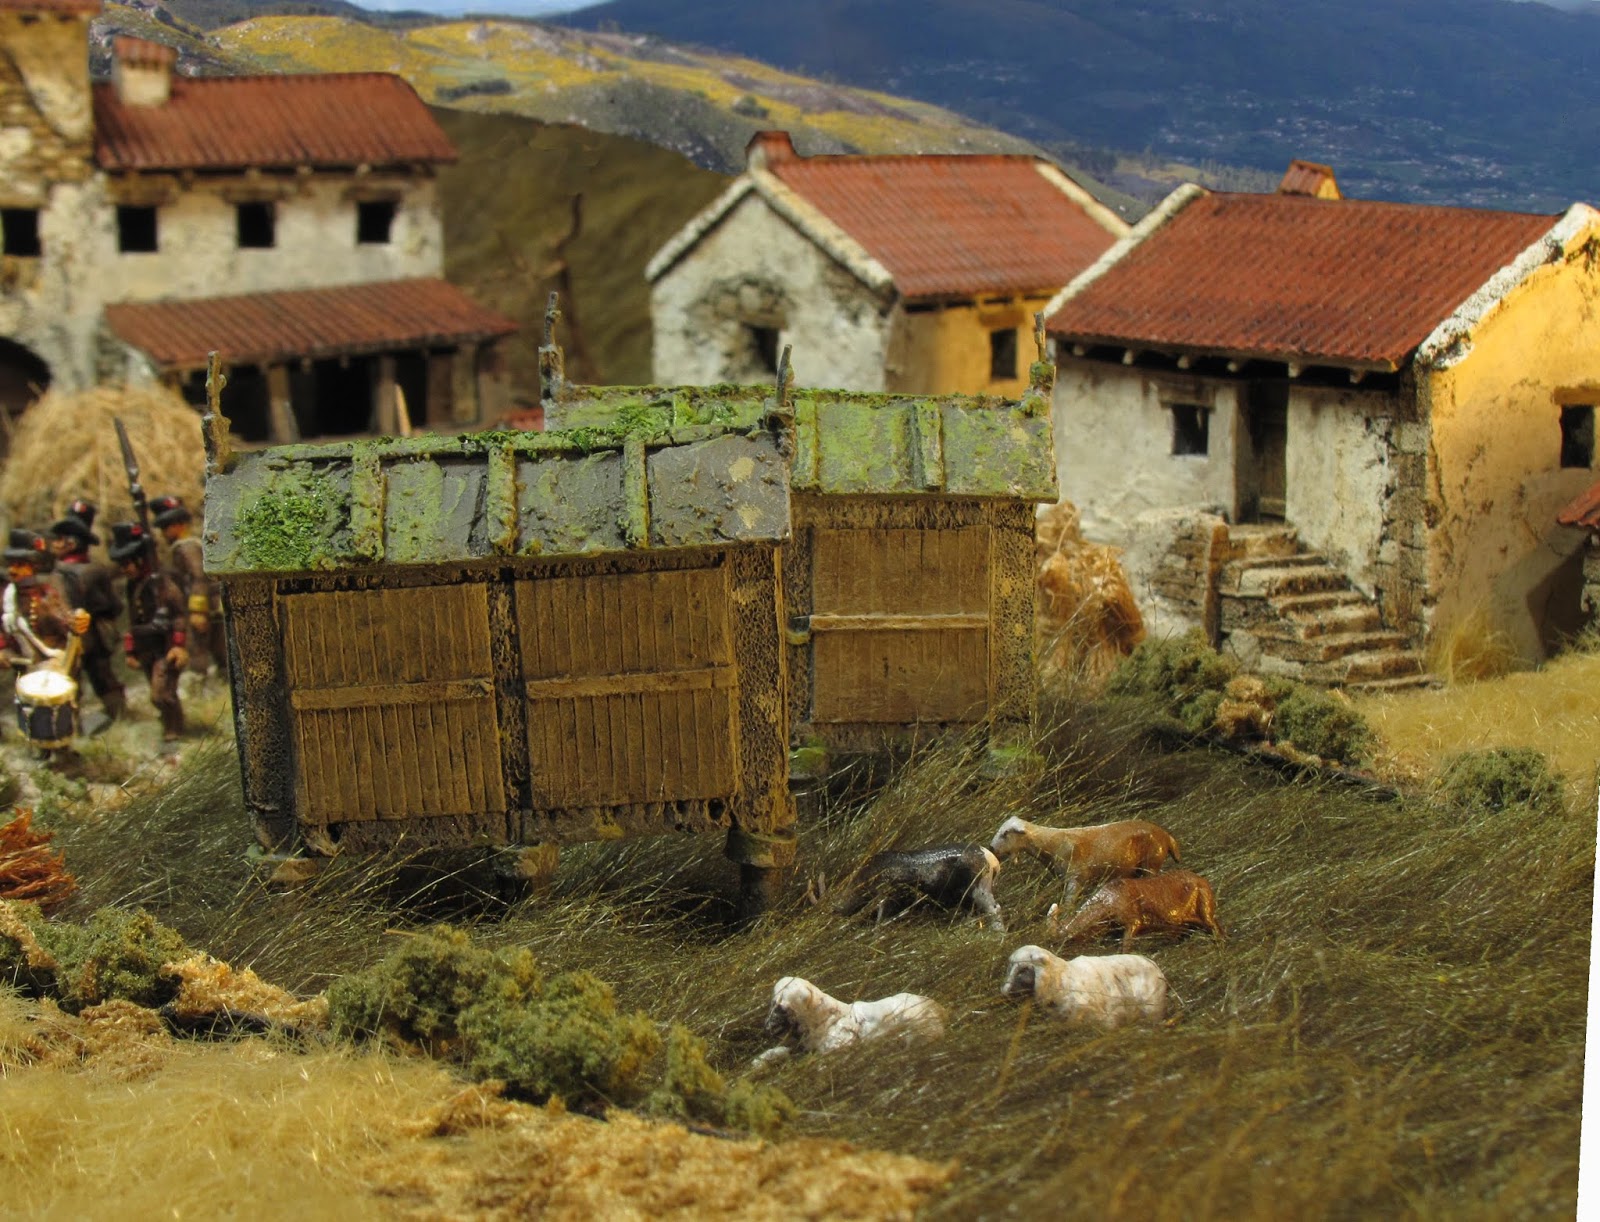
In yet another detour from my original intentions I'm now inspired to build a few outbuildings to go along with these. I plan to base them on some of the buildings and grain silos (espigueiros) we have seen on trips to central and northern Portugal.


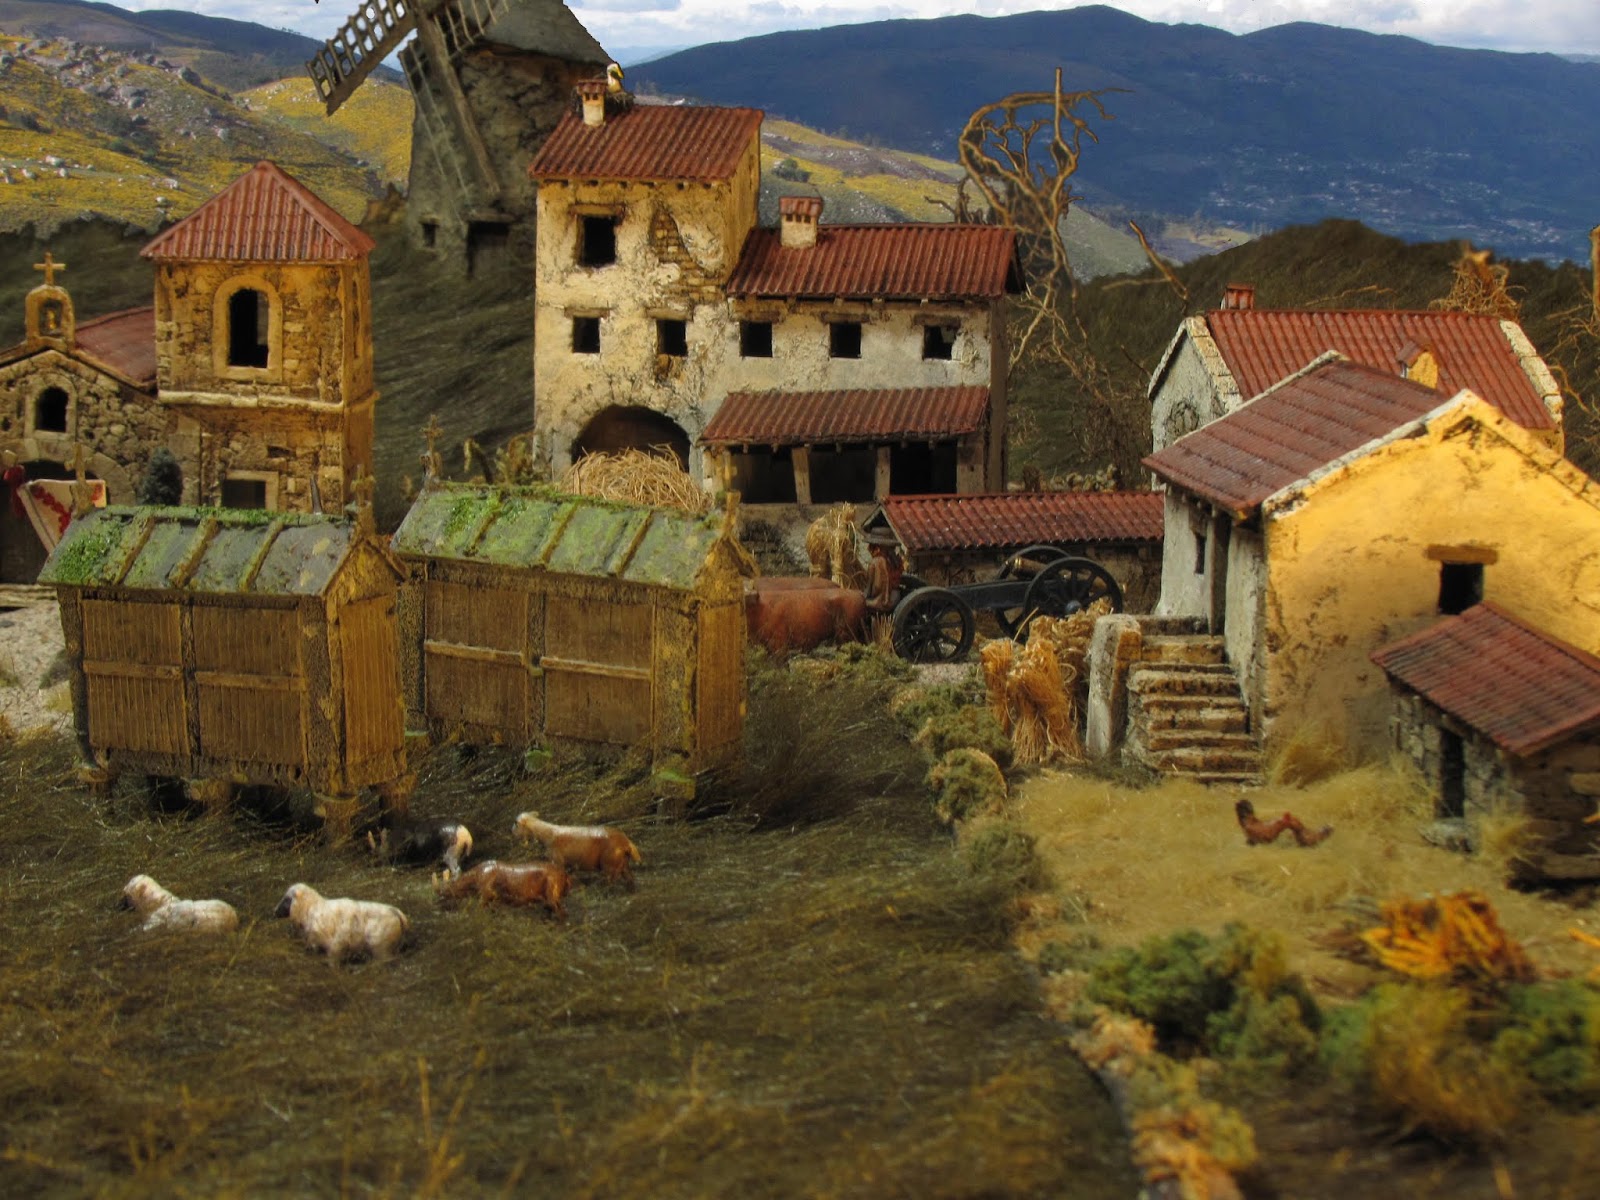
And here are a few photos of all the buildings together in a little diorama.


Excellent scratchbuilding, they look great!
ReplyDeleteThanks, Jacksarge. Im glad you enjoyed it.
DeleteVery nice work. Like the foam core distressing seems to give a great result.
ReplyDeleteThanks, Tony. I agree, you can get loads of texture and detailing from just ripping and scoring the foam core.
ReplyDeleteFantastic!
ReplyDeleteCheers, Norm.
ReplyDeleteLove the 'raised barn' type'. Definitely going on the to do list. Thanks.
ReplyDeleteRegards,
Olicanalad.
You are an absolute artist and have an incredible imagination! I have been wanting to make a Spanish church to go with my Spanish Civil War wargames for ages. Unfortunately I don't have the practical skills that you have and mine, that will a taller, narrower tower, will look nothing like as good as yours, even if I can find the modelling material. My interest in the Peninsular War is on the east coast because my parents used to have a villa near Calpe and I don't have a Wellington fixation. Any ideas about how to build a 'masia'/'mas'? If I can get them published, look out for my books on the Battle of Castalla, Denia and the British Army and the 'model divisions' of Whittingham and Roche.
ReplyDeleteThank you, Andrew, for the very kind words. I agree, there is so much more to the Peninsular War than Wellington's exploits - I'm currently battling through my good friend Brian North's scenario based on the battle of Alcaniz.
DeleteAs for ideas about building a masia, I would say that if you used some of my foam core stressing techniques above you could get the rough stone look you would want. Beyond that, it's just a case of looking at a few examples on line and going for it! I rarely have a set plan for my build, just make sure opposite walls are the same length and feel my way through it from there. Because I want to keep their footprint small generally I make my buildings smaller than scale, but try to make door sizes believable to my scale. Not much help, I know. Perhaps I will build one some day and I can share my approach.
I will look for your books, certainly! They sound very interesting.
For the benefit of your other 'subscribers' I attach a quote about the masia/mas (the Catalan/Valencian version) taken from the draft of my Spanish Civil War guide, Spanish Geography chapter, that I also hope to have published:
ReplyDelete'In Aragon and Catalonia the design of [farm] houses was different. The basic building (masia or mas) was solid and deep so that, even if it consisted of three floors, it had the appearance of being squat. It, too, only had a single window facing outwards at first floor level. Animals occupied the ground floor to which large gates and passages led and the family occupied the first floor, access to which was by internal staircases. If there was a second floor, there was often a wide balcony, sometimes framed with colonnaded arches.'
Bill
I love the additional figures you put in your models. It strikes me that a mas would be a perfect building for you with your style and set off your 'Usares de Almansa' perfectly.
Supercalifragillisticexpialidocious Beano Boy
ReplyDeleteThankyouverymuchilous!
Delete