In a departure from our steady diet of Peninsular Napoleonics, I introduced my friend Alan to WWII gaming last week, playing the Battlefront WWII scenario, The Sanatorium. Battlefront WWII was my go-to ruleset and era of choice for my first ten years or so of wargaming, and it was great to dust off the toys and get them on the table again. This scenario was written as a learning scenario for the ruleset by Richard de Ferrars and is a great match up of a couple of half battalion-sized forces, set during the Battle of the Bulge. It is one I have played a few times before.
A while ago I had taken a shot at simplifying some of the Battlefront rules to speed up play a bit (as much as I always loved BFWWII and all of its intricacies, it is tough to finish a game in a few hours!) but even with my tweaks the fight went on for a while. It ran the allotted 14 rounds and ended with... Well you will have to read the report to see!
It was played on a 6' X 4.5' table with 1/72nd scale miniatures.
 |
| The scenario map. The Americans begin deployed on the roads and in the woods to the left, while the Germans begin with an engineer company in the Sanatorium and the rest of their forces to the right of the red line. The Germans in Stoumont and Roaut may not venture beyond their deployment zone until Turn 7, setting up an attack/counterattack scenario. The principal objective is the Sanatorium. |
 |
1. The Battlefield
Rouat is left bottom, and Stoumont just above it. In the centre is the Sanatorium while at the top are the woods from which the Americans advance.

2. The Sanatorium
Most of the fighting will centre around the Sanatorium, a large building that dominates Stoumont and its vital crossroads.

3. B Company advances out of the woods
Four Shermans of C Company, 740th Tank Battalion lead the advance, but rapidly become bogged down in the soft ground as they leave the road. One of them is put out of action by German AT fire north of Rouat. In the background B Company of 1/119 Infantry Regt. cautiously venture out of the woods.

4. A long shot

5. Moving in for the assault
B Company begins to take some casualties as mortar and machinegun fire search them out.

6. C Company holding back
Meanwhile C Company holds back a bit, sending a couple of platoons forward to seize the buildings south of the Sanatorium. The battalion mortars fire smoke to help shield B Company's attack.

7. Slow going for Shermans
It's slow going for the Shermans on the American left as they try to give close support to B Company.

8. Close combat on Sanatorium
A battered B Company presses home its attack on the Sanatorium while some of C Company clear out the orchard south of the Sanatorium (top left). B Company manages to gain a foothold, but it's tough going.

9. C Company moves towards Stoumont
Meanwhile the rest of C Company advances along a hedgerow towards Stoumont. But they are spotted by the SS Panzergrenadiers of 2 Regiment holding the town, and C Company too starts to take heavy fire.

10. Holding back
Meanwhile the American commander holds back the uncommitted two Shermans, still in the cover of the woods and waiting for the order to advance, as a Panzer IV has been spotted at Stoumont with a clear sight line down the road.

11. Armour advances on American left
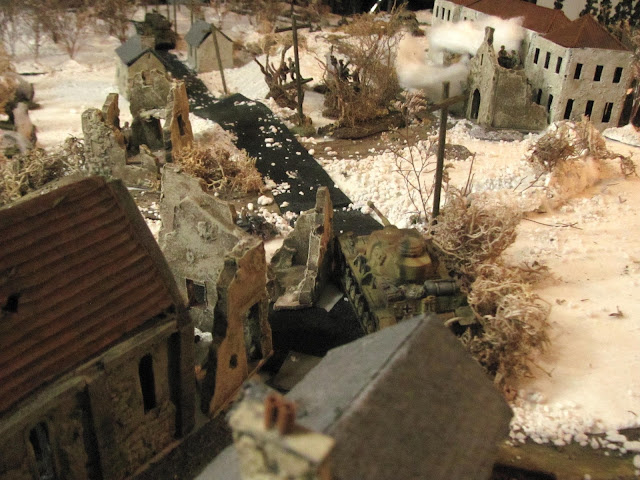
12. Panzer in Stoumont
On the outskirts of Stoumont the German Panzer keeps a wary eye on the road out of the forest.
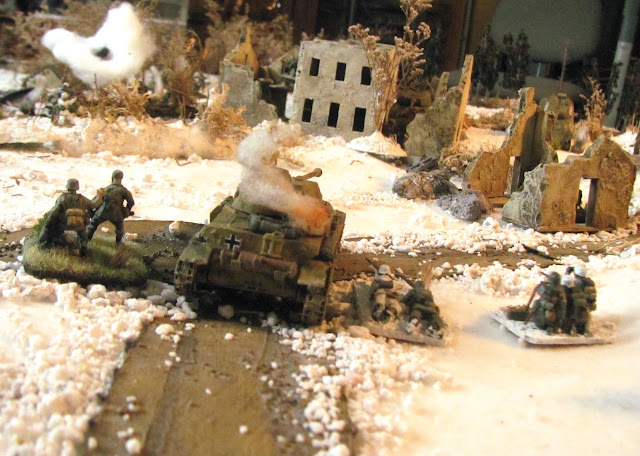
 13. KO'd
The German tank is disordered by fire from the American Jackson, and the two Shermans use the opportunity to advance. A second shot knocks it out!
 14. Sanatorium falls to the Americans
At this point, with American armour hovering outside of its walls, the German engineer company, reduced to just a few sections, still grimly holds onto the building. The German company commander, Ostuf Sievers (upper left), drives off no fewer than four American attempts to oust his headquarters section.
 15. German counterattack
But the remainder of his command is driven out, and as the surviving engineers come streaming out of the Sanatorium, the Germans launch their counterattack, supported by a second Panzer IV that arrives on the Rouat road. However, mixed orders stall the advance (a series of terrible maneuver rolls!) and the American C Company, called off from their advance on Stoumont, manage to seize the mostly empty complex before the enemy can gain a foothold.

16. Close assault on orchard
The Germans have some success in clearing the orchard south of the Sanatorium, but are unable to capitalize on the fact that the building still remains largely abandoned by both sides.
 17. Second Sherman KO'd
The German Pak begins to find its range as it KO's a second Sherman. But the German counterattack has stalled.

18. And a third!
A third American tank goes up in flames.
19. Repositioning AT gun
With the American tanks north of the Sanatorium KO'd or out of sight, the German Pak moves to reposition in Rouat. The gun's transport is put of action by a lurking Sherman but the crew bails out and manages to get the gun emplaced on the edge of the village.
 20. Back in
With the Sanatorium now firmly in American hands the first German counterattack is driven off. But, with time running out, the Germans organize for a second push.

21. German HT mortar in action
The Sdkfz. 251/2 gives what support it can, but having fired all its smoke in the first attempt, enemy targets are few.

22. Jackson threatened
As the second attack goes in, the Germans infiltrate back into the orchard and close with the Jackson before it can pull back. The SP gun falls to the close assault.
 24. Overview of final assault
Lower right, German infantry attack the disordered command tank of the 740th Tank Regiment but are driven off. The Germans succeed in taking the building sector at the bottom left but are repulsed in the bottom centre sector. A failed close assault on one of the three remaining Shermans (upper left) is driven off as well.

25. German AT gun back in action
The German 75mm, back in action, scores a fourth kill on the Sherman south of the Sanitorium, but the remaining Panzer IV, on again off again, bogs down and is unable to get into close support of the German infantry.
 |
26. Time runs out for the Germans
At the end of the allotted 14 turns, the Germans have gained a slim foothold in the Sanatorium but the Americans still control the majority of the sectors, giving them a Minor Victory. Both the Americans and the Germans are on the brink of collapse, with both sides well over 50% casualties after the Sanatorium slug fest, but the Americans held tight with a series of brilliant maneuver rolls as the German took on the thankless task of busting into the complex.
Half way through it looked as if it would be a cake walk for the Germans but their phenomenal good luck of the first half (or more accurately a whole lot of American bad luck!) collapsed on the counterattack where a number of miserable maneuver rolls left them stranded outside of the building and pounded by mortar fire.
So a narrow win for Alan on his first foray into the world of WWII Battlefront gaming. I think we will be back at it again.
No comments:
Post a Comment