Here is an after action report on our recent playing of Parker's Crossroads, a Battle of the Bulge scenario written by Giopp Loris and R. Mark Davies for the Battlefront WWII rules system.
A miscellaneous group of U.S. defenders attempt to defend the Crossroads at Baraque de Fraiture against an SS Kampfgruppe. "Attempt" is the operative word as the attack comes in from all directions.
 |
| This was the set up, with the Americans crammed into the circle in the centre while the Germans attack from all points. |
1. The Battlefield
"X" marks the spot. The Americans are ordered to hold at all costs this crucial crossroads. The perimeter of their defence is roughly defined by a circle encompassing the three clusters of farmhouses and the edge of the woods in the foreground. The initial German attack is expected from both north and south, with reinforcements arriving from almost any direction.
The Americans opt for a ring of steel, positioning the majority of their tanks to the south with a platoon of Shermans guarding the Samree road. Within the perimeter F Co. of the 2/325th Glider Infantry Regiment and a platoon of paratroops from the 509th take up positions in foxholes circling the crossroads and within the farm buildings, with the majority of the halftracks and assorted soft vehicles towards the center. These are protected by the M15 gun motor carriages positioned either side of the crossroads. A smattering of artillerymen cum infantry pick up weapons and join the defence. The recce platoon of the 87th Cavalry hold the walled farm to the southeast along with the towed anti tank platoon of M5 3" antitank guns and the Priest, kept back as a second line of defence to defend if the armoured perimeter is breached. The entire crossroads area is crammed with vehicles and guns.

2. View of the crossroads from the north along the Samree road.
Under cover of an intensive barrage the Stug company and 10. Kp. Panzergrenadiers enter along the Samree highway. As the Stugs engage the Shermans on the north side of the crossroads, the infantry dismount into the woods bordering the road.

3. View from the south.
Meanwhile 9 Kp. supported by a company of Panzer IV's moves in along the Bastogne road. A number of Shermans are immediately spotted around the crossroads as they open fire.

4. Overview of opening salvos.
The Germans concentrate their artillery on the southwest side of the crossroads, knocking out a number of defending infantry and keeping the rest pinned in their foxholes. The American tanks fire to little effect as they are blinded by the barrage and have difficulty spotting the enemy.

5. Stugs attack
One of the Stugs is brewed up as they engage the defenders to the north. Meanwhile 9 Kp. (bottom of picture) works its way through the woods, evading suspected American position as they move to the east.

6. Brave Stuart!
With one of the defending Shermans knocked out and the Stugs closing in, the recce Stuart moves in to plug the gap but is destroyed in close combat.

7. On the southern flank
To the south two more Shermans move in to the attack but one is immediately destroyed. The German armoured halftracks advance and dismount, with one being brewed up before it can do so. Its infantry bail out into the surrounding fields.

8. Bazooka scores a hit.
One of the Pz. IV's strays too close to the southern group of farm buildings and has its skull rapped by a bazooka shell, with a second shot scoring the first kill on the Pz. IV's. But wild shooting on the part of the American tanks and the FOO's inability to make contact with their supporting artillery allow the Germans to operate with relative immunity.

9. Northern flank begins to crumble
Two more Shermans along the northwest flank are knocked out, leaving nothing but a lone artilleryman armed with a bazooka to hold off the Stugs. The barrage shifts over to the west side of the road, leaving space for 9 Kp. on the south flank to advance into the perimeter.

10. Attack on walled farm.
Behind a wall of smoke 10 Kp. emerges from the woods to push home their attack on the walled farm bordering the road to Manhay. The glider infantry dug in in the woods on the north flank sweep aside a German HMG and move in to attack 10 Kp.'s exposed flank.

11. Close assault on walled farmhouse under cover of smoke.
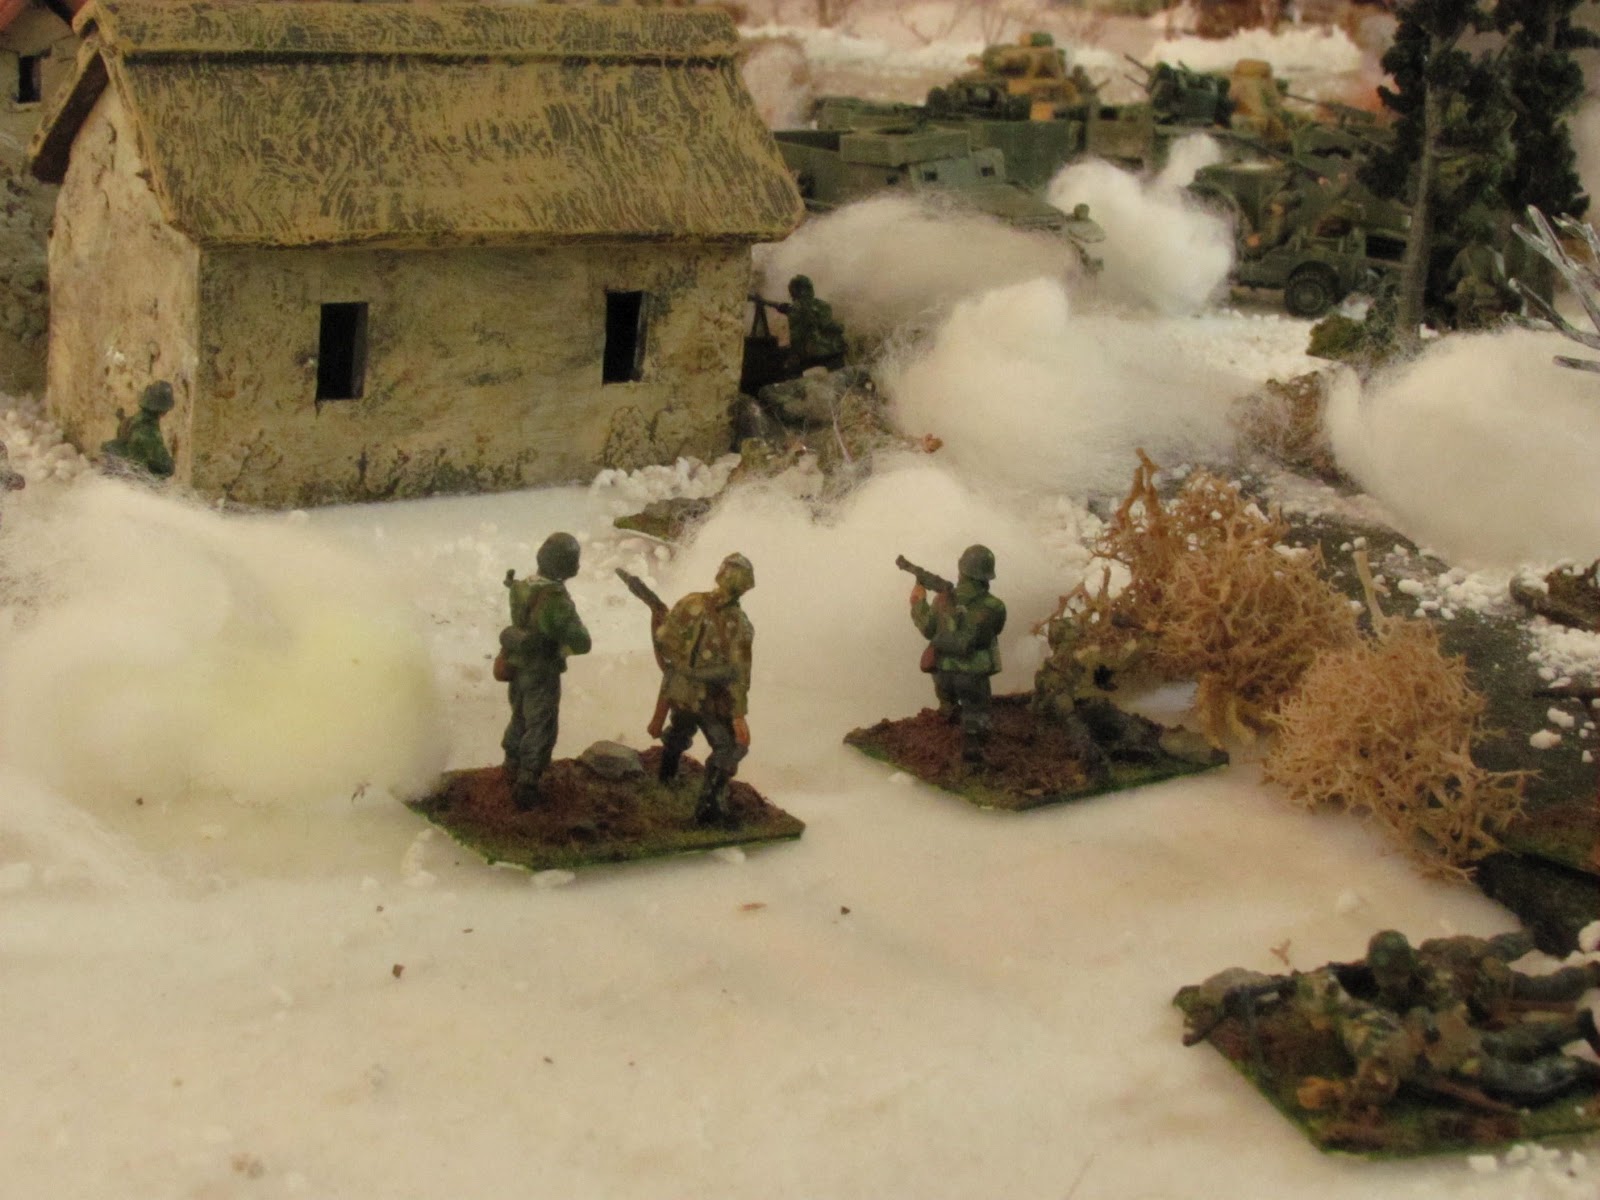
The lone bazooka holding the Samree road (northwest) farm proves hard to dislodge for someone who was firing howitzers the day before. German halftracks move up to the screen of woods bordering the farm to spray the building with machinegun fire, but he stays put, successfully knocking out a Stug and holding up this flank for the better part of two turns.

13. South flank collapses.
On the south side of the perimeter most of the Shermans are now swept away and the Pz. IV's and Stugs regroup for the push into the American lines. But a lone American light machine gun lodged in the south farm group still holds the German infantry at bay. In the distance a reinforcing platoon of Pz. IV's enters from the east, knocking out one of the two remaining Shermans in enfilade and driving the second into the woods to the east.
On the south side of the perimeter most of the Shermans are now swept away and the Pz. IV's and Stugs regroup for the push into the American lines. But a lone American light machine gun lodged in the south farm group still holds the German infantry at bay. In the distance a reinforcing platoon of Pz. IV's enters from the east, knocking out one of the two remaining Shermans in enfilade and driving the second into the woods to the east.

14. Sticky machine gun on west flank.
A lone paratroop section still alive on the west flank is overrun by the Panzers but the following German infantry balk and fail to follow up with the close assault. The light machine gun then knocks out most of the attacking German platoon before driving off the Pz. IV through close assault. It is finally knocked out in turn by halftrack machine gun fire.

Chaos reigns in the close quarters of the walled farm as punishing German shelling takes its toll. The American antitank guns and Priest try to ward off the encroaching German armour as glider troops from the perimeter retreat to the relative safety of this last holdout. The panzer grenadiers of 10 Kp. have gained a slim foothold and the Americans rally to throw them out.

16. Stug retreats to cover
With the loss of a second Stug, the remaining guns temporarily loose nerve, one retreating disordered to the shelter of the woods.

17. Ring of steel
With the Americans pushed out of the two other farm complexes the Germans tighten their ring of steel. The gun motor carriages are knocked out in quick succession and the Priest comes under fire as the glider infantry company commander abandons his foxhole to join his remaining troops by the farm.

18. Enfilade!
10 Kp.'s attack stalls out as they come under enfilade fire from the Americans emplaced in the woods and now moved to the edge of the forest.

19. 7 Kp. joins the fray
Just when things couldn't get worse for the Americans the reinforcing 7 Kp. emerges from the woods to the east (left) with their armoured halftracks in close support. Their first attack is beaten off with heavy losses while 10 Kp. is cleared from the buildings to the north.

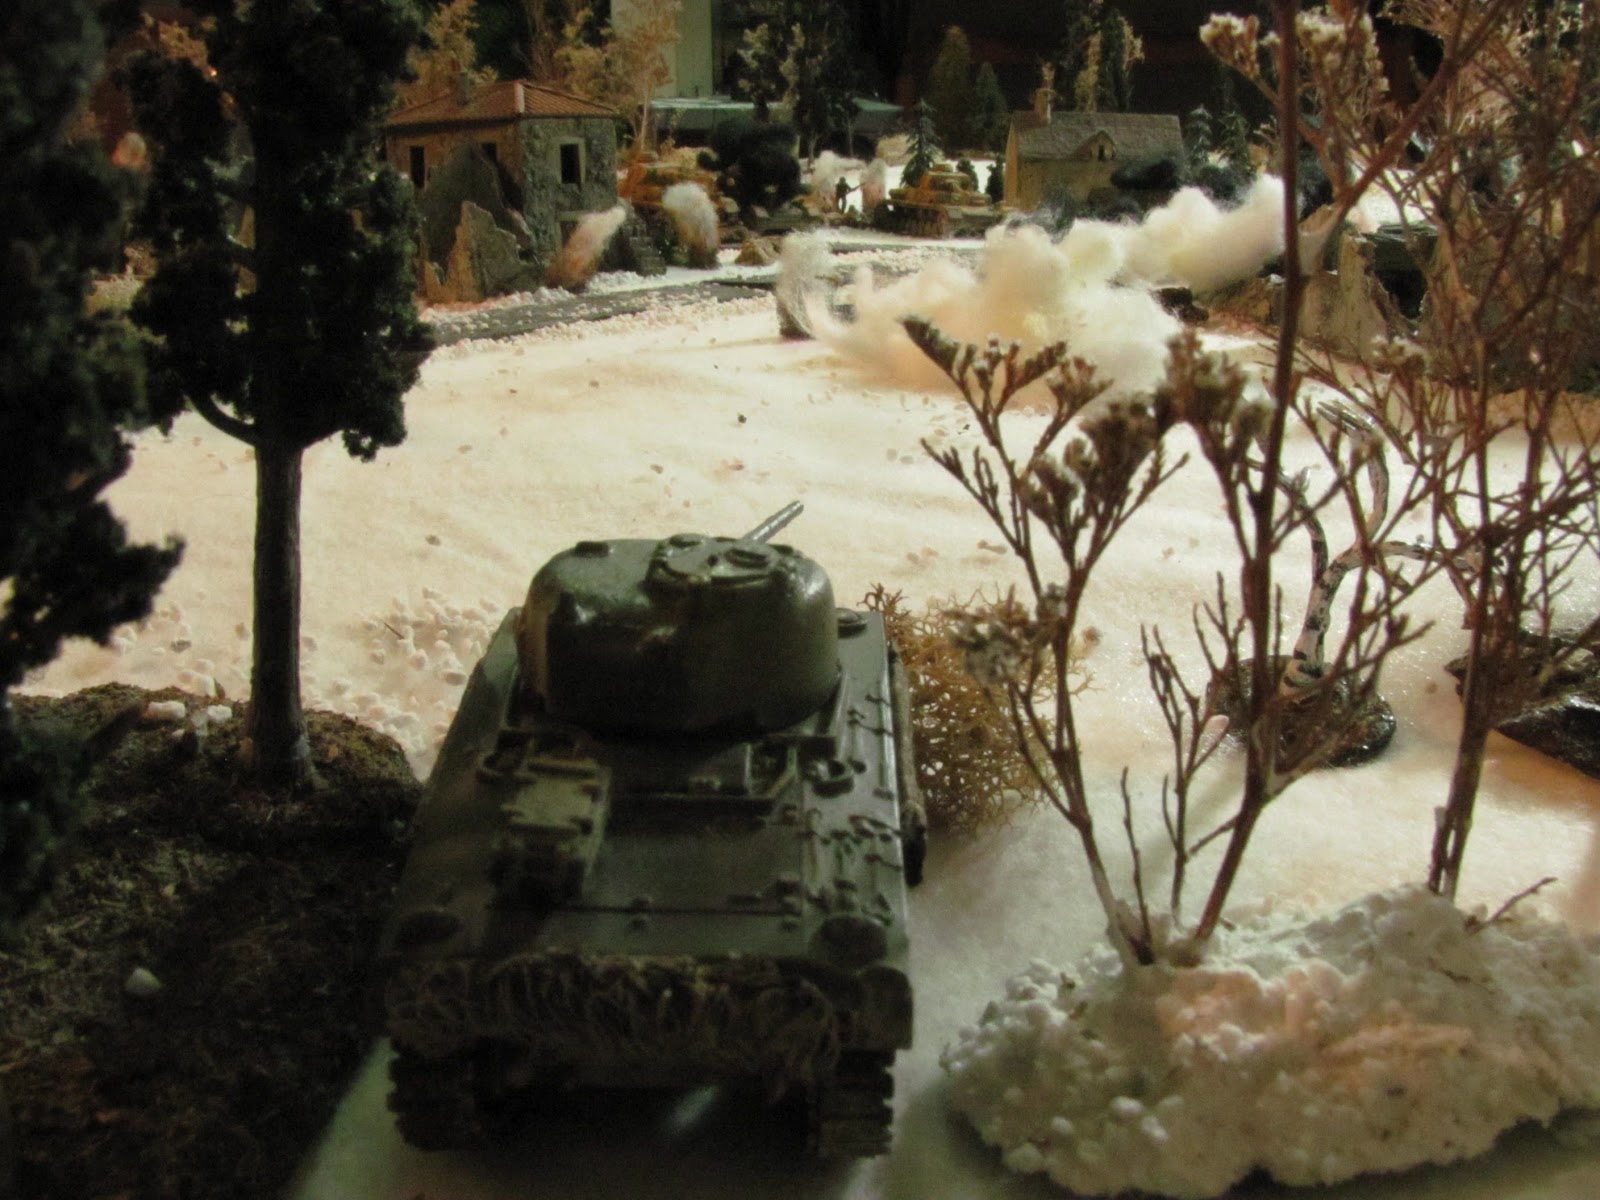
20. Last Sherman standing
The remaining Sherman, retreating into the woods disordered is pursued by a Pz. IV. In close assault the disordered Sherman disorders the German tank in turn and then knocks it out!

21. Overview
Just as victory seems imminent a series of failed maneuver rolls stalls out the German armoured advance and sends a number of their tanks in retreat towards their starting lines. The American 155's come in for the first and only time to great effect, knocking out the better part of a platoon of German infantry that have seized the southern farm complex and destroying a Pak 40 in tow. 7 Kp.'s second attack on the eastern side of the walled farm also falters and the infantry retreat to the woods, but not before eliminating the antitank gun emplaced in the farm. The second American antitank gun has also been knocked out (by Stummel fire) and the Priest by tank fire, leaving the Americans with virtually no anti tank capability other than close assault (most bazookas were destroyed in the barrage). Before being knocked out one of the American antitank guns manages to destroy one more Pz. IV, reducing the company to less than 50% of its total, but it is is all too little too late.

22. 10 Kp. breaks and runs
Having lost half their company and caught in the deadly enfilade from the woods, 10 Kp. finally breaks and flees the battle, not aware that the American defence is on its last legs.

23. Not enough tanks
The lone Sherman still surviving pokes its nose out of the woods in search of targets, only to see German tanks and infantry pouring into the perimeter. It knocks out a German halftrack by the walled farm and then trades shots with a Pz. IV on the Manhay road.
24. Down to sticky bombs
In a final burst of heroics American glider infantry close assault the two Stummels that have moved in to close the deal. Both halftracks are knocked out.

25. 7 Kp. retreats
Now taking tank fire from the Sherman on their right flank, 7 Kp. packs it in as well, fleeing the battle. The Germans are left with only a handful of infantry still in the fight.

26. Last stand
A final attempt to drive off the attackers by close assault fails, and with the German armour now ringing the farm and panzer grenadiers within the walls, the few surviving Americans surrender or fall back into the woods.

Post mortem
The German tactic of leading with their armour - infantry and support vehicles only following up after most of the tanks had been knocked out - allowed them to push into the perimeter close on the heels of the barrage. 10 Kp.'s move on foot through the woods initially caught the Americans flat-footed, thinking that they were moving to attack the line of dug in paratroops. But once the defender became aware of the axis of attack they were able to move into enfilade and effectively break up that sally.
Defending the perimeter against attack from all directions made it very difficult for the Americans to concentrate their defence or find positions that weren't easily enfiladed.The opening barrage gutted much of the American defence, knocking out half their bazooka assets as well as most of the HMG's. Also the failure of the American arty to be a no show coupled with miserable die rolling on the part of the American armour and anti tank assets meant that a difficult situation was made much worse and the battle more or less lost by Turn 6, at which point two of the three farm complexes were in German hands.
No comments:
Post a Comment