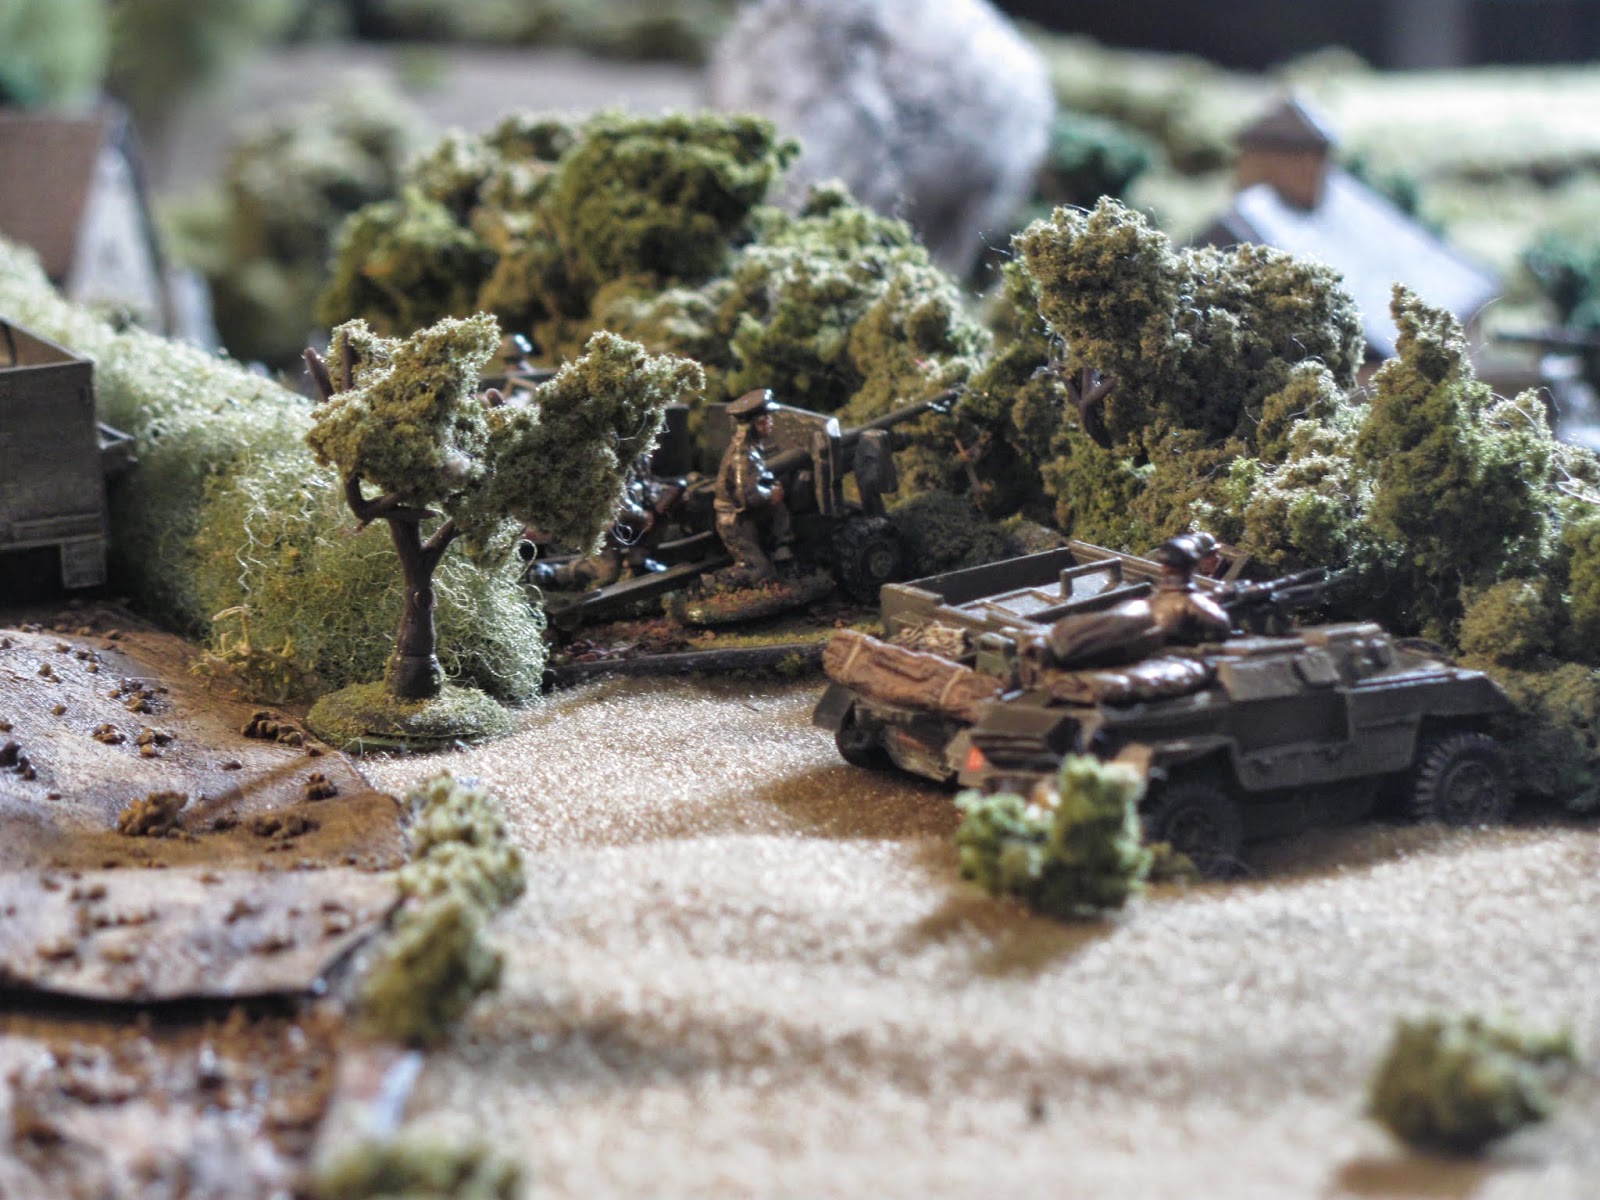
Last weekend we played Giop Loris'
Assenois scenario, with a few changes, using 20mm figures and played
with the Battlefront WWII rules set. The scenario is based on the
Combat Command Reserve of the American 4th Armoured
Division's attempt to break through the ring of German defences via
the Clochimont-Bastogne road and relieve the 101st
Airborne in Bastogne during the Battle of the Bulge.
The changes implemented were mainly
with the map itself, based on a perusal of the battlefield in Google
Earth which I cross-referenced with a 1945 aerial shot of Assenois.
My research showed the village of Assenois to be strung out along the
road to Bastogne, rather than the circular built up area featured on
the scenario map. I also changed roads and lanes to reflect more
closely what was actually there, and my visual inventory of the
battlefield revealed a few terrain features, including a small stream
that spanned the battlefield and a chateau in the woods northwest of
Assenois that served as German headquarters at the time.
The orbats are pretty well those
supplied, and I confess my research for a one day game didn't extend
to rewriting those! We ended up with a very playable scenario with
lots of terrain to make it interesting and a nail-biter finish that
only revealed the winner at the end of the final turn.
The scenario is based on the American
4th Armoured Division's Combat Command Reserve's attempt
to break through the ring of German defences via the
Clochimont-Bastogne road and relieve the 101st Airborne in
Bastogne during the Battle of the Bulge. This gave me a chance to trot out my brand new Plastic Soldier Shermans (along with a few Trumpeter models, which they match with very well) as well as my refurbished American infantry. And remarkably, I had a second chance in a row to employ my PaK43's!

Attacking Forces
The American force is divided into two groups. The Shock Group composed of Co. C of the 53rd Armoured Infantry Battalion and Shermans of Co. C of the 37th Tank Battalion is tasked with by-passing the defenders as much as possible, pushing on to exit on the north side of the board in the direction of Bastogne by Turn 8. The second group, tasked with securing Assenois, is Co. A of the 53rd Armoured Infantry Battalion and Shermans of Co. A of the 37th Tank Battalion. A FOO is attached to Co. A (infantry) to provide general fire support during the battle. All are rated “veteran”.

Defending Forces
The German defenders are a kampfgruppe composed of elements of the 39th Volksgrenadiers and 5th Fallschirmjaeger Division. The Volksgrenadier Kompanie is reinforced by a 75mm lelG37 Infantry Gun, heavy machineguns and six stands of panzershreks. Most of the infantry in both companies are well-supplied with panzerfausts as well, making the infantry antitank assets quite formidable.
The German defenders are a kampfgruppe composed of elements of the 39th Volksgrenadiers and 5th Fallschirmjaeger Division. The Volksgrenadier Kompanie is reinforced by a 75mm lelG37 Infantry Gun, heavy machineguns and six stands of panzershreks. Most of the infantry in both companies are well-supplied with panzerfausts as well, making the infantry antitank assets quite formidable.
The kampfgruppe is supported by two
panzerjaeger platoons composed of two guns each, a pair of 75mm
PaK40's and a pair of 88mm PaK43's.
The volksgrenadiers were down-graded in
our game to “trained” while the FJ's and antitank guns were left
as “experienced”.

The Battlefield
This overview of the gaming table
(6'X4.5') shows locations of the German defence, with AT guns and
mortar identified. The built up sectors representing Assenois, which
needed to be controlled by the Americans by the end of the game (Turn
12), is outlined in blue. At the north end of the board is the
American exit point via the road where the Shock Group had to exit at
least four vehicles by the end of Turn 8. Achieving both objectives
gives the Americans a partial victory, achieving only one ends the
game in a draw.
We played this game with hidden
placement, using photographs of German placement prior to their
removal, so the Americans were going in completely blind.

1.
Assenois
View of the town from the American side of the board. The chateau to the left is on a Level 1 hill. A narrow shallow stream divides Assenois into two parts.

View of the town from the American side of the board. The chateau to the left is on a Level 1 hill. A narrow shallow stream divides Assenois into two parts.
2. View from the American entry
point
The Americans will enter from the Clochimont road.

The Americans will enter from the Clochimont road.
3.
Opening barrage
An opening barrage of three medium and one heavy artillery battalions as well as a single independent battery of 155mm's slams Assenois, but much of it falls harmlessly on the largely undefended southern section of the town. A Time on Target concentration of the heavies lights up the houses just north of the stream, knocking out three of the four German defenders in these sectors and disordering the fourth.

An opening barrage of three medium and one heavy artillery battalions as well as a single independent battery of 155mm's slams Assenois, but much of it falls harmlessly on the largely undefended southern section of the town. A Time on Target concentration of the heavies lights up the houses just north of the stream, knocking out three of the four German defenders in these sectors and disordering the fourth.
4. Americans roll in
The tanks of A Company lead the way, with their halftrack mounted infantry following, some dismounting to secure the outlying buildings of the village, all of which are found empty. The first tank edges towards the stream and takes fire from a hidden panzershrek in one of the built up sectors. It is then immediately brewed up by an 88mm PaK43 hidden in the woods at the northern end of the town. The following tanks of A Company leave the road and take up positions south of the stream while the Shock Group holds back, engines revving, waiting for a way forward to be made clear.

The tanks of A Company lead the way, with their halftrack mounted infantry following, some dismounting to secure the outlying buildings of the village, all of which are found empty. The first tank edges towards the stream and takes fire from a hidden panzershrek in one of the built up sectors. It is then immediately brewed up by an 88mm PaK43 hidden in the woods at the northern end of the town. The following tanks of A Company leave the road and take up positions south of the stream while the Shock Group holds back, engines revving, waiting for a way forward to be made clear.
5. First Sherman KO'd
A nasty PaK43 with a long view down the open road running through Assenois slams the lead Sherman.

A nasty PaK43 with a long view down the open road running through Assenois slams the lead Sherman.
6. Second Sherman brewed up
A second Sherman in A Company is targeted by a PaK40 positioned at the woods' edge next to the chateau and erupts into flames, leaving the company at 50% losses.

A second Sherman in A Company is targeted by a PaK40 positioned at the woods' edge next to the chateau and erupts into flames, leaving the company at 50% losses.
7. PaK shelled
While the American FOO moves into an observation post in the Assenois church tower, an infantry stand spots the gun and manages to call in the 105's to the rear. For the first (and last time for a while) the 105's respond and bring fire down on the offending PaK40, disordering it (FYI orange bursts are used to represent “disorder” status in our game, and white bursts “suppression”).

While the American FOO moves into an observation post in the Assenois church tower, an infantry stand spots the gun and manages to call in the 105's to the rear. For the first (and last time for a while) the 105's respond and bring fire down on the offending PaK40, disordering it (FYI orange bursts are used to represent “disorder” status in our game, and white bursts “suppression”).
8. Advance
stalled
As American infantry from A Company dismount and clear out the few Germans south of the stream the American armoured juggernaut stalls. With the German 88 commanding anything that moves down the road, the tanks of A and C Companies move to safer ground either side of the road. They begin to engage any targets that present themselves in support of the infantry of A Company, who are preparing to clear the way forward for the tanks.

As American infantry from A Company dismount and clear out the few Germans south of the stream the American armoured juggernaut stalls. With the German 88 commanding anything that moves down the road, the tanks of A and C Companies move to safer ground either side of the road. They begin to engage any targets that present themselves in support of the infantry of A Company, who are preparing to clear the way forward for the tanks.
9. Germans vacate southern
Assenois
The only surviving German infantry in the forward sectors north of the stream, a Volksgrenadier light machinegun stand disordered by the armour advance, break cover and flee north through Assenois. They are quickly gunned down by the waiting tanks.
The only surviving German infantry in the forward sectors north of the stream, a Volksgrenadier light machinegun stand disordered by the armour advance, break cover and flee north through Assenois. They are quickly gunned down by the waiting tanks.

10. Dogfaces seize vacated
buildings
American infantry move across the stream, seizing the buildings cleared by the barrage and moving to close combat the next sector. They come under heavy machinegun fire from the woods, hedgerows and are driven back.

American infantry move across the stream, seizing the buildings cleared by the barrage and moving to close combat the next sector. They come under heavy machinegun fire from the woods, hedgerows and are driven back.
11. Americans run into resistance east of
Assenois
As the infantry move into the first houses north of the stream they spot German soldiers holding a defensive line along the hedgerow east of the town. Tanks move forward to dislodge them, drawing enfilade fire from the second 88, positioned at the edge of the woods west of the chateau.

As the infantry move into the first houses north of the stream they spot German soldiers holding a defensive line along the hedgerow east of the town. Tanks move forward to dislodge them, drawing enfilade fire from the second 88, positioned at the edge of the woods west of the chateau.
12. Second PaK43 opens up from
high ground on American left flank
The second PaK 43 opens up in enfilade on the Shermans as they emerge from behind the houses south of the stream. The Americans quickly answer with 60mm mortar fire, suppressing the big gun.

The second PaK 43 opens up in enfilade on the Shermans as they emerge from behind the houses south of the stream. The Americans quickly answer with 60mm mortar fire, suppressing the big gun.
13.Overview
At this point of the battle (Turn 5) the Americans decide that Assenois is too stiffly defended to be able to seize the town and exit four vehicles from the Shock Group off the northern edge of the board by Turn 8. They decide to abandon the second objective and focus on clearing Assenois. In the upper right soldiers from C Company (Shock Group) have dismounted from their halftracks and taken over the outlying building on their left flank, knocking out a panzershrek that had been lying there in ambush. Their objective is to close assault the 88 (just off picture to the right) that is threatening the Shermans. Next to them a pair of Shermans enter into a medium range duel with the PaK40, just off picture to the bottom right, by the chateau, and behind that can be seen the ruined church where the FOO and the American 60mm mortars have set up shop.
In the centre the two houses just north (below) the stream have been seized and A Company have half cleared the sectors to the left but at the cost of half their men, while the A Company tank commander clears out the German infantry line in the hedgerow to the left.

At this point of the battle (Turn 5) the Americans decide that Assenois is too stiffly defended to be able to seize the town and exit four vehicles from the Shock Group off the northern edge of the board by Turn 8. They decide to abandon the second objective and focus on clearing Assenois. In the upper right soldiers from C Company (Shock Group) have dismounted from their halftracks and taken over the outlying building on their left flank, knocking out a panzershrek that had been lying there in ambush. Their objective is to close assault the 88 (just off picture to the right) that is threatening the Shermans. Next to them a pair of Shermans enter into a medium range duel with the PaK40, just off picture to the bottom right, by the chateau, and behind that can be seen the ruined church where the FOO and the American 60mm mortars have set up shop.
In the centre the two houses just north (below) the stream have been seized and A Company have half cleared the sectors to the left but at the cost of half their men, while the A Company tank commander clears out the German infantry line in the hedgerow to the left.
14. Sherman caught in enfilade but survives
The Sherman caught in enfilade by the 88 on the American left flank manages to move into a better position to engage the gun, while the other tanks stay out of sight.

The Sherman caught in enfilade by the 88 on the American left flank manages to move into a better position to engage the gun, while the other tanks stay out of sight.
15. American infantry move in
to silence the 88
Taking fire from the 88 and the nearby PaK40, American infantry sprint across the stream to successfully engage the big gun in close combat and knock it out.

Taking fire from the 88 and the nearby PaK40, American infantry sprint across the stream to successfully engage the big gun in close combat and knock it out.
16. Third Sherman
KO'd by second PaK40
As the A Company commander flushes out the remaining Germans from the hedgerow east of Assenois, it drives into the sights of the still hidden second PaK40 and gets knocked out.

As the A Company commander flushes out the remaining Germans from the hedgerow east of Assenois, it drives into the sights of the still hidden second PaK40 and gets knocked out.
17. PaK nest
From their positions in a small wood north of Assenois, a PaK43 and a PaK40 engage any Americans that venture up the road or the east side of Assenois.

From their positions in a small wood north of Assenois, a PaK43 and a PaK40 engage any Americans that venture up the road or the east side of Assenois.
18. Germans move
to block Americans by chateau
Spotting the Americans close combating the 88 on the west flank, German Fallschirmjaeger and a Volksgrenadier heavy machinegun move to block them from infiltrating through the woods.

Spotting the Americans close combating the 88 on the west flank, German Fallschirmjaeger and a Volksgrenadier heavy machinegun move to block them from infiltrating through the woods.
19. Americans pull back from chateau
Seeing the Germans waiting in ambush by the chateau, their commander orders them back to support the main thrust into the village.

Seeing the Germans waiting in ambush by the chateau, their commander orders them back to support the main thrust into the village.
20.
American armour probes west of Assenois
With the one 88 silenced and the second with no line of fire to the west of the village, American tanks cautiously move forward under fire from the two PaK 40's that command this approach.

With the one 88 silenced and the second with no line of fire to the west of the village, American tanks cautiously move forward under fire from the two PaK 40's that command this approach.
21. American 60mm mortars in
action by church
With the FOO failing to make contact with the 105mm battery, the heavy lifting falls on the shoulders of the 60mm mortars, which keep a rain of shells on the German antitank and mortar positions, in an attempt to neutralize them.

With the FOO failing to make contact with the 105mm battery, the heavy lifting falls on the shoulders of the 60mm mortars, which keep a rain of shells on the German antitank and mortar positions, in an attempt to neutralize them.
22. Remaining
Sherman from A Company withdraws from battle
With the loss of his commander three of the four A Company tanks are knocked out. The morale of the fourth breaks and it retreats from the battlefield.

With the loss of his commander three of the four A Company tanks are knocked out. The morale of the fourth breaks and it retreats from the battlefield.
23.
Shermans from C Company move to close assault
In an attempt to break the stalemate and help the American infantry clear the village, tanks of C Company breach the stream and move forward with the intention of close assaulting the PaK 40 by the chateau. Before they can arrive, however, the 105's suddenly come back on line, and the PaK 40 is blown sky high. The second PaK 40 north of Assenois is engaged at the same time by the American mortars and it, too, is silenced for good.

In an attempt to break the stalemate and help the American infantry clear the village, tanks of C Company breach the stream and move forward with the intention of close assaulting the PaK 40 by the chateau. Before they can arrive, however, the 105's suddenly come back on line, and the PaK 40 is blown sky high. The second PaK 40 north of Assenois is engaged at the same time by the American mortars and it, too, is silenced for good.
24. With German guns silenced, Shermans
brass up backside of Assenois
With only a single PaK43 now surviving and it commanding no line of fire at all west of Assenois, the Shermans move forward with relative impunity, staying out of panzerfaust and panzershrek range and brassing up the German infantry holed up in the houses along the road.

With only a single PaK43 now surviving and it commanding no line of fire at all west of Assenois, the Shermans move forward with relative impunity, staying out of panzerfaust and panzershrek range and brassing up the German infantry holed up in the houses along the road.
25. Overview
American infantry have now seize the three top most houses and are preparing to close assault supported by the tanks. The American halftracks have also moved up in a supporting roll, laying down machinegun fire from a safe distance and keeping retreating Germans at the left of the picture from joining up with their fellow combatants.

American infantry have now seize the three top most houses and are preparing to close assault supported by the tanks. The American halftracks have also moved up in a supporting roll, laying down machinegun fire from a safe distance and keeping retreating Germans at the left of the picture from joining up with their fellow combatants.
26. View
from west of Assenois
The American infantry that knocked out the 88 in close combat make their way back along the stream as the tanks of C Company roll in to Assenois.

The American infantry that knocked out the 88 in close combat make their way back along the stream as the tanks of C Company roll in to Assenois.
27. House clearing with
combined arms
While the American mortars lay down protecting smoke against enemy supporting fire, American infantry advance up both sides of the line of houses, seizing each one in close combat as the tanks brass up the defenders, disordering them and forcing their heads down.

While the American mortars lay down protecting smoke against enemy supporting fire, American infantry advance up both sides of the line of houses, seizing each one in close combat as the tanks brass up the defenders, disordering them and forcing their heads down.
28. Knocking on
doors
American infantry clear Assenois of the enemy.

American infantry clear Assenois of the enemy.
29.
Meanwhile, skulking nearby in the woods…
As the Americans focus on clearing Assenois, the relatively unscathed Fallschirmjaeger company rallies in the woods northwest of the town preparing for a counterattack.

As the Americans focus on clearing Assenois, the relatively unscathed Fallschirmjaeger company rallies in the woods northwest of the town preparing for a counterattack.
30. Counterattack!
The Fallschirmjaeger burst from the woods and close assault the Shermans in a desperate attempt to halt the American advance. But they are vulnerable in the open and rack up considerable casualties before they are even close enough to engage.

The Fallschirmjaeger burst from the woods and close assault the Shermans in a desperate attempt to halt the American advance. But they are vulnerable in the open and rack up considerable casualties before they are even close enough to engage.
31. Time on Target
The attack is driven off and the
Germans now find themselves on the receiving end of a heap of
indirect fire. A TOT lights into their ranks as well as mortar fire,
knocking out another stand and suppressing and disordering most of
the remainder.

32. Mopping up
The Americans move in, with the rest of C Company's tanks arriving. The Germans fire off their remaining panzerfausts but despite some good rolls, their disordered and suppressed states render the fire ineffective. The tanks and American infantry mop up the survivors and seize the last of the Assenois sectors.

The Americans move in, with the rest of C Company's tanks arriving. The Germans fire off their remaining panzerfausts but despite some good rolls, their disordered and suppressed states render the fire ineffective. The tanks and American infantry mop up the survivors and seize the last of the Assenois sectors.
33. End of game
On the German's final turn, they attempt to infiltrate at least one stand into a vacant sector at the north end of Assenois, but the American fire is too heavy and none of the attempts succeed. This overview shows all of Assenois' northern sectors free of the enemy, and although the tanks took a battering from panzerfausts in the last round of enemy fire, all survive.
On the German's final turn, they attempt to infiltrate at least one stand into a vacant sector at the north end of Assenois, but the American fire is too heavy and none of the attempts succeed. This overview shows all of Assenois' northern sectors free of the enemy, and although the tanks took a battering from panzerfausts in the last round of enemy fire, all survive.
The victory conditions gave a partial
victory to the Americans for seizing Assenois and a partial victory
to the Germans for preventing four vehicles of the Shock Group from
exiting on the road to Bastogne by Turn 8, so the game concludes in a solid
draw.