Wednesday, September 19, 2012

"The Neck of the Swan" The Battle for Wetteren Bridge


We played R. Mark Davies excellent scenario "The Neck of the Swan" The Battle for Wetteren Bridge last weekend. It was played on a 6' X 4' table (you can see how the table was put together in the post below) using 20mm figures and the Battlefront WWII rules system. 

The fight takes place on September 6, 1944, and is an odd little spat in that it places a field squadron of engineers in the unusual position of having to act like combat troops. In the highly fluid situation created as the Germans retreated and the Allied pursued them through France and Belgium, the bridge at Wetteren was threatened by counterattack and the engineers were the only available troops to defend it. Other Allied troops and armour had already crossed the bridge and were now ranging ahead on the north side so it was imperative that the bridge be held.

The attacking units were from the 70. Infanterie-Division (Weissbroft), soldiers that had been placed in a common unit because of their collective stomach disorders. On both sides the units were tagged as  'trained" for this scenario.

I chose to bolster the German side by an additional weak company as it seemed that the objective would have been difficult to take with the suggested orbats. The designer of the scenario suggested this as one of several approaches to modifying the scenario for game balance.

Spoiler alert: If you plan to play this scenario you might not want to read the AAR as their are things that only the umpire should know.


The British player chooses to defend with No. 2 Troop in Kappellendries, No. 3 Troop in the built up area north of the bridge (which I 'm calling Liefkenshoek) as well as the small woods just north of  the village, and No. 1 Troop with the attached 17 pdr. on the south bank, clustered around the bridge in Wetteren. His recce vehicles (historically Humber LRC Mk. II's but substituted with Bren-mounted Universal Carriers in this scenario) are all re-assigned to bolster No. 3 Troop.

1. The Battlefield
All the fighting took place on the north side of the bridge. Liefkenshoek is in the foreground, Wetteren Bridge just to the left and Kappellendries in the middle distance. The countryside is flat and criss-crossed with hedgerows and woods, making for close terrain. 


2. The Objective
Wetteren Bridge, crossing the Schelde is both sides' objective. The Royal Engineers of 4 Field Squadron 7th Armoured Division are to hold it, the Germans of Grenadier Regiment 1020 must try to blow it. The British forces are bolstered by an attached 17 pdr. with the hope of reinforcements arriving in the form of a squadron of Cromwells and a company of infantry.
The Germans have the only indirect fire support available, a mortar platoon. They are also supported by a PaK 40 anti-tank gun and an attached platoon of pioneers present to blow the bridge.
The River Schelde is impassable with steep banks and a low embankment at the top.

3. The German Advance
The Germans move from their starting positions, swiftly advancing their mortar platoon just north of the river to where they will have a clear view through to the bridge.

4. First Contact
 As 1 and 2 Kps. converge on Kappellendries from two different directions an advance squad draws fire from the outlying houses. 3 Kp. (in the foreground) move to the left flank.

5.  3 Kp. moves to the left flank

6. PaK 40 moves forward
Behind the advance the horse drawn PaK 40 and attached pioneer platoon move cautiously forward.

7. Clearing Kappellendries
A fierce firefight  breaks out as the Germans discover that Kappellendries is solidly defended. Suppressing fire is laid down as a Panzershrek squad attempts to close in on a British halftrack.

8. 17 pdr. opens up
The British 17 pdr., emplaced in Wetteren proper opens up long range on the advancing German infantry.

9. 3 Kp. approaches Liefkenshoek
3 Kp.makes the paved road undetected and moves in column towards Liefkenshoek from the north.

10. Overview
On the left 3 Kp. can be seen making their way towards Liefenshoek, while 1 and 2 Kps. work to clear Kappellendries.

11. Taking heavy fire from Kappellendries
The defending engineers prove tough to dislodge but the Germans slowly push their way in to the village, forcing the British to fall back to Liefkenshoeck.

12. Engineer's recce attempts overrun
Spotting the Germans advancing towards the north of Liefenshoek, a Bren carrier attempts an overrun but is stopped short by a panzerfaust. This starts a cat and mouse game between the two, but has the effect of moving the rest of 3 Kp. off the road and into the adjoining field. (We hide panzerfausts etc. until they actually fire, making it more difficult to judge whether they are safe to approach or not.)

13.  3 Kp. comes under fire
With much of Kappellendries secured the Germans start to infiltrate along the north side of the village. Caught in the open 3 Kp. and elements of 2 Kp. take heavy fire from the woods directly north of Liefkenshoek,  and 3 Kp., already not at full strength, rapidly exceeds 50% casualties.

14. PaK 40 moves into Kappellendries 
Kappellendries is finally cleared and the Germans move their anti-tank gun up to the edge of the village. From here it is able to sight down to the bridge as well as cover the entrances to Liefkenshoek.

15. British armour pulls back
With the PaK 40 emplacing, the British carriers and halftracks, up to now providing solid fire support to the defending infantry, are forced to pull back out of sight of the guns. This allows the Germans to begin to form up for the final push into Liefekenshoek and towards the bridge.

16. Recce knocked out
Meanwhile, on the left flank the Germans enfilade and knock out the blocking recce vehicle in close combat and begin to infiltrate into Liefkenshoek from the north. They are temporarily driven out again through fierce counterattack as casualties on both sides mount.

17. Attack closes in on Wetteren Bridge
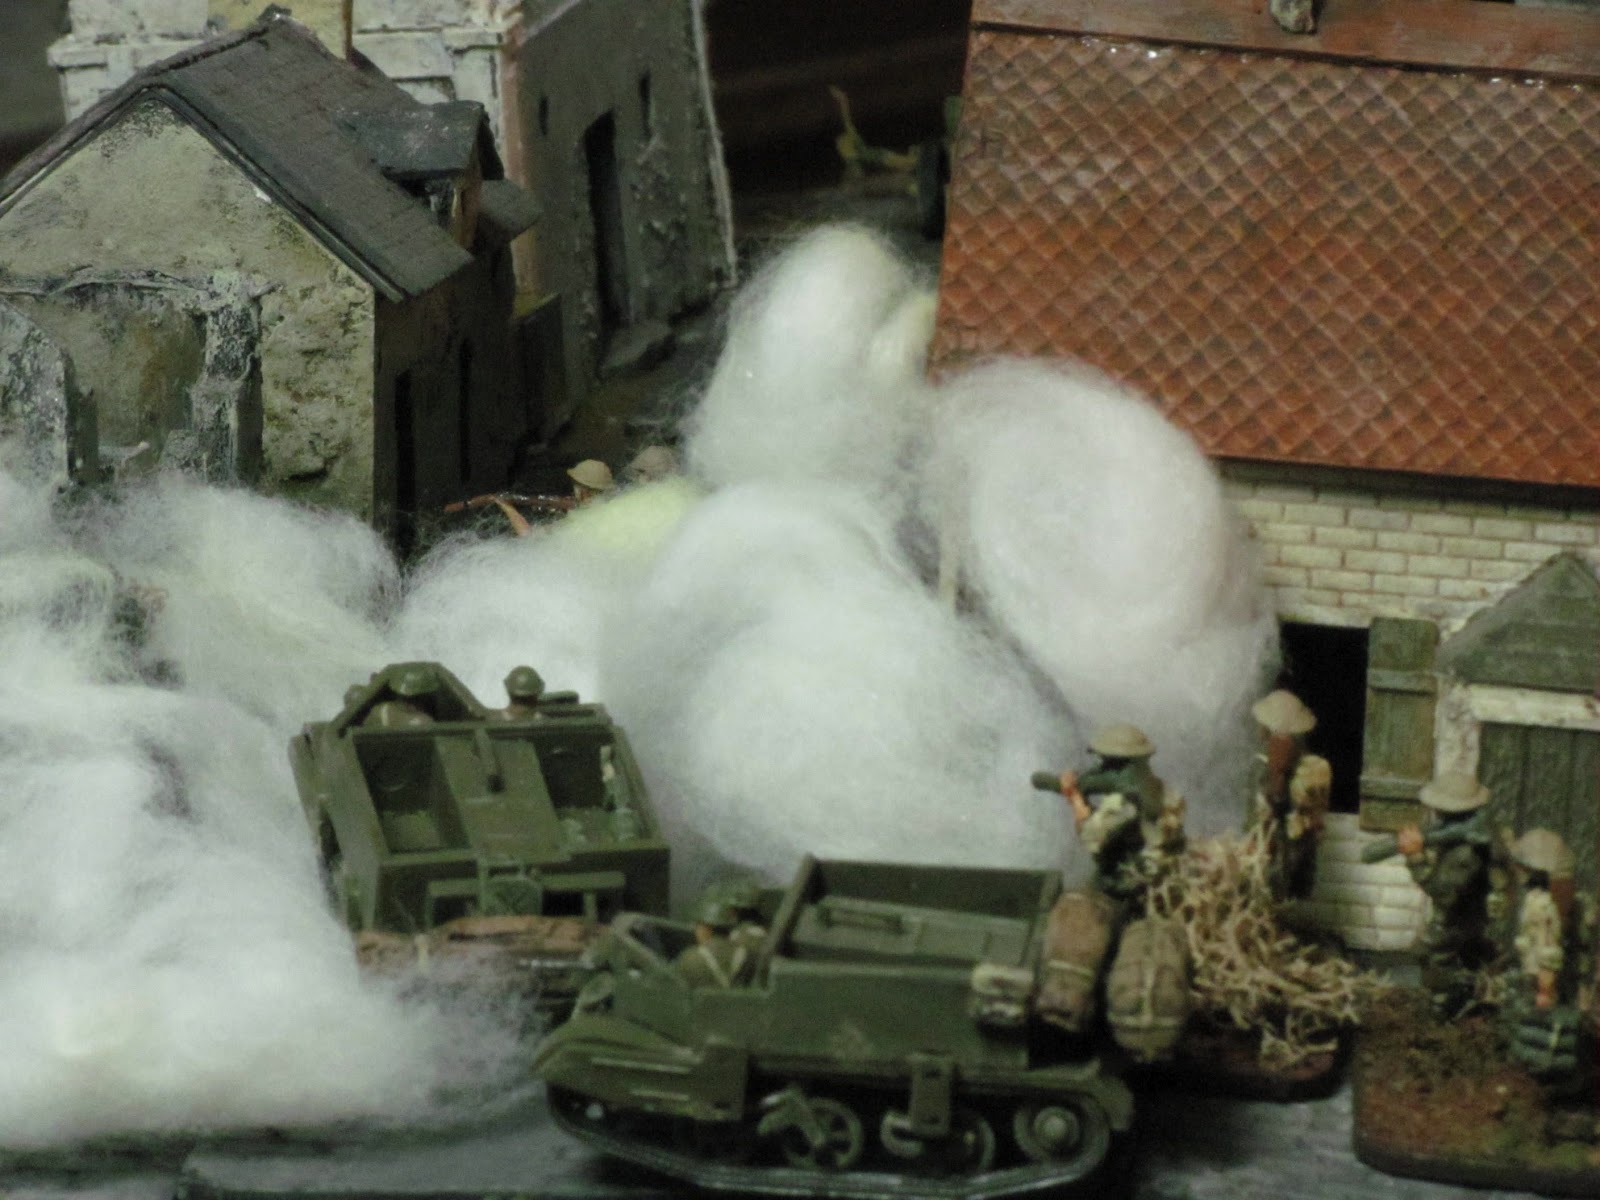
The German mortars lay down a smoke screen along the south side of the river, hoping to cut off enfilade fire as they move towards the bridge. A Troop's halftrack takes advantage of the smoke to dash across the bridge to bolster the north side defence with its 50 cal.

18. No. 1 Troop moves to reinforce north bank
Other elements of No. 1 Troop also sprint across the bridge to harden the dwindling north shore defence. Hard on their tail comes a mysterious Dingo which has arrived on the scene from Overbeke. It is the vehicle of the Divisional Commander Royal Engineers, Lieut. Col. AD Hunter, who is making inquiries as to the location of 4 Field Squadron's commander, Major Fitzgerald.

19. Liefkenshoek begins to fall
As No. 1 Troop units take up positions along the river bank, No. 3 Troop battles it out in Liefkenshoek. The Germans clear the woods, brewing up two of the halftracks in close combat. Commander Fitzgerald's HQ (tile-roofed house), well-advanced, comes under attack. 

20. Major Fitzgerald falls back towards bridge
Squadron HQ survives the attack but is driven back into a building adjacent to the bridge.

21. No. 3 Troop bugs out
With the Germans all around No. 3 Troop breaks and abandons Liefkenshoek, running for the safety of the south bank.

22. Lieut. Col. A.D. Hunter gains an appreciation of the situation
Hunter arrives at Fitzgerald's newly relocated to find No. 3 Troop streaming by in full retreat and Fitzgerald's HQ occupied by the enemy. A substantial mortar stonk convinces him that it is time to bug out as well.

23. 1 Kp. in full retreat
Casualties are causing command and control on both sides to break down. Just as the British defence on the north side of the river collapses, 1 Kp. breaks off the attack and flees, snatching defeat from the jaws of victory - or something like that.

24. Slim foothold
A second deadly mortar attack on the bridge thins the British ranks further. 2 Kp., backed up by the German pioneers, pick up the attack and knock out the British from the remaining riverside building, leaving only two defending stands on the north bank.

25. Last attempt to get help
With a skirmish line of German infantry thrown up along the river bank, the pioneers move into position to begin wiring the bridge for demolition. In a final attempt to break through and seek out reinforcements Hunter guns his Dingo across the bridge …

26. End game
But is knocked out by a German Panzershrek. A second Quixotic attempt by No. 3 Troop's recce is stopped by German AT fire, while the screening German infantry keep the enemy's heads down, allowing their pioneers to do their work. The bridge is successfully wired for demolition on the very first attempt.

27. Thar she blows!
The charges are detonated and the Wetteren Bridge goes into the Schelde, taking Hunter's Dingo and the recce carrier with it. Mission accomplished, one for the bad guys.

Friday, September 14, 2012

Building Terrain - Wetteren Bridge


Okay, so I confess to a bit of an agenda here. I see all these beautiful models being built and painted and then fielded on – um – less than interesting gaming boards. Now I confess to being a bit of a nut for terrain and know that this isn't necessarily where everyone's interests or talents lie, but with a bit of effort you can build up a board that will make your models and figures look so much better in context. And given that wargaming is a visual medium, why not go the extra yard if you have the time to do it!

Everything I have used for this terrain piece is from my stock of terrain bits and pieces, put together over a few hours this week. It's totally modular, takes a bit of time to set up, I acknowledge, but knocks down in about an hour. And the beauty of modular stuff is you don't end up with a whole lot of purpose built terrain pieces that limit your ability to accurately reflect an historic battlefield and just end up cluttering your gaming space.

This board is based on the following map created by R. Mark Davies for his Battlefront WWII scenario, "The Neck of the Swan" - The Battle for Wetteren Bridge.

Mark's game map. Because I'm playing a 15mm game in 20 mm I scale up the board 150%.

Although I own river pieces the focus of this battle, Wetteren Bridge, and the River Schelde that it crosses provide the most intersting aspects to this battlefield in otherwise fairly flat terrain. So I opt instead to build the terrain up so that the river and its steep banks are more accurately represented. Below is a step by step of the table construction.

I set up the tabletop with some 2' X 4' masonite sheets to create a 6' X 4' tabletop.
To create the river I lay down a couple of 2X4 flourescent light coverings with a crackle pattern, spray-painted a green grey on one side. I picked up this trick from Al Gaspar, terrain modeller extaordinaire.

Next I rough in the river with bits of Styrofoam from my Styrofoam bits bag – and a few World Book Encyclopedias that are the right thickness and near to hand. I use a ruler to constantly check key bits of terrain to make sure they are where they should be (more or less) according to the map.


Next I overlay my bits of Styrofoam with some more sheets of Masonite, panelling board, and foam core to make a nice flat terrain, raised above the river level.

I now bring out my secret weapon, sheet leading. Scrounged from a building demolition site it had been used to sound proof a home. It is totally malleable and provides heft and shape to my terrain building. I crimp pieces with a straight edge to create my river banks…
… and then use it to give final shape to the river. 
I now place my ground cloths over this base structure. Because I need two (one for each bank) I have to go with different colours of green but I don't sweat it too much. By the time I'm done it won't be worrisome.
I tuck both cloths under the edge of my sheet lead river banks to create a nice clean line between bank and water.
Because it will be the center piece of the battle, I can't resist  adding some finishing touches to the river.  I have a box of modular reed bits created with broken broom stalks and brown lichen based in little blobs of Sculptamold (an invaluable paper mash product I use for almost everything) that I scatter along the water's edge, and then garnish with a healthy sprinkle of cat litter (clean). It's having on hand things like a box of modular reed bits that help make terrain building a lot more gratifying.
Okay, on to the set up. I start by laying down the roads according to the map. My paved roads are just strips of asphalt roofing tile. The dirt roads I created with Sculptamold on strips of card and the town streets were made by coating thick card with molding paste (an artist's product) and pressing a plastic reverse brick pattern onto them. Again, all bits in the tickle trunk.
Then I place the buildings. I make healthy use of my modular ruin pieces (each one is a corner, allowing for different sized structures), not because Wettern was necessarily in ruins but more because these buildings facilitate play. Most of my building s are scratch made with the exception of a few model railroad structures and an old repurposed Airfix Waterloo Farmhouse set that survived my childhood.
Now the hedges and forests go in based on Mark's map. I could stop now, but there is a bit of window dressing I still want to do to bring the terrain together.
The final step is to add some fabric fields to break up the ground cloth (and disguise the two colours used) and place some small road and field edging strips that I use to soften the transitions between terrain elements. I line the upper bank of the river with some green lichen, add some rubble piles around the ruined buildings and sprinkle with the ubiquitous kitty litter.
Everything I used in creating this board were things I had on hand. Nothing was created specifically for this scenario. It has taken a few years to collect all of that stuff, mostly bits of fabric, household garbage and stuff scrounged from nature - so terrain doesn't have to bust the budget!
Here are some close up photos of the finished table. Because it really doesn't sing until viewed from the point of view of your little plastic and lead soldiers…

The objective in this scenario, Wetteren Bridge.
View of the bridge and Wetteren from the north side of the river. 
View from north of Liefkenshoek.
View along river from Overbeke.
Dirt road with edging on left.
From Overbeke, looking down road to Wetteren's factory district.

Tuesday, June 26, 2012

Grammichele, Sicily, July 15, 1943

A straight road through open country with the ubiquitous hill town at the end leads to a trap laid by the waiting enemy. But by moving quickly to the attack the Hasty P's mange to turn disaster into victory.


This scenario, Ambush at Grammichele, written for the Battlefront WWII rules and played in 20 mm, is based on the first encounter of the Canadian Hasting Prince Edward Regiment with the Germans in Sicily. Pushing hard after the beach landings on the southern shore of Sicily, the Canadians were carrying the far left flank of the 8th Army in their advance north. The Germans, in an attempt to slow the enemy while establishing a firmer defensive line across the Catania plain, executed a series of blocking actions in the hill towns strung along the route of the advancing Canadians.

As the Hasty P's, supported by A Squadron of the Three Rivers Tank Regiment, approached the hill town of Grammichele they were strung out mounted on a long line of tanks and a hodgepodge of borrowed and captured transport, (having lost their own transport when the ship carrying it was sunk on the way to Sicily). This scenario begins with the advance units, the Three Rivers recce section and a platoon of the Hasty P's B Co. mounted on tanks disappearing into the town ahead, while the remainder of the force is strung out in the valley below, brought up short by a crater blocking the road. Yet undiscovered, the defenders, elements of the Hermann Goring Division, wait to spring their trap on the unsuspecting enemy below and in the town.

The intention of the scenario was to begin at the moment the trap was sprung, with the set up for the Canadians based on the historical situation, and the challenge to turn a bad situation around and if possible, block the German retreat. The German objective is to cause as much damage as possible and then retreat from the town relatively intact before their escape is cut off.


1. Approaching Grammichele

Mounted on anything that moves, the Hasty P's wait in a long column on the ditch lined Highway 124 as their lead elements stop to fill in a crater that blocks the road. The recce elements have already disappeared into the hill town ahead.


2. All Quiet …


From the town above the German rearguard wait to spring the trap.


3. Ambush!

Unable to wait any longer, the Germans open up on the Canadians that have ventured into the town. The lead scout car and Three Rivers recce carriers are quickly knocked out by an anti tank gun as the infantry bail out of the carriers and off the tank. German infantry on both sides of the street move to the attack while the Canadians run for cover.


4. Enfilade!

German panzers on both sides of the Sherman move in to attack but one of them instead has to fend off a close assault by B Co. soldiers. As the German infantry quickly mop up the platoon of B Co.and recce troops the Sherman, after trading some ineffective shots with the German armour, manages to reverse out of the ambush unharmed. The three tanks then hold their position, effectively blocking each other in, with none daring to poke their nose around the corner for the double tap at close range.


5. Lead tank shelled

Meanwhile the troops and vehicles in the valley have also come under fire. A lead tank is disordered by 88 fire and the tank riders bail off into the ditch on either side of the road. An Sd.Kfz. 7/1 with a 20mm Flakvierling opens up on the enemy from an orchard near the railway station, but fortunately for the Canadians, the fire is wildly inaccurate.


6. Canadians quickly move to the attack

As the attackers take fire from the escarpment on the north side of the town, and the high ground to the south, they quickly move to the attack. The Hasty P's B and A companies dismount from their transport and move to engage the enemy on the escarpment while the Shermans, providing covering fire, try to move out of the sites of the 88 and a Pz. IV that has made itself known on the edge of Grammichele and into a dead zone at the foot of the hill. Meanwhile the carrier platoon exits the road to envelop the town to the south.


7. Flakvierling opens fire from top of escarpment

A second Sd.Kfz. 7/1 opens up from the north side of Grammichele, along with a German heavy machine gun. Easily spotted, the gun comes under fire and is quickly knocked out by the advancing tanks as it attempts to withdraw.


8. C Co. joins the attack

 C Co. moves at double time up the road to pressure the Germans on their south flank.  A second German Pz. IV pokes its nose out of town to engage a Three Rivers tank that is approaching from the east.


9. Sherman is brewed up


As B and A Cos. begin to scale the heights on the north edge of the town, after some wild firing the 88 finally knocks out one of the Shermans as most of the rest of the squadron move out of sight of the enemy guns.


10. 88 covering south flank

On the south side of Grammichele a second 88 opens fire on the advancing Canadians, but like his counterpart on the escarpment, fails to land any serious hits!


11. South side of Grammichele

The Vickers platoon dismounts under fire of the German 88, but manage to move safely into the town while their carriers withdraw, miraculously unscathed.


12. Carrier platoon clears south flank

Meanwhile, the carrier platoon clears the orchards and railway station of defenders on the south side of the village. The Sdk.Kfz.7/1 is quickly knocked out and an HMG nest cleared, while two carriers are lost to fire from a 75mm Lig  emplaced next to the 88.


13. D Co. moves forward

From the back of the column D Co. dismounts from its transport and moves towards the battle, passing the battery of Royal Devon Yeomanry Sextons (Priest stand-ins!) and the 17 lbr. troop emplacing to engage the enemy.


14. Fire support

Disentangled form the traffic jam on the highway, the battalion mortars and supporting SPG's emplace in the fields below Grammichele to finally bring indirect fire down on the Germans dug in at the top of the escarpment. The HMG is quickly knocked out and the 88 suppressed by the Allied arty and mortars.


15. Germans begin to withdraw

As indirect fire begins to take a toll on the units on the outskirts of Grammichelle and lead Canadian elements begin to push into the town, the German commander gives the order to withdraw. The panzers pull back from the town edge, tightening the defensive ring as the German panzergrenadiers accompany them. The 88, knocking out a second Sherman, is too slow to disengage, and the first Hasty P's to reach the top of the escarpment drive it back, forcing it to limber up and withdraw under fire. It is quickly overcome by the advancing infantry and lost as its transport is knocked out.
With the battle moving into the town, the tail end of the column, the 6 lbrs. and battalion command, move up along Hwy. 124. The 17 lbr. limbers up as well, and moves forward.


16. Carrier platoon secures railway station

The carrier platoon clears the orchards and railway station and regroups to push in from the south in hopes of cutting off the German retreat. The first tanks of A Squadron enter the town, keeping the pressure on the German armour and  tying up their withdrawal.


17. 75mm Lig withdraws

The last gun on the outskirts to withdraw is the German 75mm infantry gun, hand-hauled out of the built up sector back towards its transport. The lead carrier bursts into town and attacks but is driven off in close assault. The next round the transport arrives and the gun makes good its escape, following the 88 that had exited just prior to this.


18. Hasty P's sweep through town

With their commander in the lead, the Hasty P's B Co. lead the charge through town. Small arms fire from the last remaining enemy infantry tie them up at an intersection.


19. Pz. IV knocked out

Elements of A Co. trap a Pz. IV before it can safely withdraw and knock it out in close combat.


20. Carrier platoon pushes in from the south

Under cover of smoke the carrier platoon pushes into Grammichele from the south, clearing out the few remaining German defenders in this part of town before pushing towards the closest exits.


21. In the streets of Grammichele


22. Pz. III pulls back


 On the north edge of town a Pz. III beats off an assault and joins the withdrawal.


23. Final withdrawal

With the remaining guns and infantry safely withdrawn, the three surviving German panzers attempt to withdraw. But the Canadian infantry have infiltrated the town from all directions and move to cut off their retreat.


24. Too late for Pz. III

A second German tank falls to close assault just as it moves to exit the battle, with elements of the carrier platoon supported by tanks seizing two of the crucial exit points. After attempting to fight through the troops blocking their way the last two German tanks also succumb to close assault. 


Post Mortem


Although the Germans managed to score a slim majority in victory point allocation, they needed to outscore their opponent 2 to 1. So with that and all four board exits occupied by the Canadians by the end of Turn 7, precipitating an early end to the game, the Canadians score a major victory.

Interestingly enough, historically the German rearguard action at Grammichele, which under the circumstances (catching the Canadians completely flat-footed and strung across the plain in column formation) should have allowed them an easy victory and unhindered withdrawal, instead turned into a Canadian success. In the actual action the Canadians went over to the attack immediately and with such force that the Germans had to hastily abandon the town, leaving behind a number of knocked out tanks and captured transport.

In this game the Canadians also pushed home the attack with a lot of gusto, forcing the Germans to ward off the enemy from all directions with meagre resources. In the early stages, when the Canadians were scrambling to close with the enemy, a series of pathetic die rolls on the part of the German 88's and tanks meant that the Canadians were able to close relatively unscathed. But even still, when the Germans began their withdrawal, they had exacted enough damage to allow them to withdraw with hope of still scoring a major victory. But as noted, the Canadian attack outstripped the German withdrawal and took advantage of the early departure of the German infantry to press home close assaults on the armour in the close confines of the town streets. Another lesson learned the hard way!