Monday, October 22, 2018

The Battle of Barrosa, March 5th, 1811

Last Tuesday I had the pleasure of hosting at my home Brian North, another enthusiast for the Peninsular Wars (and more specifically the Spanish) to playtest a scenario based on the Battle of Barrosa, fought on March 5, 1811 in the south of Spain. Again, it is one of those strange things that happen in this age of forums and connectivity, but Brian had first seen my battle report for Valls on TMP  (which can be seen here) and was intrigued as he was currently playing out the same battle with his own rules and figures.
The interesting part of all this is that Brian is British, currently living in Zurich and I live in central Canada. As fate would have it, however, Brian’s life is such that it brings him to Toronto fairly often and he is crazy enough to got to the trouble of catching a bus out to nowhere, where I live, so we can play toy soldiers.
This was his second journey out to my home, and on this occasion I had this Barrosa scenario to try out. Brian had already helped me with some of the orbats, mainly the composition of Zayas’ force that sallied out from the Isla de León so it seemed to make sense that he would be the one to playtest it.

The full scenario can be found here. It has been tweaked since we played this game, and at the end of this report I will include a bit about my solo replay with the tweaked version, which had a completely different result! This scenario can be played two ways, historically or a “what if” version of the battle where there is a chance that La Peña may actually do something rather than sit tight and wait for the British to fail. As it turned out, it was even a greater “what if” because Graham does not only fail, but under my hand he does it spectacularly and quickly, and on the fly we had to decide what La Peña’s options should be when the French suddenly arrive on his eastern flank (as they did in this game). We decided that, being La Peña, he would most likely withdraw to the safety of the Isla de León and let the remnants of Graham’s force fend for themselves, with a slim chance that he would go on the offensive. We rolled for it, and the battle became an exercise in strategic withdrawal for the Spanish, which was fascinating in and of itself.

The scenario

The game was played out on a 7.5’ X 4.5’ table, using 1/72 scale figures and Age of Eagles II rules. The scenario and background material can be found posted here. This scenario represents the battle after the point when Vilatte and the lead Spanish forces clashed south of Almansa Creek. Vilatte, concerned about Zayas' force (which had crossed the boat bridge from the Isle of León and appeared on his flank) retreated with some difficulty over the Almansa Creek, taking up a new blocking position on the Cádiz road and La Peña, upon hearing of Victor's approach from the north, has positioned his forces to defend the bridgehead. The Spanish baggage train along with Béguines' brigade, are at the point of moving up to join La Peña's main force, while a Spanish/British rearguard force (Cruez Murgeon  brigade) under the command of Graham occupies the Cerro de Puerco but is in the process of withdrawing (against the protestations of Browne, the commander of the British battalion included in this force). A KGL/Spanish cavalry force, under Whittingham, also covers the withdrawal. 
The British division under Graham is in the process of responding to La Peña's command to join him in the area south of the Almansa Creek, much against Graham's better judgement, by marching along a path through the pine forest north of the coastal road. They (like Peña) have also just received word from Spanish guerrillas that a large force of French have emerged from the north, threatening the rear.

The scenario map. Area A is Vilatte, Area C La Peña. W and Z are Cruz Murgeon's brigade and Whittingham's cavalry. E and F are Wheatley and Dilkes under Graham and X is Béguines. The French under Victor entered from the top of the map north of the Cerro de Puerco.

Table top

From Cerro de Puerco

From Isla de León

1. Zayas’ brigade marches over Almansa Creek

As Zayas relaunches his boat bridge and marches over Almansa Creek to threaten Vilatte’s rear, Vilatte withdraws north of the creek, blocking the road to Cadiz

2. Over the Almansa

Another view of the boat bridge built specially for this scenario!

3. Initial deployment

The battle begins with Vilatte north of the Almansa (upper left), La Peña’s forces facing off against them and Zayas (below creek centre left) forming up, having crossed the boat bridge (not yet built so not in this picture).
Béguines’ militia can be seen approaching La Peña in the lower right along the coastal road, with baggage train while above him Graham’s British can be glimpsed moving through the pine woods to join up with La Peña.

4. Béguines' brigade

Béguines' militia brigade, baggage train in tow, makes its slow way along the coastal road towards La Peña’s lines, oblivious of the French descending to his rear.

5. La Peña confronts Vilatte

La Peña arrays his troops in front of Vilatte, who has retreated to the north side of the creek. He places Lardizabal on the left and Anglona on the right, and out of skirmish range they exchange cannon fire. The Spanish at this point easily outnumber the French more than three to one but La Peña waits for Graham to join him before he initiates the attack.

6. Zayas forms up on near bank

Zayas’ Irlanda Regiment and Royal Spanish Guard form ranks behind.

7. Meanwhile in the woods…

Graham moves his two British brigades through the pine forest along a track in order to join up with La Peña, as commanded. Suddenly Spanish guerrillas appear to warn him that the French approach in numbers from the north. On his own initiative Graham decides to about face and move to block the French.

8. Cruz Murgeon's brigade and Whittingham's cavalry south of the Cerro de Puerco

The Spanish brigade under Cruz Murgeon (under Graham’s command with Browne’s composite flank battalion attached) lurk out of sight of the advancing French on the south side of the Cerro de Puerco, wavering as to whether to hold the position or retreat. Whittingham’s cavalry are in the process of pulling back on the coastal road.

9. Whittingham's cavalry

Whttingham’s cavalry (a KGL/Spanish mix under command of La Peña) limber up their half battery and prepare to withdraw.

10. Dilkes’ Guards spotted by French

Dilkes’ brigade (upper left) march out of the woods with the intention of forming up on the west side of the Cerro de Puerco. But he is spotted by Laval’s advancing columns, who immediately unlimber their cannon and commence to fire.

11. Meunier attacks

Laval sends his élite brigade under Meunier in to attack before Dilkes can shake out of march column (failed maneuver roll!) Caught completely flat-footed, the Guards are sent back reeling with casualties.

12. Cruz Murgeon moves into line next to Dilkes

Cruz Murgeon wheels on the Cerro de Puerco to form up next to Dilkes while Whittingham brings his cavalry in on the flank.

13. Overview

In this overview Dilkes and Cruz Murgeon form up bottom right on the west slope of the Cerro de Puerco while Meunier’s and Laplane’s brigades march up the north slope of the hill to engage. Meanwhile, centre left in the woods, Wheatley’s brigade has failed to beat the French to the woods edge and, on making contact, choose to withdraw in an attempt to link up with Dilkes. The two batteries of British cannon have yet to appear on the table (hidden movement) but have actually been placed in line with Wheatley’s brigade.
Barrois’ brigade,  under direct command of Ruffin can be spotted top right on the edge of the woods, preparing to enter in pursuit of Wheatley.

14. Wheatley driven back, one battery lost, second damaged

Ruffin’s division (top right) and Meunier’s élite (centre) charge Wheatley deep in the forest. Meunier takes a pounding from the British artillery but the attack is successful, sending Wheatley’s brigade reeling back (centre left). The British batteries limber up to join the retreat, but the rough forest terrain slows their retreat, leaving them behind and vulnerable to a second French attack. This attack does occur and one battery is lost while the second rejoins Wheatley’s lines badly damaged.

15. Cavalry action

Meanwhile Dermoncort’s cavalry has worked its way around the Cerro de Puerco, clashing in charge and countercharge with Whittingham’s brigade.

16. Battling it out on the Cerro de Puerco

Laplane’s brigade scales the east slope of the Cerro de Puerco, bringing up both batteries of French artillery, to engage Dilkes and Cruz Murgeon. They succeed in driving the Allies off the feature.

17. Wheatley driven back to la Peña's lines 

Wheatley continues to be driven back by Ruffin’s assault, emerging in disorder from the pine woods next to Béguines, who is still moving slowly towards the Spanish lines. La Peña, seeing Wheatley in full retreat and Dilkes and Cruz Murgeon driven off the Cerro, now has to decide whether to come to the rescue of the British or prepare to withdraw to the safety of the Isla de León. (As this was a playtest and this “what if” had not been foreseen, Brian and I decided to put it to a roll of the die, but, being La Peña, heavily weighted to him withdrawing without giving battle!)

18. Dilke and Cruz Murgeon routed

Things continue to go badly for Graham as Dilkes and Cruz Murgeon are both routed by Laplane! Whealtey’s battered brigade also joins the stream of British routing back through the Spanish lines. As the remnants of Graham’s force come streaming back towards his lines La Peña, confirmed in his expectations that the British would lose this fight, prepares to withdraw his forces.

19. Zayas moves forward to block French approach

Now it is a matter of performing a withdrawal in the face of the enemy. Fortunately for the Spanish French artillery is well back and their numbers not enough to take on the entire Spanish force with confidence. Behind La Peña’s lines Zayas, in reserve, marches forward to block the coastal road while La Peña’s small cavalry force is sent back across the boat bridge.

20. Overview

Top left the Spanish scramble to get Béguines brigade off to safety, as Zayas moves up along the coast to link up with Lardizabal and Anglona who are in the process of shifting their lines left in front of Vilatte. Laplane is already well along the coastal road, threatening the rear of Béguines column while Laplane marches down through the forest to link up. Meunier’s brigade, badly battered in its encounter with Wheatley, has retired from the field.

21. Spanish tighten bridgehead

The Spanish manage to move back Béguines and seal off the peninsula just in time. La Peña reorganizes his troops, placing Lardizabal opposite Vilatte, Anglona astride the coastal road while moving Zayas up to replace Anglona.

22. Béguines retreats to the Isla de León

Behind this screen Béguines and the baggage train retreat over the boat bridge.

23. Remnants of Whittingham's cavalry routs back towards the Spanish lines

Cut off from the rest of the army and pounded by artillery, Whittingham’s shattered brigade routs back to the Spanish lines.

24. Virué's brigade pulled out of the line

Anglona’s second brigade is pulled from the line and Zayas takes over his position as Ruffin and Laval’s remaining brigade close in.

25. From the French lines


26. Virués marches across the boat bridge to the Isla

With Anglona at its head Virués marches across the boat bridge to the Isla while Zayas pulls back to the Torre Bermeja amd Lardizibal moves by the flank west down the Almansa.

27. Dermancourt's brigade arrives on Ruffin's seaward flank

With Whittingham dealt with Laval’s cavalry arrives, and the French wait for their artillery to moved up into line.


28. Zayas and Lardizabal pull back adjacent to the Torre Bermeja

With the sun getting low the Spanish tighten their ranks further, with Lardizabal preparing to exit. But La Peña moves Lardizabal too soon, exposing Zayas’ flank to Vilatte’s cannon as well as the artillery newly arrived along the coastal road.


29. French assault on rear guard

With Zayas disordered by artillery fire into his flank the French surge in on the rear guard. Vilatte pours over the creek, firing into Zayas’ flank while Barrois’ and Laplane’s brigades slam into them from the front.


30. Breakthrough charges

Zayas’ breaks and routs over the boat bridge while Barrois’ and Laplane’s momentum carry them into the flank of the Spanish lines. A battery is captured and Lardizabal is sent reeling back to the banks of the Almansa’s mouth.
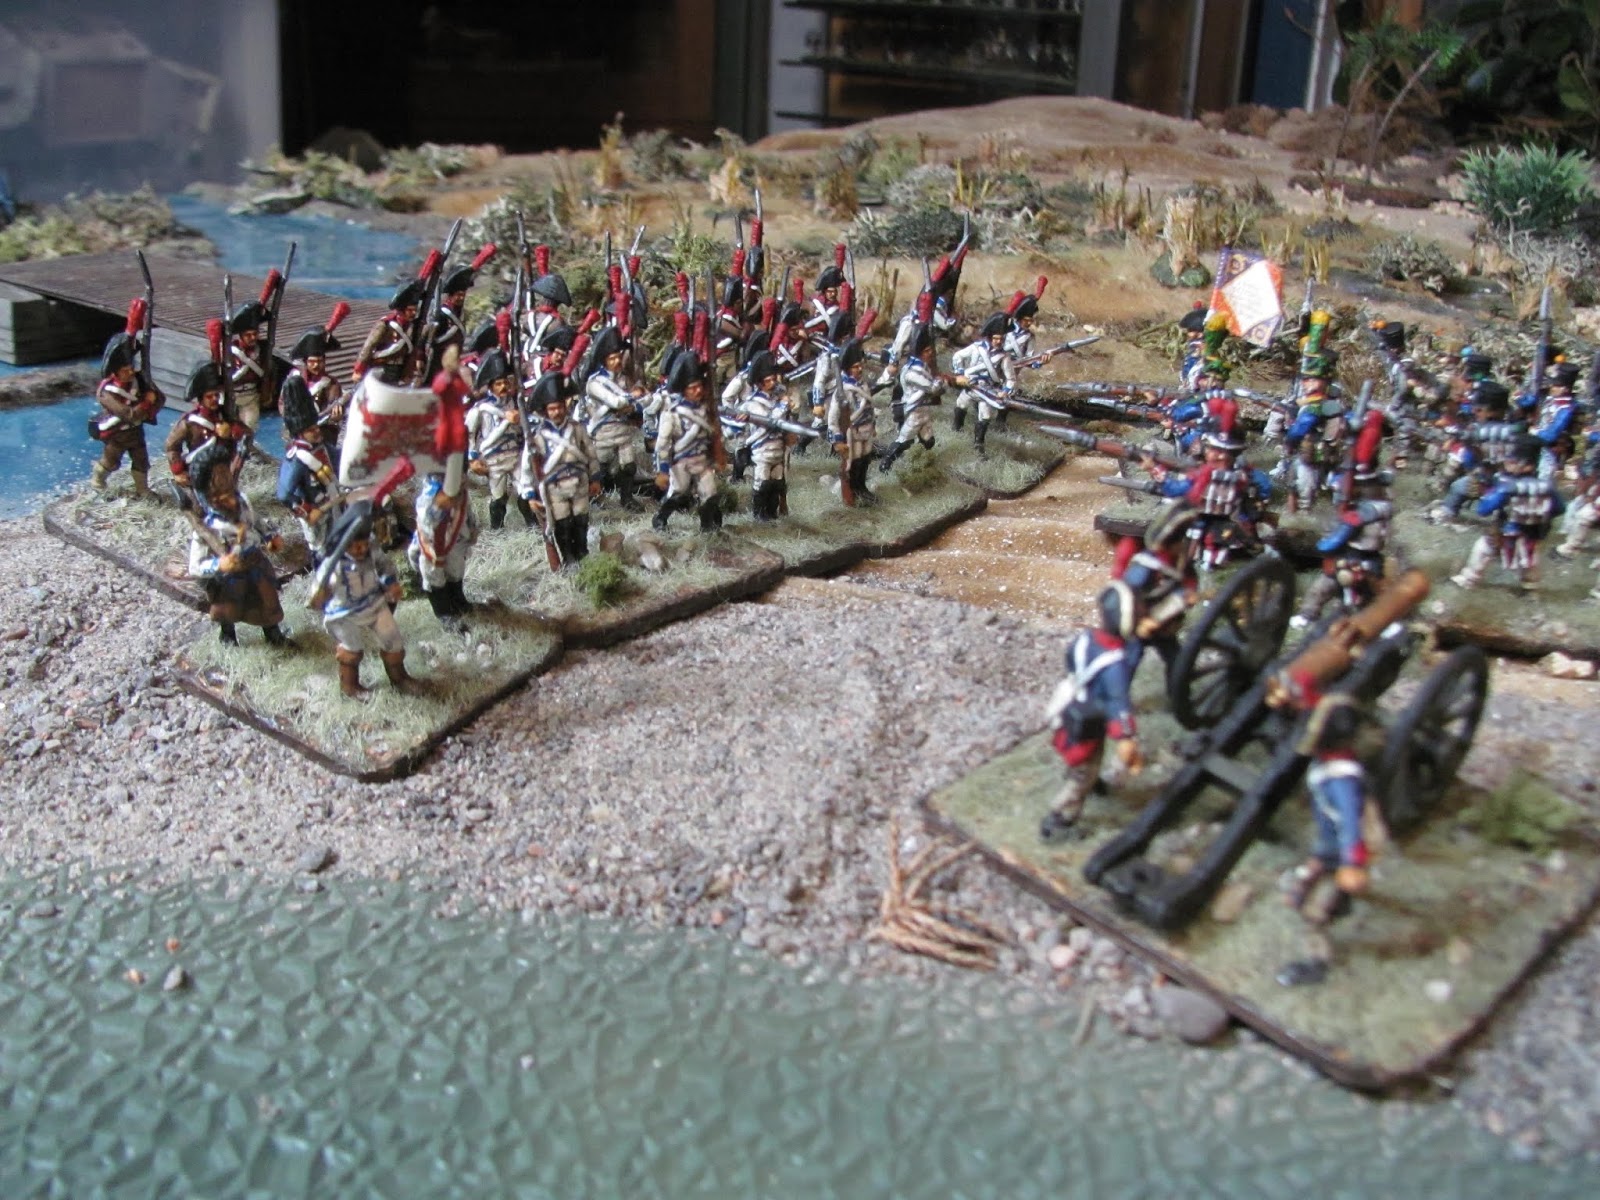
31. Lardizabal forced back to bridge

Forced back to the bridge Lardizabal manages to form up in the face of the advancing French. Béguines half battery, still on the near shore and unable to escape unlimbers to put some ineffective fire in the French flank.

32. Lardizabal marches across to the Isla de León

Game ends as Lardizabal retreats under cover of a rearguard to join the rest of the battered Allies on the Isla de León.

The game was a whole lot of fun. Although it didn’t play out historically by any stretch of the imagination it did lead one to think what would have happened if Graham’s gamble hadn’t paid off. Knowing La Peña, a withdrawal to the Isla de León was probably the most likely scenario, bringing the Allies long and circuitous march to engage Victor and lift the siege of Cadiz all for nought. As it was, historically little was accomplished even with Graham’s victory because la Peña refused to follow it up and capitalize on it. The withdrawal of the Spanish was a fun exercise at the end of the game, and we introduced a mechanic that would reward the Spanish for doing this successfully. As it was, Graham’s force was so seriously trounced that any points the Spanish scored paled in the face of the massive French victory. But as so many of us who wargame, we don’t really play to win or lose but rather see how things unfold.
So…

The Refight


With what Brian and I learned from this first go around, we introduced mechanics in the game to try and mirror more accurately the opening stages of the battle. The French entry point was moved further to the east, Cruz Murgeon and Whittingham’s brigades were restricted in activity for the first two turns and the Spanish under La Peña were deployed as they were historically after Vilatte had withdrawn and Zayas had advanced from the Isla de León. Rules were also written to formalize, in the “what if” scenario, what would happen in the event that the British were defeated and the fight brought to La Peña. Interestingly enough in this replay with the new rules it played out much closer to the historical record and the French were so badly beaten by Graham that the need to activate the Spanish didn’t arise. But it still felt like it could have gone either way, which is good.

1. New deployment

Changes now have the Spanish in a defensive ring around the peninsula and Béguines moved further away from La Peña.

2. Whitttingham and Cruz Murgeon south of the Cerro de Puerco

Both are now delayed to act for the first two turns. Whittingham is set up in a defensive position with artillery unlimbered and the correct number of stands this time.

3. Spanish under La Peña

Spanish, as noted, are placed in a defensive perimeter as they were historically with Zayas opposite Vilatte, Lardizibal to his right and Anglona anchored on the coast.

4. Graham in the woods

Graham’s forces are positioned as before, but now with the time to reach the woods’ edge if his initiative rolls are good enough.

5. French enter

French enter further to the east in column and with the requirement that their first move is directly towards the coast. This puts them to the northeast of the Cerro de Puerco, as they were historically.

6. Graham moves to block French

On the replay Dilkes marches out of the woods unobserved by the French and Wheatley is able to successfully march through the woods and form up on its edge with artillery in line. Dilkes changes from march to supported line and they form line of battle along the edge of the woods.

7. Overview

In this overview you can see at the top Dilkes on the left (British right) and Wheatley next to him. Having spotted the British forces Laplane (far right) goes into supported line and unlimbers and attaches his artillery while Meunier, to Laplane’s left and still in brigade masse, moves towards the Cerro de Puerco’s ridge. Here the hill is lower and easily traversed whereas further to the south (left) it becomes higher and more difficult (scenario changes were made regarding this feature). Ruffin (lower left) prepares to scale it with his artillery following.

8. Cruz Murgeon occupies ruins of chapel

The Spanish suddenly appear at the top of the hill, occupying the area around the ruined chapel. In the background (top) Dilkes sorties from the safety of the woods, also seizing the ridge and firing an ineffective volley into the approaching French.

9. Béguines arrives behind safety of Spanish lines

Meanwhile, back at the Almansa creek, Béguines reaches the safety of La Peña’s lines, which part to let him pass. La Peña continues to sit tight and let Graham battle it out. 

10.Ruffin (Barrois' brigade) charges Spanish

Ruffin's forces charge up the Cerro de Puerco, trying to sweep the Spanish from the ridge.

11. Ruffin driven back

Cruz Murgeon repels Ruffin’s first attempt to carry the Cerro, sending him reeling back to the foot of the hill.

12. Wheatley charges French flank

As the French form up to assault the British line, in a surprise move Wheatley charges from the cover of the woods to attack the the now unattached French cannon. The cannon limbers up in a panic and flees but now Laplane finds the British ranged out in line on his flank.

13. Wheatley lets a volley fly in enfilade

Wheatley’s brigade steps forward and unlooses a deadly volley into the French flank, dropping them in droves.

14. Meunier's brigade moves to the flank to cover Laplane

Laplane’s diminished ranks manage to turn and face Wheatley as Meunier’s brigade moves over to protect his flank against Dilkes. At upper right Dilkes can be seen, retreated to the safety of the woods but within charge range of the French left.

14. Ruffin again charges Cerro de Puerco

Meanwhile, on the French far left Ruffin again charges Cruz Murgeon at the peak of the Cerro de Puerco, this time softening them first with cannon fire. This time he succeeds in driving him off the hill with Spanish losses.

15. Ruffin carries the Cerro


16. Cruz Murgeon and Whittingham rout

Badly mauled Cruz Murgeon’s brigade routs, along with Whittingham who has been soundly beaten by the French cavalry. But all the successes on this flank are not enough to turn the tide… 

17. Dilkes fires devastating volley into French flank

For a second time the British, this time Dilkes, maneuvers on to the French flank and let loose a deadly volley into the flank of Meunier.

18. Dilkes' charge destroys Meunier's and Laplane's brigades

Dilkes’ subsequent charge routs Meunier’s brigade and the breakthrough charge routs Laplane. With only Ruffin’s troops left on this part of the battlefield Victor admits defeat and withdraws from the field, with the British having achieved a massive victory.


Wednesday, August 1, 2018

Battle of Tudela, November 23, 1808

Last weekend we got together for our annual summer Big Game, a tradition that has been going on for about ten years now. It means two solid days of gaming a larger scenario than usual with multiple players (in this case two per side) on a ridiculously big table. It is accompanied by a great deal of bonhommie, punctuated by some amazing food and hopefully (rarely but this time successfully!) coming to a conclusion before we all collapse from gaming exhaustion at the end of the second day.
This year we decided to tackle our largest Napoleonic scenario to date, the Battle of Tudela. This was the culmination of a few years painting work, getting to finally play a scenario that I had written about a year ago. The intervening time was spent finishing the 1000 figures that I needed to field the two armies and playtesting the scenario.
The Battle of Tudela on 23 November 1808 saw an Imperial French army led by Marshal Jean Lannes attack a Spanish army under General Castaños. The battle resulted in the complete victory of the Imperial forces over their adversaries. The combat occurred near Tudela in Navarre, Spain during the Peninsular War.
Spanish casualties according to Oman were estimated to be about 3,000 killed and wounded and over 1,000 prisoners out of a total force of 33,000. The French and Poles lost no more than 600 dead and wounded out of a total of 30,000. This is one of the battles whose name was engraved on the Arc de Triomphe in Paris.
This scenario was based on the original forces and deployment that occurred historically, but subsequent play was at the players' discretion. Because it was a given that the Spanish would lose, a game mechanic was introduced that would allow the Spanish under La Pena in Cascante to march in support if the Spanish leader was able to get to their location. Historically Castaños headed out to command La Pena to do just that but French cavalry spotted him and gave chase, causing him to flee to the shelter of the olive groves and never reach Cascante.
Probably the most interesting task for the Spanish was to deploy over the Rio Ebro before the French consolidated in front of the gates of Tudela (figurative "gates" as it had none!) Because of the low quality of the Spanish troops their maneuvers were painfully slow, and required good humour on the part of the players. Thankfully, thanks to Tim Shannon, that was in good supply.
The game was played out on a 12'X 7.5' table, most of the 12' just being the four miles between Cascante and Tudela. We played with 1/72 scale figures and used the AoEII rules, with a stand representing 360 soldiers. Most of the figures are HaT with a smattering of other manufacturers in the mix. The scenario can be found here.

The scenario map with key troop movements marked on. The Spanish lines (red) primarily ran from Santa Barbara to south of Tudela with reinforcements marching but never arriving from Cascante. The French (purple) entered the board at two locations, those entering at Point B arriving halfway through the game. The Grand Battery is the small square in the centre of the French lines.
Because we were playing this in 1/72 (scaled up 1.5 from 15mm play) we removed a foot from the top of the table and another foot from the left.

The Battlefield

The River Ebro is in the foreground with the bridge over to the town of Tudela. Castaños forces start the battle in and around Tudela, with a large proportion of O’Neille’s corps, The Army of Aragon, having arrived the night before and still undeployed east of the Ebro (bottom of board). At the top of the board can be seen Cascante, where La Pena’s strong division of the Army of the Centre held the line of the Rio Quieles about four miles further west.
The Quieles travels east to west across the battlefield (top to bottom here) but offers no real impediment to crossing. Castaõs position is anchored on Tudela, with the low hills east (above) and the higher ground around the ancient castle on Santa Barbara (out of picture to the right of Tudela) providing favourable ground to defend.
The land north of the Quieles is relatively open but south of the smaller river it is largely olive groves.The Rio Ebro is unpassable, save by the bridge at Tudela.


The Spanish

Army of Aragon

The Spanish Army (under Castaños) roughly equal the French, with more infantry but fewer horse and cannon and their forces split between Cascante and Tudela. The Tudela forces are still largely undeployed when the French arrive and much inferior, consisting mostly of newly levied militia. Shown above is O’Neilles’ (originally Palfox’s) Army of Aragon with three divisions (eight brigades) of infantry and a fourth division (two brigades under Roca) attached from the Army of the Centre. This force also includes two small brigades of horse and four batteries of cannon.


Army of the Centre

La Pena’s force in Cascante numbers a strong division (four brigades) along with a small brigade of horse and three batteries of artillery. These troops are of higher quality, including Royal Guard and the Irlanda Regiment, but unfortunately they never come into play!


French Army

The French army, under Lannes, is mostly composed of de Moncey’s III Corps, supported later in the battle by the 2nd Division and cavalry of the VI Corps. They number five divisions (12 brigades) of infantry and three large brigades of horse. The infantry is mostly composed of French line infantry with a single elite brigade under Miozinski of Poles of the Vistula Legion. The force is supported by ten batteries of cannon.


1. Spanish deployment
The battle begins with the Spanish deployed more or less as they were historically. Having no cavalry watching the advance of the French army (!) Lannes arrives unexpectedly in front of the Spanish position on the morning of November 23, 1808. Castaños had planned to make his stand at Tudela with his left flank anchored on the Ebro and the rest of his forces holding the higher ground defined by the two hills, Cabezo Malla and Santa Quiteria that run west from the town and south of the Rio Quieles. He had hoped to be rapidly joined by La Pena’s troops four miles west in Cascante.
However Palfox’s Army of Aragon had arrived late on the previous day and chosen to bivouac east of the Ebro. Thus they were found only partly debouched over the bridge into Tudela when the French arrived! Things were further complicated by the departure of Palfox that morning, when the first shots were fired, leaving O’Neille (1st Division) to take charge of the army while Fiballer assumed command of O'Neille's division.
Roca and Fiballer’s divisions were already over the bridge and in the process of deploying in and around Tudela.


2. Spanish deploy on Santa Barbara
With news of the French arrival, O'Neille pushes Fiballer's division (foreground) up into the high ground of Santa Barbara (this is rough terrain and offers significant advantages to the defender) while Roca’s division (troops in white) shakes out into supported lines north of Tudela (right).

3. Seizing the high ground
As Fiballer gains the high ground, they wheel to face west as they spot the French approaching from the northwest.

4. Marching over the Ebro
The bridge over the Ebro serves as a bottleneck as Castaños struggles to get O’Neille’s remaining troops over the river and deployed before the French arrive. But the Spanish troops, mostly newly raised levies, do not move quickly!


5. French deploy in front of Tudela
The French arrive in stages on the field, with Wathier’s Polish Lancers first on the scene, followed by Morlot’s 3rd Division and Musnier’s 1st. Seeing the Spanish well established in the hills they choose not to try and force the high ground around Santa Barbara but instead to form their line of battle in the low ground northwest of the town.


6. In charge the Poles
Hoping to bring things to a rapid conclusion before the Spanish can properly deploy Lannes sends his élite Poles against Roca’s division. The Spanish return a deadly fusillade and send the Poles reeling back with losses.


7. Deploying south of the Rio Quieles
Painfully slow, the Spanish levies begin to deploy in the hills south of the Quieles (top left). With the French already at the gates of Tudela and French horse (Vistula Lancers top right) crossing the river, Castaños tries to establish a blocking line south of the town.


8. Lannes surveys the Spanish lines


9. Spanish militia deploying along the ridge of Santa Quiteria west of Tudela


10. Overview
In this overview you can see the Spanish line now more or less in good order from the heights of Santa Barbara (centre right) arcing up to Tudela and then south blocking the road to Cascante (upper left). Bad maneuver rolls have stalled the Spanish crossing of the bridge with Villalba’s division and the Spanish horse still tied up east of the Ebro.
Meanwhile the French begin to get their cannon deployed in their centre while Lannes sends his Polish Lancers over the Rio Quieles to threaten the Spanish left.


11. Protecting the south flank
Saint-Marc places cannon in his line south of the Quieles.


12.  The long road to Cascante
Meanwhile Castaños (bottom centre) wonders why La Pena has not responded to his request to march east and join up. Somewhat confident that he now has as good a battle line as can be expected, he leaves the army under O’Neille’s supervision to personally rouse the laggard La Pena out of Cascante (top). But it is a long and in the end fruitless ride to Cascante to try and get La Pena’s troops marching to the sound of the guns!


13. Trading cannon fire
 Back at the battle, after the first disastrous charge of the Poles, the French redress their lines and bring their cannon into action. But their marksmanship is off and the Spanish return better than they receive, thinning out Morlot’s ranks on the left.


14. Spanish push the French left
Seeing more and more French approaching across the plains, O’Neille decides to try and push the French off the high ground on the Spanish right. Only a couple of weak brigades hold this flank, protecting the French cannon, so O’Neille maneuvers his line cavalry onto their flank while advancing Fiballer’s brigade towards their front.  The French, rather than give battle, fall back from the heights to consolidate around their cannon.


15. Roca charges the French right
Meanwhile on the Spanish centre in the open ground in front of Tudela, Spanish cannon play havoc on Mathieu’s Poles. After disordering the enemy with cannon fire Roca charges in, sending the Poles reeling backwards once more. But the charge leaves the Spanish centre in a precarious position as the brigade fails to withdraw and is slammed with artillery and musketry fire until it routs and flees the battlefield, marking the end of the high water mark for the Spanish.


16. Villalba reinforces Spanish left
Finally Villalba’s division manages to cross the Ebro and deploy in the Spanish line south of Tudela. But all appears quiet here so the cannon are withdrawn from the lines and sent to support the Spanish right.


17. Overview
Out of picture to the left the French have once more sent their Polish horse across the Quieles to threaten the Spanish left. In response O’Neille elects to shorten his line, wrapping it around Tudela and anchoring the Spanish right on the Ebro itself. One brigade occupies the area of town closest to the French (top left of town) while a second tries to deploy in the southern section south of the Quieles. This allows the Spanish to pull one of Saint-Marc’s brigades out of the line and march off to the Spanish right, where it appears the hammer is about to fall. But the Spanish are so unwieldly that one of Saint-Marc’s brigades stays strung out along the Quieles until its almost too late while Villalba’s troops mill about in front of the town and fail to deploy within the relative safety of its buildings.
Meanwhile the remainder of the French forces, including Legrange’s are forming up outside of Tudela, biding their time.


18. Well, I hope he brought doughnuts…
Best line of the game from one of the Spanish players when Castaños, having been gone for most of the fight, has successfully (but belatedly) delivered his orders to La Pena in person and is now galloping back towards Tudela. But his way is blocked by the Polish Lancers who, ravaged by a failed charge and Spanish gun fire have been sent by Lannes to slow down any movement of La Pena’s troops from Cascante. Castaños spends the remainder of the battle trying to circumnavigate the French troops now operating freely south of the Quieles and never makes it back to his lines. (For this scenario we introduced a game mechanic that doesn’t allow unattached leader stands to be within 6” of the enemy without an intervening friendly brigade.)


19. Digeon’s dragoons south of the Quieles
With the Spanish cannon withdrawn to the north, their lines collapsing on Tudela and no movement of the Spanish from Cascante  the French begin to push troops across the river.


20. La Pena departs from Cascante
Meanwhile, after a further hour’s delay, La Pena finally begins to march his troops out of Cascante and towards Tudela. (Bad reserve movement rolls kept the Spanish stuck in Cascante for two more crucial turns!)


21. The long road to Tudela


22. The Spanish right
Meanwhile, back in Tudela the Spanish see the French forces steadily strengthening before them with a new division and yet more artillery arriving in the lines. O’Neille redresses his own lines, with the far right settling out with a single infantry brigade and cavalry holding the forward spur of high ground they had seized earlier while the rest of the line falls back on the hills around Santa Barbara.


23. Overview of Spanish left
The Spanish line is caught in a dangerous position when one of the bridges (centre left) fails to fall back and reform in front of Tudela. Fortunately the French are unable to exploit the opportunity due to a bad maneuver roll while upper right yet more French infantry march into line.


24. Waiting for the onslaught 
La Roca’s surviving brigade wait outside Tudela for the French to attack.


25. Fiballer’s militia is driven from their position
The French begin their attack by driving Fiballer’s militia from their forward position on the Spanish right.


26. Forming the Grand Battery
Meanwhile, with enough guns finally on the field, Lannes has his artillery ADC form up a Grand Battery of five stands in the centre.


27. French switch their attack to south of the Quieles
With the battery formed the French suddenly and swiftly switch the focus of their attack to south of the Quieles. Having struggled the entire fight just to deploy the Spanish commanders can only watch with envy as the French army maneuvers effortlessly across their front.


28. High ground seized, cavalry routed
On the Spanish left the high ground is seized and the cavalry routed as Fiballer’s battered brigade falls back on the Spanish main line.


29. Irlanda Regiment marching to Tudela
Meanwhile, in fits and starts and many delays, La Pena’s troops march on towards Tudela…


30. La Pena’s guns go into action against Vistula Lancers
Sent ahead, La Pena’s cannon are forced to unlimber and engage Wathier’s lancers that are guarding against the Spanish approach. Although they are successful in holding them at bay it further slows down the guns' approach to Tudela.


31. Overview
The French Grand Battery goes into action, destroying one of the Spanish cannon and damaging another before turning its attention on Villalba’s militia holding the eastern most part of Tudela, softening them up before the final attack. 


32. Spanish defence of Tudela
At top centre a brigade of Villalba’s militia have occupied Tudela (buildings stripped away) but are repeatedly shelled by the French cannon. To their left (centre) the Spanish have finally massaged their troops into some sort of supported line before Tudela although the brigade lower left continually fails to occupy that part of the town. But it turns out all for nought…


33. Tudela stormed
In the centre right a French column storms Tudela driving out the militia defending this part of the town. 


34. Spanish outflanked
In a breakthrough charge the attacking French column drives into the side of the next supporting Spanish brigade and sends them reeling back as well, placing the column firmly behind the enemy. The rest of the French converge on the southwest side of the town, forming up for the final assault.


35. House to house fighting in Tudela
Two battered brigades of Spanish fall back disordered into the eastern section of the town as the French hit the remaining Spanish simultaneously front and rear.


36. Final onslaught
Digeon’s dragoons and two more brigades of infantry slam into the defenders as a third French brigade hits them from the rear. With its retreat cut off one brigade lays down its arms and surrenders while the second is driven back to the banks of the Ebro.


37. Spanish driven into the Ebro
Caught between the Ebro and the French dragoons, a second Spanish brigade lays down its arms.


38. O’Neille watches his corps’ destruction
From his vantage point atop Santa Barbara O’Neille watches as one after another of his brigades routs across the Ebro or lays down its arms in surrender. With morale broken the entire right wing of the Spanish army, still intact, also collapses and flees the field and the battle is suddenly over.


39. End of battle
This final overview shows Tudela vacated by the Spanish, the four defending brigades having routed over the bridge or surrendered. The Spanish right wing, too, has routed with only a couple of brigades still holding firm in the centre. But now testing at -8 on their maneuver rolls, the future of those still holding is not in doubt either and the Spanish commanders throw in the towel.
La Pena’s forces are still four turns away from entering the battle, which meant the French did not have to tell off troops to hold them at bay. A tardy exit by Castaños to rouse La Pena coupled with some bad maneuver rolls kept these troops from entering the fray - historically La Pena never left Cascante and retired with his force almost completely intact. However, the Spanish not having their commander in chief in Tudela for most of the fight further hampered a chronic inability for the Spanish levies to maneuver effectively and made it even easier for the French to out maneuver their enemy.
In retrospect it may have been a mistake for the Spanish to collapse their left flank on Tudela rather than hold the line of the Quieles (as was done historically) and for them to commit two entire divisions to the hills north of the town, as it enabled the French to put the defenders into a pincer movement in Tudela with no avenue of escape.
The Spanish managed to fight almost to nightfall (18 of 20 turns), improving on the historic record and actually giving better than they got for the first half of the battle. But with the increasing arrival of more French, the formation of the Grand Battery and the no show of La Pena, they were doomed from the start. Even a moral victory (one intact brigade still in contention around Tudela) was denied them and the French scored a resounding, if predictable, victory over the hapless Spanish.