Saturday, December 6, 2025

Delaying Action Scenario - Chain of Command

I haven’t written up a battle report for ages, or indeed posted at all on this blog, but have been really enjoying our foray into the Lardies’ Chain of Command rules. The other day I decided to game solo, with the intention of fielding my newly minted British paras against a German platoon of green conscripts. I was curious about two things. The first was how the paras would fare, as at first glance they seem to field a lot less than the standard British platoon for a greater cost. But I had noticed the superior junior leader rule, which really adds to the command and control aspect, paying off on my first deployment roll that featured three fours!

I also noted the addition of the sniper and some of the airborne specific options, like upgrading a rifle section to be two Bren guns. I took the last option, and then spent their remaining points (rolled low) on a 2” mortar, a 6 pdr. and crew and a PIAT team as insurance. As it turned out the PIAT was never fielded but both the mortar and especially the 6 pdr. earned their keep.

The green Germans meant that they actually received more support points than the attackers, which they spent on what is always my first choice, an additional senior leader, plus a Marder II and a Stummel, giving me an odd little Kampfgruppe which seemed to work for a hastily thrown together delaying action - the scenario I was playing. The Germans also rolled a spectacular morale roll (feeling cocky) which gave them 11 morale to the British 8.

So on to the battle…


1. The Battlefield

As we are still learning the game and playing fictional scenarios, we have been constructing our boards randomly, dicing for the elements on a grid basis. The rolls generated lots of terrain this time, three hills, some large areas of tall crops, and a huge area of soft ground on the British right (this view is from the British end of the table).

It also generated a good defensive positions for the Germans, with a low stone wall running across most of their deployment area (top of board) backed by a couple of hills that provided some rear area cover.

Out of the frame, on the left, is a small copse of trees, really the only cover available to the British on that flank.


2. Airborne Jump Off Point

The key jump off point used for the para attack.


3. The Objective

This German JOP is the objective. Holding this at game end wins.


4. Germans on right

The Germans, getting the initiative, begin by deploying a section on their far right behind a stone wall bordering a track.


5. Armour rolls in

At the same time they opt to get their armour support on the field, a Marder II and Sdkfz. 251/9 Stummel, as these need to get well forward to be beyond the hills and have an open field of fire.


6. German line

An overview of the German line, with one section deployed on the right and the armour top left. The objective is behind the stone wall at the top.


7. Airborne Bren section deployed

The British deploy their Bren section on the left, the British lieutenant deploying with them as does the 2” mortar a bit further back, to provide fire support for the main attack on the right.


8. Airborne rifle section deployed

At the same time the first rifle section deploys, scrambling to get over the hill and into the cover of the large  field beyond.


9. British initial deployment

Bren section is in the copse at the bottom, the lieutenant just behind and the 2” mortar at bottom right, which immediately goes into action. The rifle section is on the hill at top right.


10. Rifle section chewed up

The paras are immediately in trouble as the Germans deploy a second section in front of the objective JOP who, along with the Marder II and Stummel, deliver devastating fire.


11. Third German section deployed

The third and final German section is deployed on the right, bringing 26 FP die to bear on the British Bren section in the copse.


12. Bren section at losing end of fire fight, withdraw to cover

With their lieutenant wounded and then stunned the Bren section, at the losing end of this vicious firefight, is forced to fall back behind the copse to regroup.
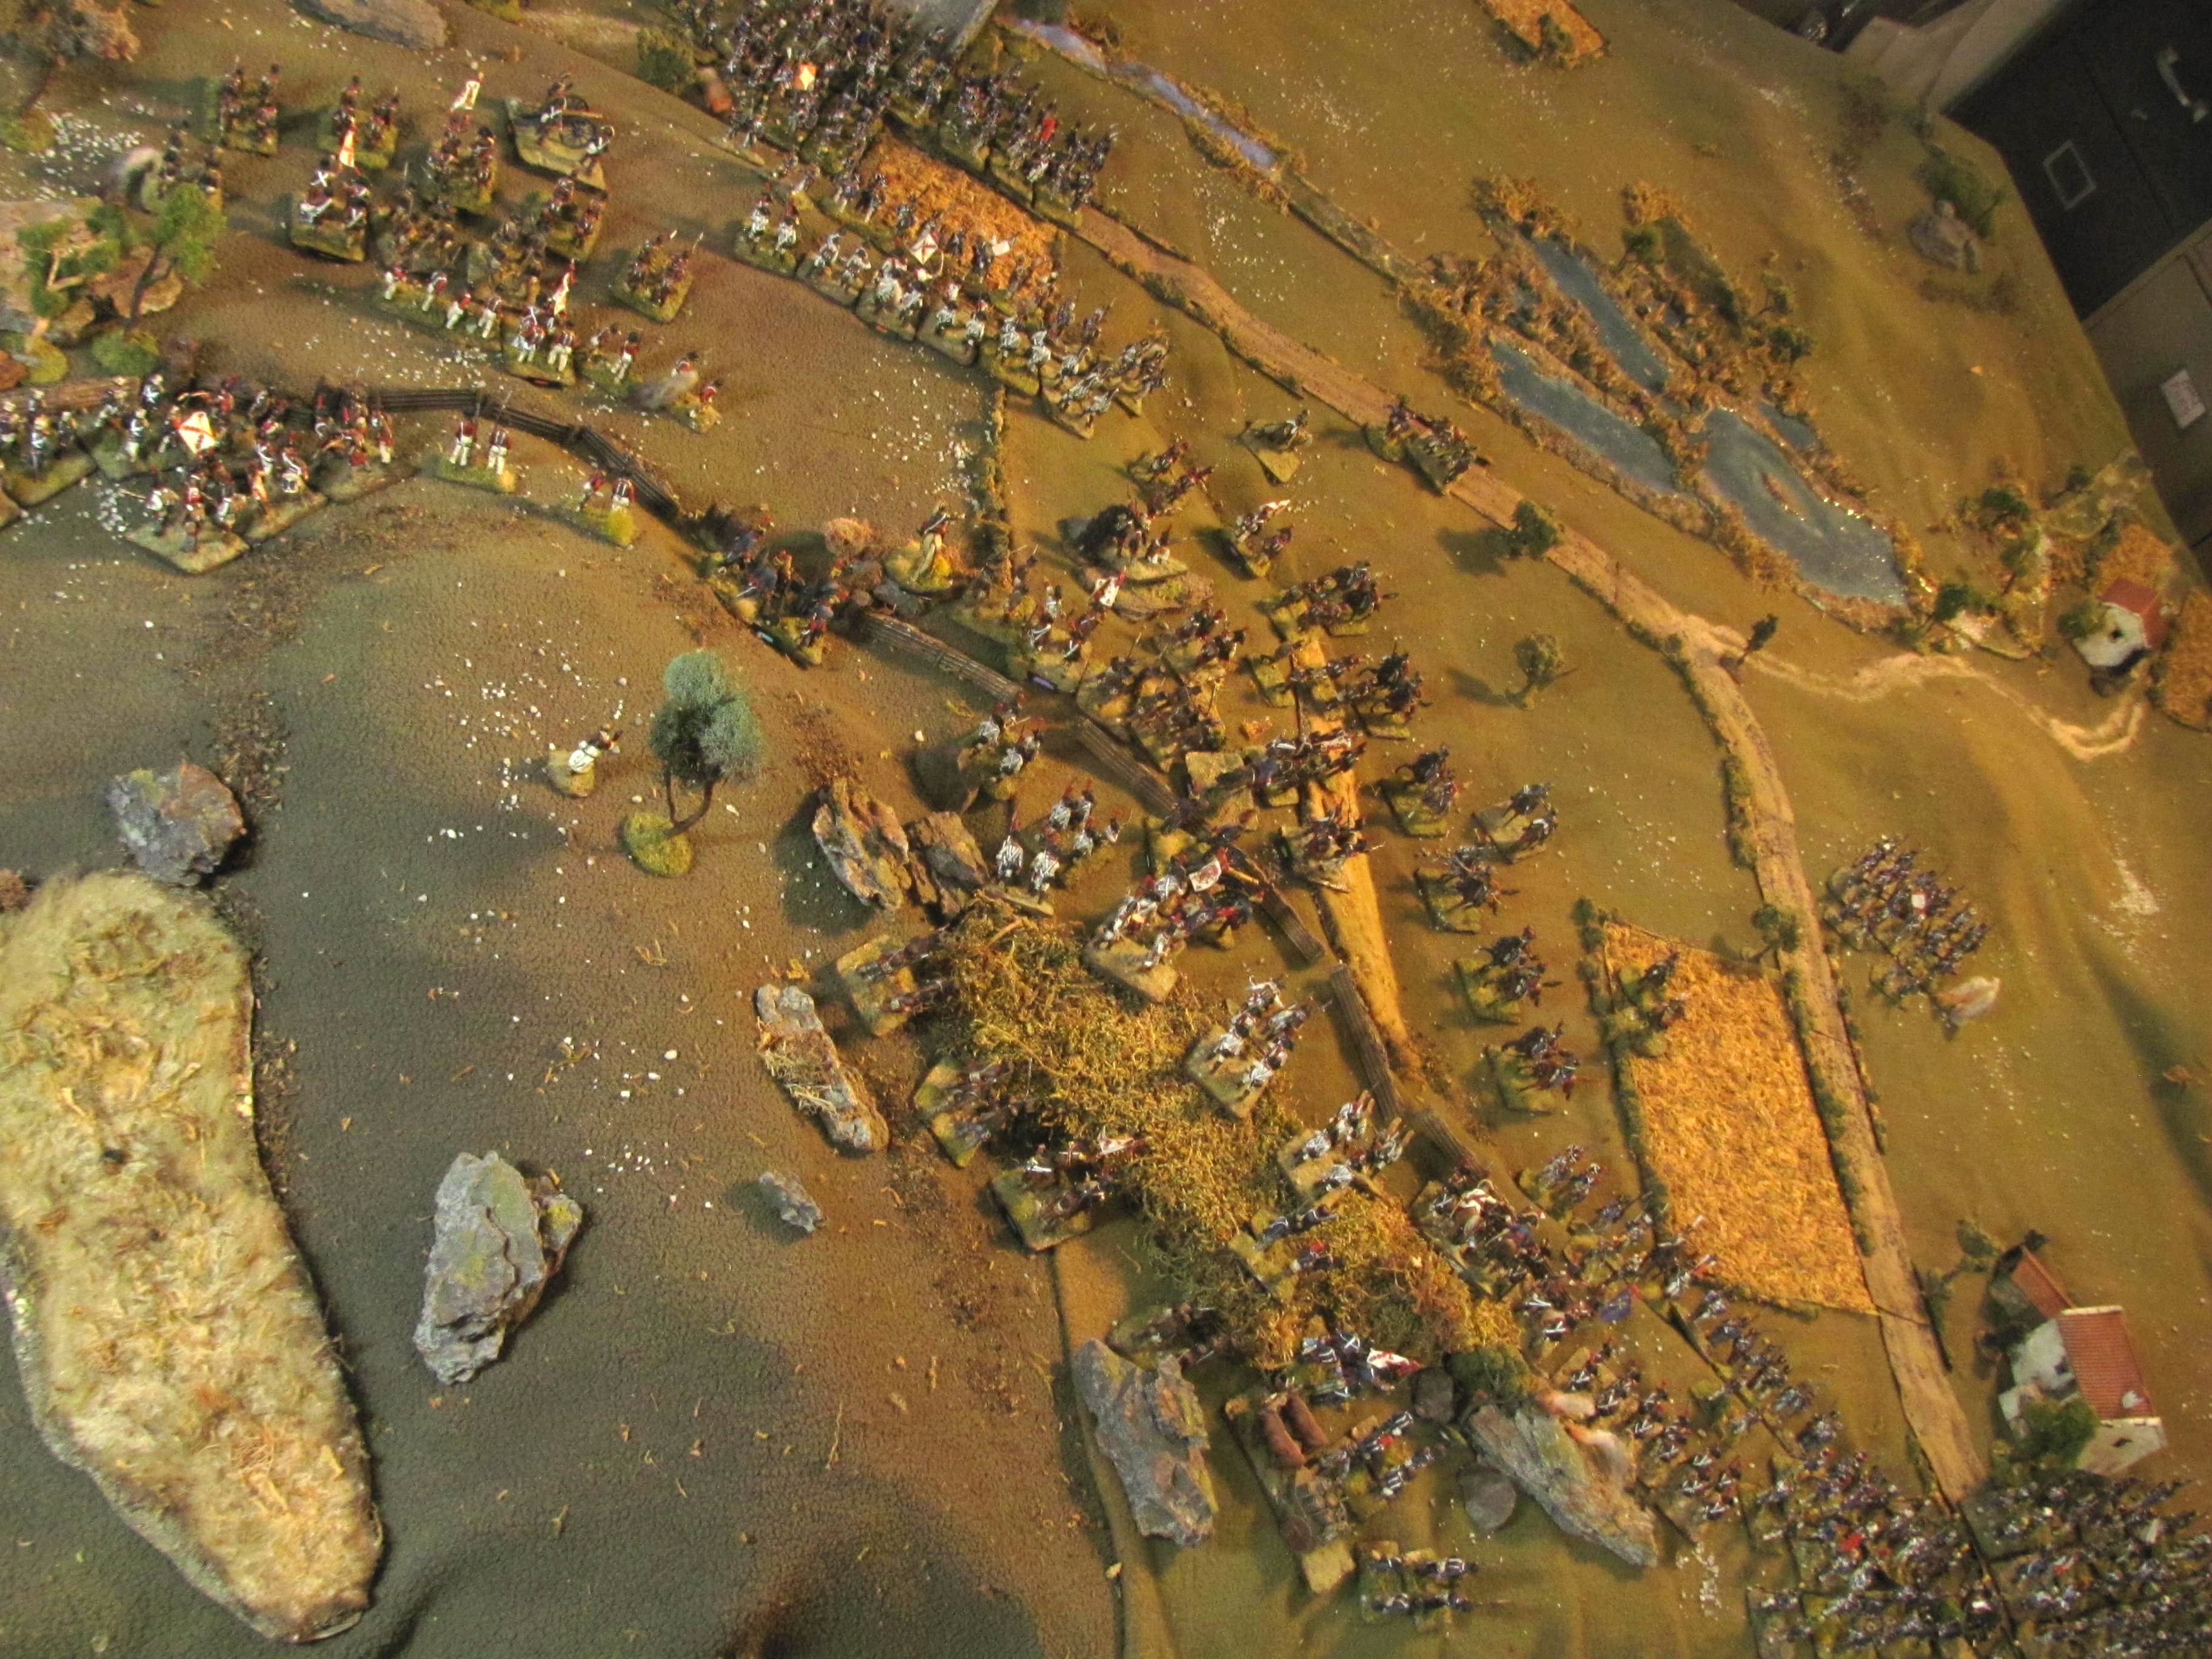


13. Overview

The Germans are now fully deployed behind the stone walls. The British 2” mortar has dropped some smoke, trying to give their already beleaguered attack a bit of respite while the Bren section, bottom left, prepares to pull back.


14. Battered rifle section makes it to cover

The para rifle section makes it off the hill and disappears into tall crops but have left half their section behind as casualties on the hill. They desperately need some support…


15. 6 pdr. goes into action...

Which arrives in the shape of the 6 pdr. (Obviously not a 6 pdr.🙄 For some reason I got it in my head the Airborne Pack Howitzer was their version of the 6 pdr. ) The first shot clips the Stummel (which I'm not taking back!)


16. With spectacular results

And the second seriously rattles the Marder II which has pulled beyond the smoke to get a shot in. A double phase allows a third shot that blows the Stummel sky high! This is followed up with a fourth shot on the next British phase that dispatches the Marder and suddenly things are looking much better for the British.


17. Final airborne section deployed

The British use this opportunity to get their third section into play, albeit a bit more cautiously this time, using the hill as cover before sprinting to the fields. The 6 pdr. although still in action, has been clobbered by the full weight of the German small arms fire as the gun has become the only visible target. 


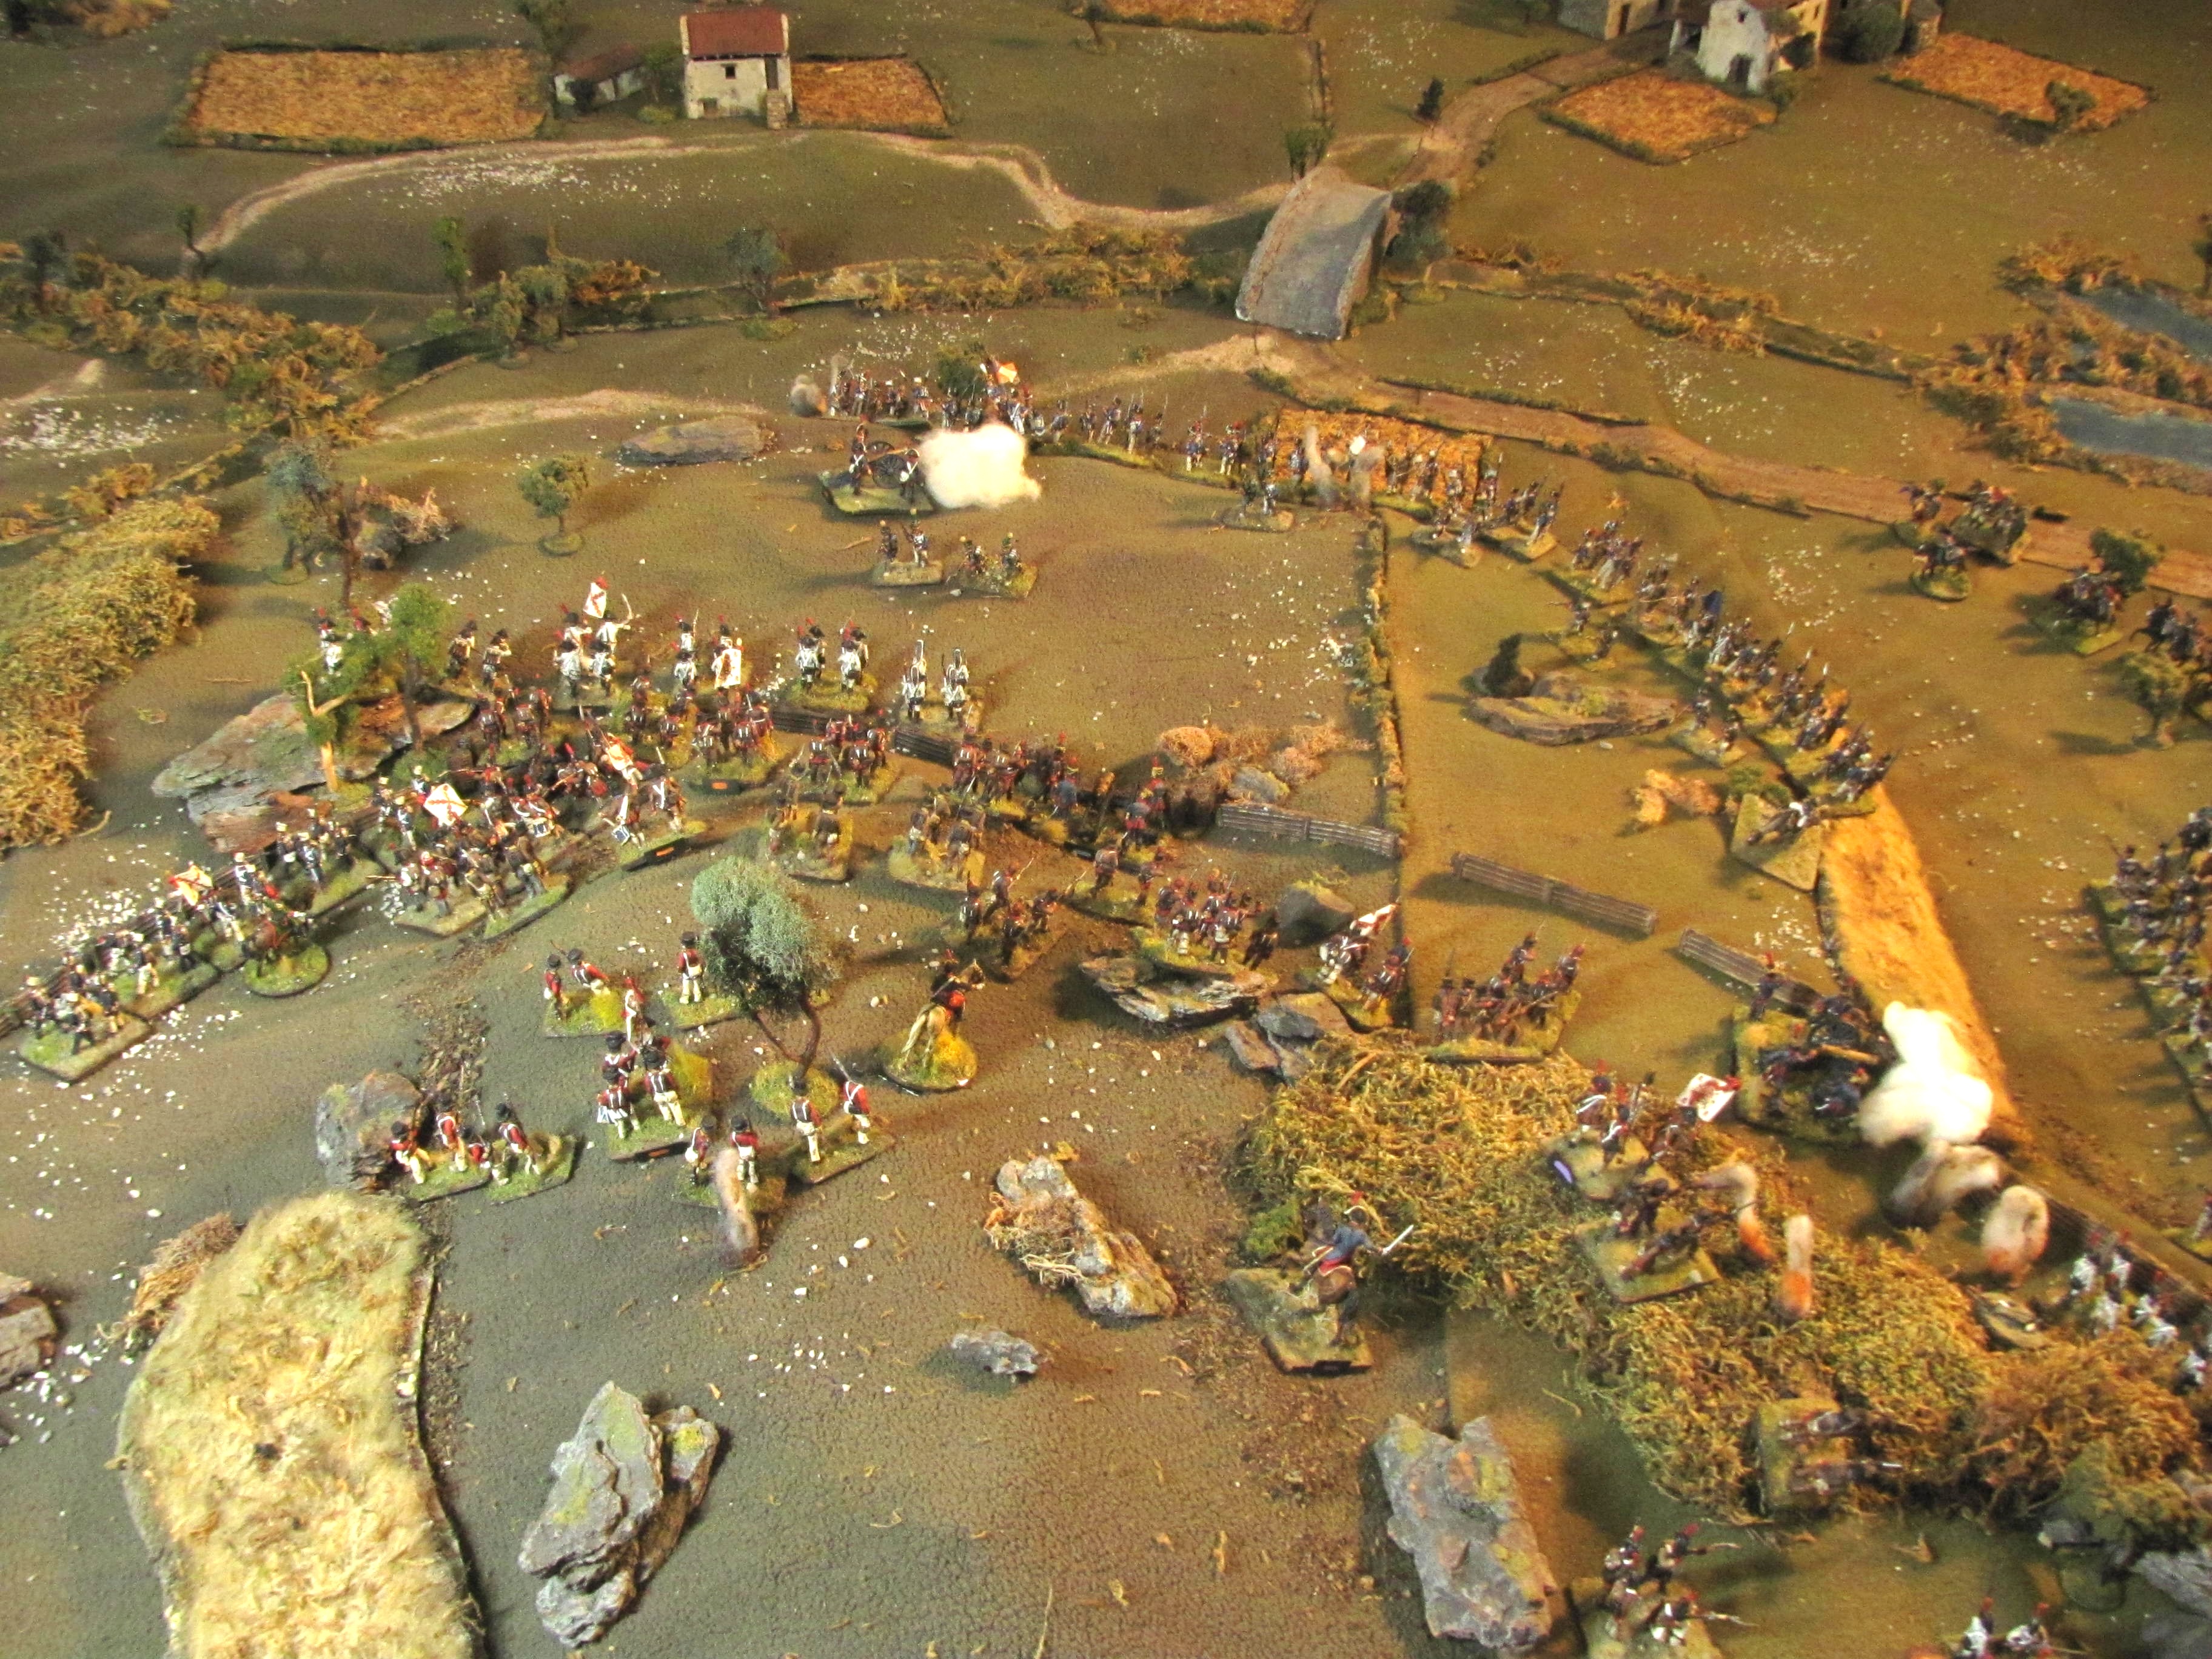
18. Germans now take heavy fire

The tables are now reversed. As the Germans move to reposition from their right flank to protect the Objective JOP, they take heavy fire from the mortar and Bren section, back in action. A German section leader is killed and the green troops are rendered ineffective by mounting shocks. Also the loss of the two AFV’s have reduced the German morale to 5 and they are now operating with one less command die.
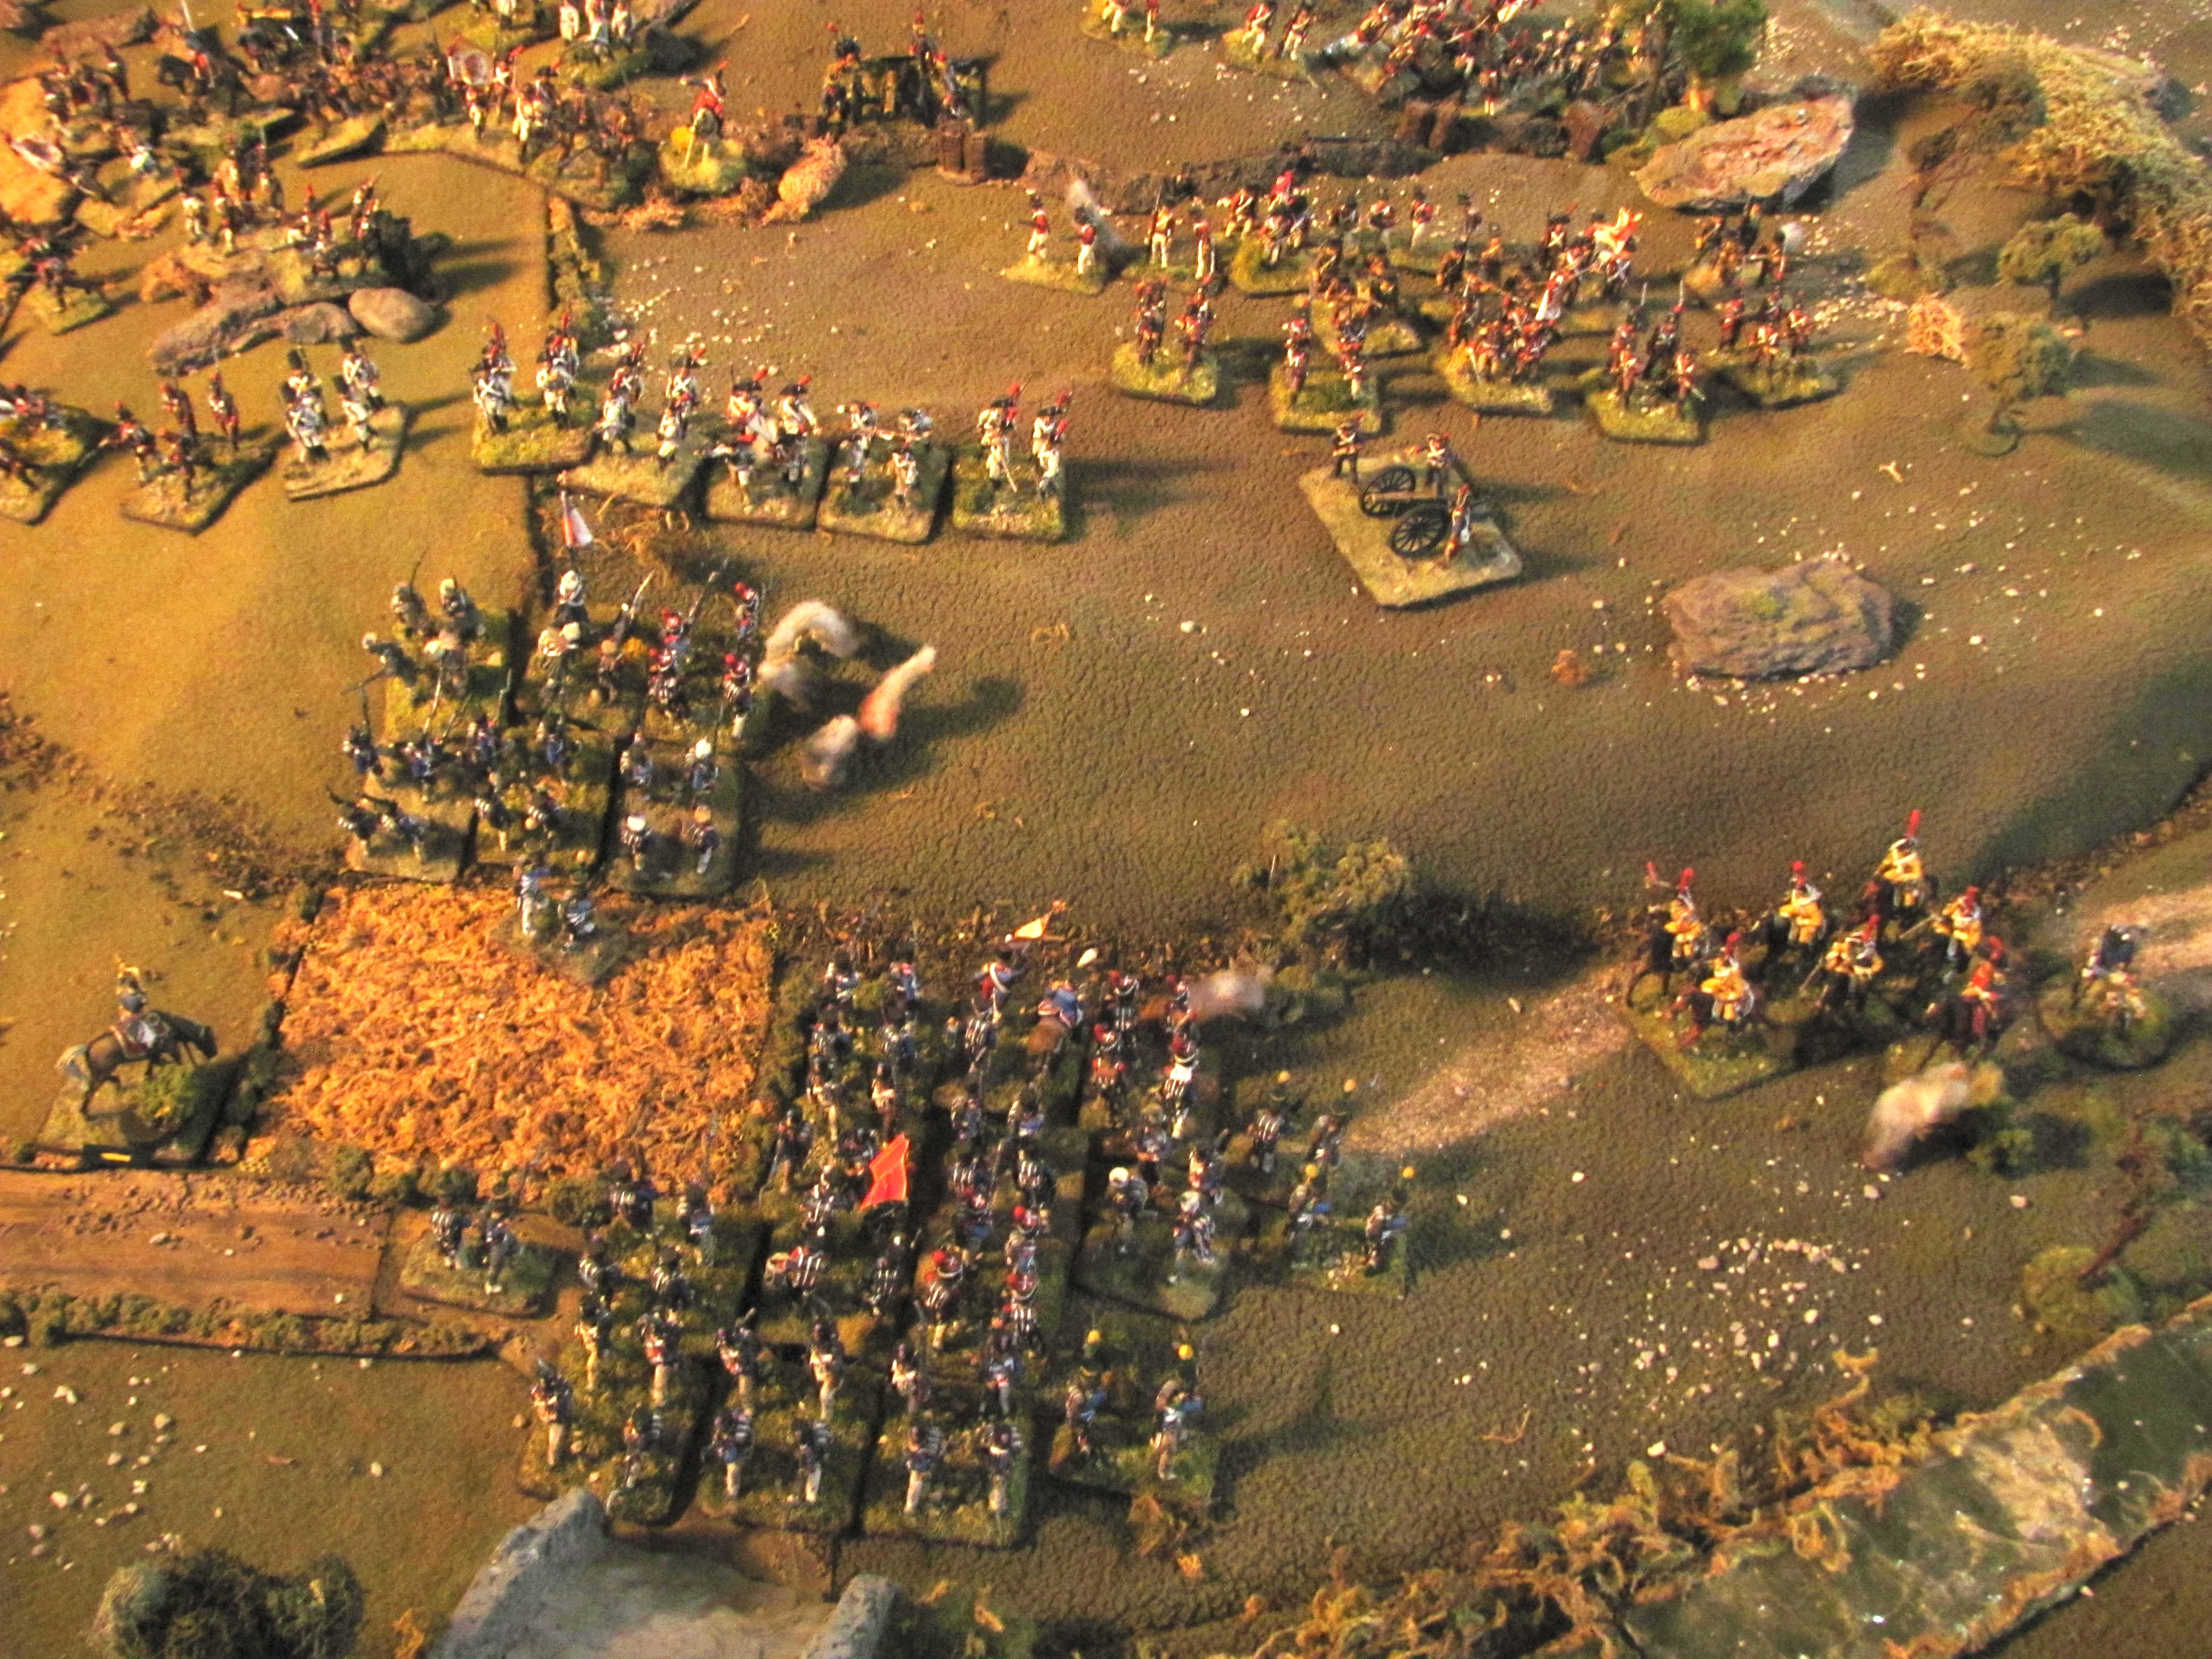


19. Overview

With time running out for the British (the Germans have hoarded their CoC points and now spend 9 to end the second turn and initiate Final Countdown) the British press home their attack. Under heavy fire and mounting casualties the two rifle sections press forward into small arms short range centre right with the platoon sergeant taking a couple of bullets but pressing on. The 6 pdr, bottom right, still pinned at turn end, is out of the fight. Both sides are now down to one morale point apiece so not many command dice in play…


20. British press home the attack

The ticking clock rounds end and a double six will give the game to the Germans. The British, on their phase and with a single section leader activation die available, debate whether to hazard a close combat to seize the Objective JOP (a gamble that might come up short of contact, although they have the numbers and both German leaders here are hors de combat) or fire a volley. They opt for the latter, score a wound on the German sergeant and the enemy morale drops to 0. Game end.


21. Game end

I am fascinated by the way CoC games come to an end - such interesting game mechanics. Usually, with reduced command dice, the play switches rapidly from side to side and becomes super focussed. Peripheral troops become irrelevant as all the action zeroes in on the key point of the battlefield, creating a terrific narrative tension. In our half dozen games so far I think they all have ended through morale loss, even though every attempt is made to seize the objectives and we are often a phase or two away from that probably happening.

So Airborne vs. German green infantry? I would say the airborne superior junior leader really gave a lot of command options to the British, and the extra 2 FP die for 1 support point seemed value for the upgrading to a Bren section. The sniper only took two shots, both misses, and the PIAT was never deployed. This was probably my fault, having chosen two of the three units (sniper, mortar and PIAT) that all activate on 1’s, rolls which just didn’t show up for most of the game.

I love the 6 pdr. - it was my favourite weapon when I played Battlefront WWII and it has paid off in spades twice now in CoC games. And I can’t field the British without them having their the ubiquitous British 2” mortar, which again totally out performed and, being adjacent to its JOP, managed to replenish successfully although too late to fire again.

German green troops? Honestly, with the extra senior commander, they were rarely debilitated by the increased shock effects and their good morale roll padded them from the decreased command dice later in the game. So I would say I got value for money, gaining those 5 support points. However those were spent badly on the two lightly armoured AFV’s - next time I will be fielding AT and infantry guns, I think! Armour has not performed well in our games, which suits me fine as I prefer infantry battles anyway!

Sunday, January 19, 2025

Zalamea la Real 15 April 1810

Last week Brian North and I  played out a new scenario by Brian, the Battle of Zalamaea.  The following is extracted from Brian’s excellent background on the battle:

Zalamea is the second of the long series of duels between Ballesteros and elements of 5th Corps taking place in Extremadura and Huelva in 1810 and 1811, on the borders of Andalucia. As with the whole of this campaign, accounts are very sparse – and contradictory. Most modern sources (e.g. Esdaile and De Valle) follow Arteche and Lapène who say that Ballesteros tried to prevent the French crossing the Rio Tinto, while Priego, the modern official history, follows Toreno in saying Ballesteros was himself caught while in the process of crossing the river – a precursor of the disaster at Alba de Tormes to befall the Army of the Left the following year. Esdaile follows Lapène in saying that the Spanish attempted to stave off the French from the shelter of a ridge studded with rocky outcrops and difficult to access, which was to right of the town, presumably behind the river. This suggests the crossing of the Rio Tinto near Nerva – even today the only bridge in the vicinity – where there is a rocky ridge on the bank defended by the Spanish. Both Esdaile and De Valle, further state that Ballesteros consolidated his position, but whether that means entrenchments is unclear. There is no information about the course of the battle, or even when it started. De Valle, who gives most detail, says that Moriter raced ahead of the main body of the 5th Corps with 10th Hussars and ‘three regiments of infantry.’ He cites the Granada Gazette’s that the 34th Line, a battalion of 100th Line under Captain Lasalle and the 10th Hussars all distinguished themselves in the action. The only point clear is that Ballesteros was defeated and retreated.

We played this using the Over the Hills ruleset with my 1/72nd scale toy soldiers on a 6’ X 9’ table.

The scenario map - shaded areas are steep rocky terrain, slow-going and inaccessible to cavalry. The Spanish begin below the river while the French enter via Nerva.


1. The Battlefield

The Spanish begin in a strong position on high ground (left of picture) opposite the bridge crossing the Rio Tinto with a small force of irregulars in skirmish order on the French side of the bridge. The river is relatively shallow and fordable at numerous points but the French need to discover those fords on their arrival.


2. Spanish on the high ground

View from Nerva with the majority of the Spanish on the far bank.


3. Spanish irregulars on the French side of Rio Tinto


4. Cavalry in support


5. Ballesteros in two lines

Ballesteros arrays his two brigades (one under his immediate control and the other under the control of his lieutenant, Menacho). Menacho has his skirmishers (Covadonga) arrayed in front. The entire hill is very steep and rough, making movement slow and difficult and impassable to cavalry. In the end this hampered the attack more than the defence.


6. Ballesteros directs the defence

Ballesteros surrounded by his ADC’s and priests. A big challenge for the Spanish was for Ballesteros to successfully command the entire battle while at the same time command his own massive brigade.


7. Spanish right, second line


8. Spanish left second line

The entire second line begins in entrenchments, making it a powerful position for the Spanish to fall back upon. 


9. Overview


10. French debouch from Nerva

Mortier’s arrival is staggered and at the whim of the dice.  Fairly rapidly, however, the 10th Hussars arrive followed by the three battalions of the 34th Line, under the command of Rémond.


11. Hussars seek ford

The Hussars fan out to the south in search of a ford, with the 34th close behind.


12. Spanish dragoons charge the French host - sort of

The Hussars rapidly find two fords but with the 34th with only one battalion across Ballesteros sends his two small dragoon units (Lusitania and Sagunto) to slow down the crossing. Sagunto scatters the hussars away from the river, but then balks at charging the massed French columns. The Hussars quickly form up and countercharge the Spanish, now trapped on the French side of the river.


13. Cavalry clash on the banks of the Rio Tinto

The conclusion was foregone as Sagunto is crushed by the French countercharge.


14. Ballesteros redeploys his lines

Seeing the French approaching from the south, Ballesteros starts the long and slow process of redeploying to that side of the high ground (right). He sends his skirmish troops down to the foot of the hill (but within a safe distance to evade into the rocky terrain) while two of his batteries limber up and crawl across the hillside. Fortunately the long French approach has bought him a lot of time to redeploy.


15. Dembowski's brigade and the 3/100th arrive

With a delayed arrival, Dembowski finally arrives with the three battalions of the 88th Line, supported by the 3/100th. Mortier sends these to attack the Spanish front, hopefully pinning Ballesteros’ front line (under Menacho) while Rémond develops his attack on the Spanish right.


16. French columns pour across the fords

The rest of Rémond's command, the three battalions of the 40th Line, follow the 34th as they cross the Rio Tinto. However Rémond’s attack has been slowed somewhat by the sacrifice of Sagunto.


17. Lusitania retreat to threaten Dembowski

The remaining Spanish dragoons are ordered back to the bridge to impede Dembowski’s crossing. This they are able to successfully do in the narrow bit of bank between the bridge and the high ground, as Dembowski is forced to close up his columns to ward off the Spanish horse, making them nice juicy targets for Menacho’s  half battery of artillery.


18.View from the Spanish lines of Dembowski’s attack


19. Dembowski urges his columns forward


20. Hussars drive off the Spanish skirmish line as they cover Rémond's advance

The Spanish skirmishers evade back to the high ground while a half battery fires ineffectually at the dispersed French cavalry. However, with the Spanish now safely on the rocky ridge and the Lusitania Dragoons out of reach the Hussar’s role in this battle comes to a conclusion.


21. 2/88th advance against Navarra

Dembowski finally gets one of his battalions in action, but they are badly savaged by Navarra’s volleys and cannon fire.


22. Menacho begins to withdraw

Seeing Dembowski's attack bogged down, Menacho begins to withdraw to the entrenched positions vacated by some of Ballesteros' brigade, which have also started to withdraw.


23. Rémond's attack goes in

Meanwhile a first attack on the Spanish right by two battalions in column is crushed with the 2/34th routed and the 3/34th destroyed by devastating fire by the Spanish artillery and a stout defence by the entrenched Spanish. Ballesteros pulls the battered Princesa out of the line and brings in Oviedo.


24. Overview

In this overview, on the left you can see the Spanish lines thinning as they begin to pull their troops back in preparation for withdrawal (the scenario calls for the Spanish to hold until Turn 10 and then withdraw). The battery on this flank cannot be withdrawn because of the terrain. On the right bottom Ballesteros desperately tries to hold off the repeated French attacks in column, cycling in fresh troops in the lulls between attacks as he keeps the French from blocking his line of retreat.


25. 3/34th presses home a second attack

Oviedo is in turn pulled out of the line and Princesa, now rallied, steps back in to meet a second attack by the 3/40th. However the Spanish are very hard to budge!

This second attack is also driven off, this time with Rémond, leading from the front, falling in combat.

The Spanish line holds but Ballesteros, in the trenches with Princesa, takes a French musket ball and is laid low as well, with both sides now losing key commanders.


26. Menacho's battery firing canister

The battle comes to a rapid conclusion with two very large bangs. Menacho’s battery, abandoned as his battalion withdraws to the entrenched lines, drives off an attack by Dembowski with a devastating round of canister that shatters the ranks of the 2/88th.


27. French receive the same treatment on Spanish right

At the same time the 3/88th, marching to the support of Rémond’s attack on the Spanish right, marches directly in front of a Spanish battery and takes a similar pounding, thus breaking Dembowski’s brigade.


28. Battle end

With Dembowski’s brigade broken and Rémond’s wavering, the Spanish manage to hold their position, with the loss of only one unit, the Santiago Dragoons, albeit with the tragic loss of their commander as well. (Ballesteros will likely survive his wounds to fight again as Brian has more of these encounters in his to-do box.)

The French suffered the loss of two battalions broken, one routed and the loss of their most promising brigadier. However we decided the nut was too hard to crack, mostly because the terrain crippled any French attack that went in, so there will be a minor rewrite and then we will try this again.