| The scenario map showing the starting positions.The dark green areas are steep slopes unnegotiable by cavalry or artillery. The yellow line shows the area that still must be controlled by the Spanish at game's end. The French plan was to pin the Spanish at the front of the ridge with Musnier's force and break through and assault up the spurs on the Spanish right with Habert, Robert and Wathier's cavalry. The arrows show the French assault, pivoting Musnier back so that the French line became parallel to the road. The red arrow shows the strong Spanish advance down from the ridge later in the battle.
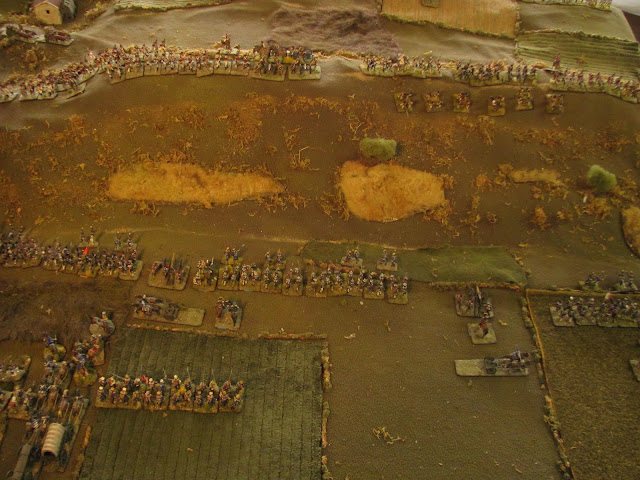
1. The battlefieldThe Spanish (left) in line along the ridge with Lacy's brigade and the Spanish horse between the ridge and the canal. Lazan's division forms a strong second line on the plateau. Facing them, bottom right is Habert's brigade and Wathier's horse with Musnier above.
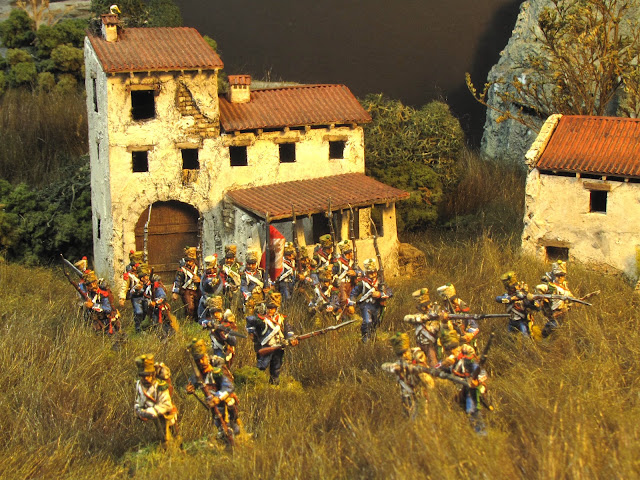
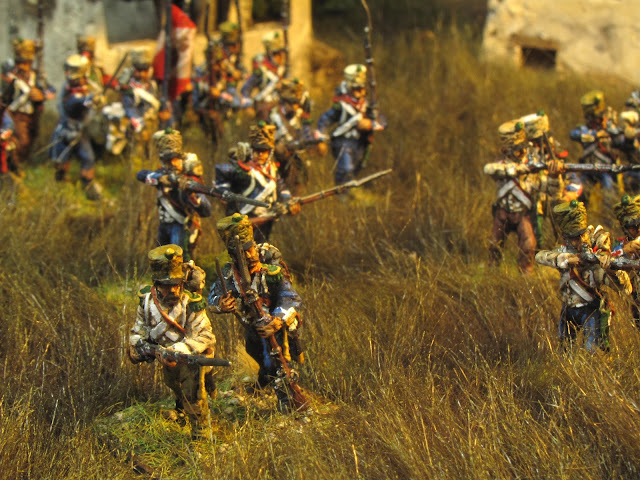
2. French right
3. Spanish left on ridgeRoca's 2nd Brigade, a mix of recently raised Spanish regiments.
4. French leftThe French horse are massed in columns of squadrons behind Habert's brigade.
5. Spanish cannon on the ridgeThe Spanish have two batteries in commanding positions on the forward ridge, this one in the interval between Roca's 2nd and 1st brigades.
6. Spanish refuse right wingThe Spanish get things rolling immediately, pivoting Lacy's Vanguard troops out of the valley towards the higher ground to the rear while O'Donoju's Cazadores Olivenza, supported by Santiago, ride to the front to confront the French.
7. Poles driven offSuchet orders Habert into the attack, hoping for a quick breakthrough on the French left. Habert sends in his veteran Vistula/1 in column to crush the retreating Almeria. But the Spanish stand firm and the Poles instead are thrown back with heavy losses. This was the first of many upsets for the cocky French.
8. Blake initiates feint against French rightBlake orders Roca's second brigade down off the ridge in a feint (bottom left), hoping to tie down Musnier's division. But Musnier has begun his slow retreat towards the river (upper left), covering the French right while Suchet focusses on breaking the Spanish early on his left.
9. Roca's 2nd Brigade moves down the ridge while Pirez arrives in supportBlake sends Pirez to take over Roca's 2nd Brigade positions at the top of the ridge.
10. French cannon in actionMusnier reunites his two half batteries into a single battery and starts to shell the Saboya battalions making up Roca"s right.
11. 5th Legere driven offMeanwhile Habert has been taking a pounding from the Spanish artillery. In danger of Habert breaking, Suchet sends over his reserve, the 5th Legere and 64th Line, to bolster Habert. Habert immediately squanders the 5th Legere in a head on assault of the Spanish battery, hoping to put them out of action. But the Spanish are ready and send the French reeling back with a load of canister. The Spanish line holds and Habert will have much to answer for to Suchet when this battle is over.
12. Cavalry clashLacy manages to get his vanguard back to safety on the heights at the east end of the ridge. Wathier's cavalry, still trying to break through on the French left, engage in a pitched battle,that leaves both sides falling back, with the Spanish light horse amazingly resisting the crushing charge of the cuirassiers!
13. French left flank overviewIn this overview lower left the Spanish cavalry still manage to thwart Wathier's breakthrough. Above them, upper left, Lacy has withdrawn to the heights while Menacha (center top) now moves to face off against Habert. The narrow accesses to the ridge via the spurs limits the use of the cavalry in support of Habert while on the upper right Musnier can be seen pulling his line back to cover the French flank.
14. Menacha takes over from LacyLacy's Vanguard, battered but proud, withdraws to the rear while Menacha takes over the front line. Blake moves Lazan's battery forward to support this flank.
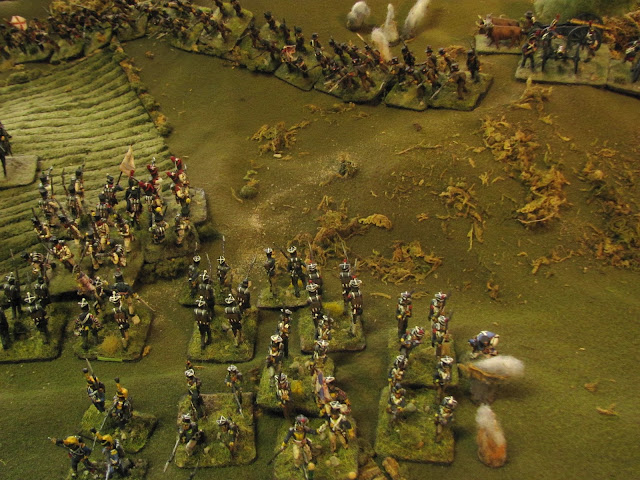
15. A lot of Spanish on the high ground!Blake pushes Hernandez' brigade to join Pirez in massing at the front of the ridge, still believing that the French attack will fall towards the front. With the Spanish feint down the ridge and the massing towards the front, this plays into Suchet's plan of a flanking move perfectly.
16. The cavalry clash a second timeThe cavalry clash a second time, and this time both the Spanish and cuirassiers break, fleeing the battlefield. Wathier manages to rally his 4me Hussards, but with their 'big brothers' routed, the Hussards are very fragile.
17. Cuirassiers rout
18. Roca calls back the 2nd BrigadeWith Musnier clearly in retreat and Kliski's squadron of Vistula lancers roaming near by, Roca calls off the feint on his far left and the 2nd Brigade retreats to the safety of the ridge.
19. OverviewLooking down the length of the ridge the 2nd brigade can be seen foreground retreating up the ridge while Pirez' and Hernandez' brigades and Roca's Saboya battalions mass on the forward ridge. Top left the cuirassiers rout as Musnier's line is thinned by the departure of his cannon, now sent up the French left flank to support the main event. Verges' brigade as well has moved off leaving only Fabre facing off against the masses of Spanish on the ridge.
20. Verges takes the leadWith Habert badly mauled, Verges' brigade takes over the lead on the French left. The two French batteries are limbered up and race over to this flank in support. But Suchet is really just playing for time, not wanting to show his hand on the left too early, as he waits for the arrival of Robert's massive brigade numbering 3000 reinforcements.
21. Overview French leftLower right Fabre's brigade continues to drift left, now spread out in open order to try and blunt the relentless toll being wreaked on them by the Spanish cannon while above to the left Verges' brigade takes over the advance from Habert. Above them on the spur a lone Spanish battery begins to feel exposed as the enemy draws closer, but mostly Blake has his troops where he wants them, well-emplaced on the high ground. Top left the 4me Hussards threaten Lacy (once again!) who is still perilously exposed on the lower reaches of the spurs.
22. Almeria again on the front lineLacy's Almeria regiment once again finds itself on the front lines as the French cavalry appear at the foot of the ridge.
22. Verges brigade broken!With Lacy's Almeria/1 forced into square by the 4me Hussards and nothing but a thin skirmish line of Valencian Cazadores in front, Musnier has Verges throw his battalions into the attack. But rather than evading, in yet another heroic stand the cazadores stand fast and drive off their attackers before they can hit the square! Lacy's vanguard once again beats the odds and holds the line and the losses are enough to break Verges' brigade, who are forced to withdraw.
23. Robert arrives in support of HabertHowever at this moment Robert's long-awaited six battalions of fresh troops march onto the battlefield. Suchet orders Robert up the French left towards the rear of the Spanish position to take over the attack. Musnier's batteries unlimber and their cannon go into action against Menacha (top right).
24. Spanish advanceWith Robert's arrival and only Fabre's brigade now holding the French right, Blake finally orders his troops that were massed on the ridge into the attack. Eleven Spanish battalions, almost 9,0000 men march down from the ridge towards the enemy.
24. Kliski's lancers disrupts Spanish advance on French rightBut their advance is slowed by the small detachment of Polish cavalry on this flank. Caught out of square, Kliski's lancers rout the Tiradores de Cariñena but a second manages to form square just in time.
25. Tiradores de Cariñena routed
26. Overview of Spanish advanceOn the right the bulk of the Spanish army marches on Fabre, leaving only their guns along with Menacha's brigade (reinforced by a battalion detached from Roca's Saboya) and Lacy's Vanguard guarding the spurs (upper left). But the Spanish advance is slow and cumbersome as Fabre falls back (lower left) and the rest of the French push up the Spanish right (off frame left). The Spanish attack has played directly into Suchet's plans, which was to have the Spanish committed so far forward that Suchet's army could pivot on Musinier's left and punch through Lacy at the rear. In this manner they would break onto the high ground, essentially cutting off the Spanish from their retreat.
27. Robert and Habert march to assault the Spanish right flankLacy's Almeria and Valencian Cazadores watch nervously as yet again the force of the French attack threatens to fall on them. Belatedly Blake realizes that Suchet is shifting everything over to the Spanish rear.
28. The gathering stormWith the French Hussards keeping some of the Spanish tied up in squares, Robert's battalions march down the Spanish right. A storm is gathering that threatens to overwhelm the thin Spanish line. But another storm threatens as the skies darken on the horizon...
29. Vistula 2/2 routed by Spanish musket fire, storm breaksSome telling musket routs Habert's Poles. Broken but then rallied, this goes to show how fragile Habert's brigade is.
30. Robert with Habert following form up in columns to assault up the back two spursAt this point a massive tempest sweeps over the battlefield, stopping all advance and cannon and musket fire as the opposing lines disappear from sight. The tempest could not have come at a worse time for the French. Suchet had got Robert into position to assault a weakened Lacy while his cannon were close enough to be dealing some serious grief to Menacha. But all the French can do now is weather the storm, with Robert and Habert forming up into columns of division for the assault once the skies clear. Suchet sends an ADC to Musnier to have him fall back and guard the rear of the French but the ADC becomes lost in the pounding rain and is unable to find the French divisional commander!
31. Blake pulls Lacy back further on ridgeThe Spanish are able to use the lull in the fighting more effectively. Lacy and Menacha are pulled further back up the ridge and their lines tidied up.
31. OverviewThe Spanish lines (top) straddle the spurs, with rough ground either side that impacts any French assault. Robert, with Habert in support, form up in columns (left) in preparation for the assault. At the same time Saboya/1, attached to Menacha, is marched over to take up a position behind Almeria providing the most vulnerable part of the Spanish defence a second line. Top centre/right Menacha has also pulled back, and is now out of close range of the French artillery.
32. Musnier pulls Fabre backMusnier finally receives Suchet's order to withdraw further, to a line between the ridge and the canal, putting more distance between his line and the advancing Spanish. But the Spanish continue to pound Fabre's line with cannon fire from the ridge and casualties mount. Can they hold long enough for Robert to achieve his breakthrough?

33. The Spanish continue to press forward relentlessly on the French right
34. And the Spanish cannons pound Fabre from the ridge
35. First French assault goes in against Spanish rightRobert's first assault finally goes in, with two battalions in columns of division crashing into Almeria/1 simultaneously. Behind Almeria/1 the Spanish cannon is still limbered and the French are confident that the Spanish will be driven back and the line broken as more of Robert's columns file up in a second wave.
36. And is repulsed!But again Almeria/1 defies the odds, repulsing the attack with one French battalion broken and the second routed (Alan rolls two 1's on a pair of d10's - snake eyes!!)
37. Second French wave hits Spanish rightUndaunted, Robert's second wave goes in. Lacy's brigade, finally broken by the last assault despite standing firm, begins to withdraw but Saboya/1 (bottom) is there to oppose the two fresh French battalions hitting them in column. Above these a third of Robert's battalions in open order attack the Spanish battery, now unlimbered and ready for action (behind the cannon Almeria 1 and 2 withdraw while Lacy's Cazadores fall back behind Saboya).
38. And is repulsed a second time!The French battalion assaulting the gun wades through a hail of canister but, badly mauled, is driven off and routed by the gun teams in close combat. Two more French battalions are broken by Saboya's line, which stands firm (Alan's die rolling was formidable, mine pathetic!) and in a matter of minutes three of Robert's battalions are broken and two routed, gutting any hope of a French victory.
39. Battle overThis overview shows the battle at game's end. It would now be for the remaining French to withdraw back along the road while Fabre's line (lower right, close to being broken, with only a handful of fatigue hits remaining), the French guns and the cavalry hold back the mass of Spanish on their right that threatens to cut off the retreat. Despite everything going to plan for Suchet - the thinning of the Spanish rear and drawing the enemy down from the ridge at the front - nothing went right as far as luck for the French. Alan, realizing too late that the weight of my attack was going to fall on the rear of his position, still did a masterful job of juggling the few resources he had on that flank to his best advantage and, of course, the storm's arrival time certainly played into the hands of the defender. The Spanish cavalry performed heroically, holding back the massive wave of French cuirassiers long enough to blunt the Spanish attack up the valley and, of course, Lacy's vanguard, at the forefront of the fighting throughout, won the day for the Spanish. In the end, as always, luck was the prevailing factor on the battlefield and this time it was all with the Spanish, who achieved a resounding victory. | 





.jpg)


