We played a small pick up game this
weekend, fielding my much-loved 2 pdr. portees, and three newly
painted German panzers in a non-historical fictional scenario set
somewhere in the chaos following the battle at Gazala, as the Allied
forces fell back towards Egypt.
The game was played in 1/72 scale on an 8' X 5' table using Battlefront WWII rules. In this scenario, a small Australian
blocking force is sent to occupy the ruins of a desert fort at a
crucial road junction. Armoured help is on the way, but will it be
enough to stop the German column in hot pursuit of the fleeing
forces? Short answer … no.
 1. The Attackers
The German
force consists of two motorized infantry companies (one short of
transport and partially entering battle as tank riders), with an
Sdkfz. 10AA halftrack and a towed 5cm PaK 38 attached.
 2. The
Defenders
2. The
Defenders
The Australian force is composed of a
motor company with an attached Vickers platoon and two 2 pdr.
portees.
Reinforcements, to arrive at staggered
times, consist of a recce platoon (2 Humber Mk II's) and a squadron
of Valentines.
 3. Australians take up positions
The Australians arrive on the first
turn, and by the second have dismounted from their transport and
taken up positions in the fort and a nearby wadi as the trucks
withdraw to shelter behind the fort. In the background can be seen
the armoured car platoon which is picking its way down the rough road
from the escarpment, where it had arrived on Turn 2.
 4.
Germans advance
4.
Germans advance
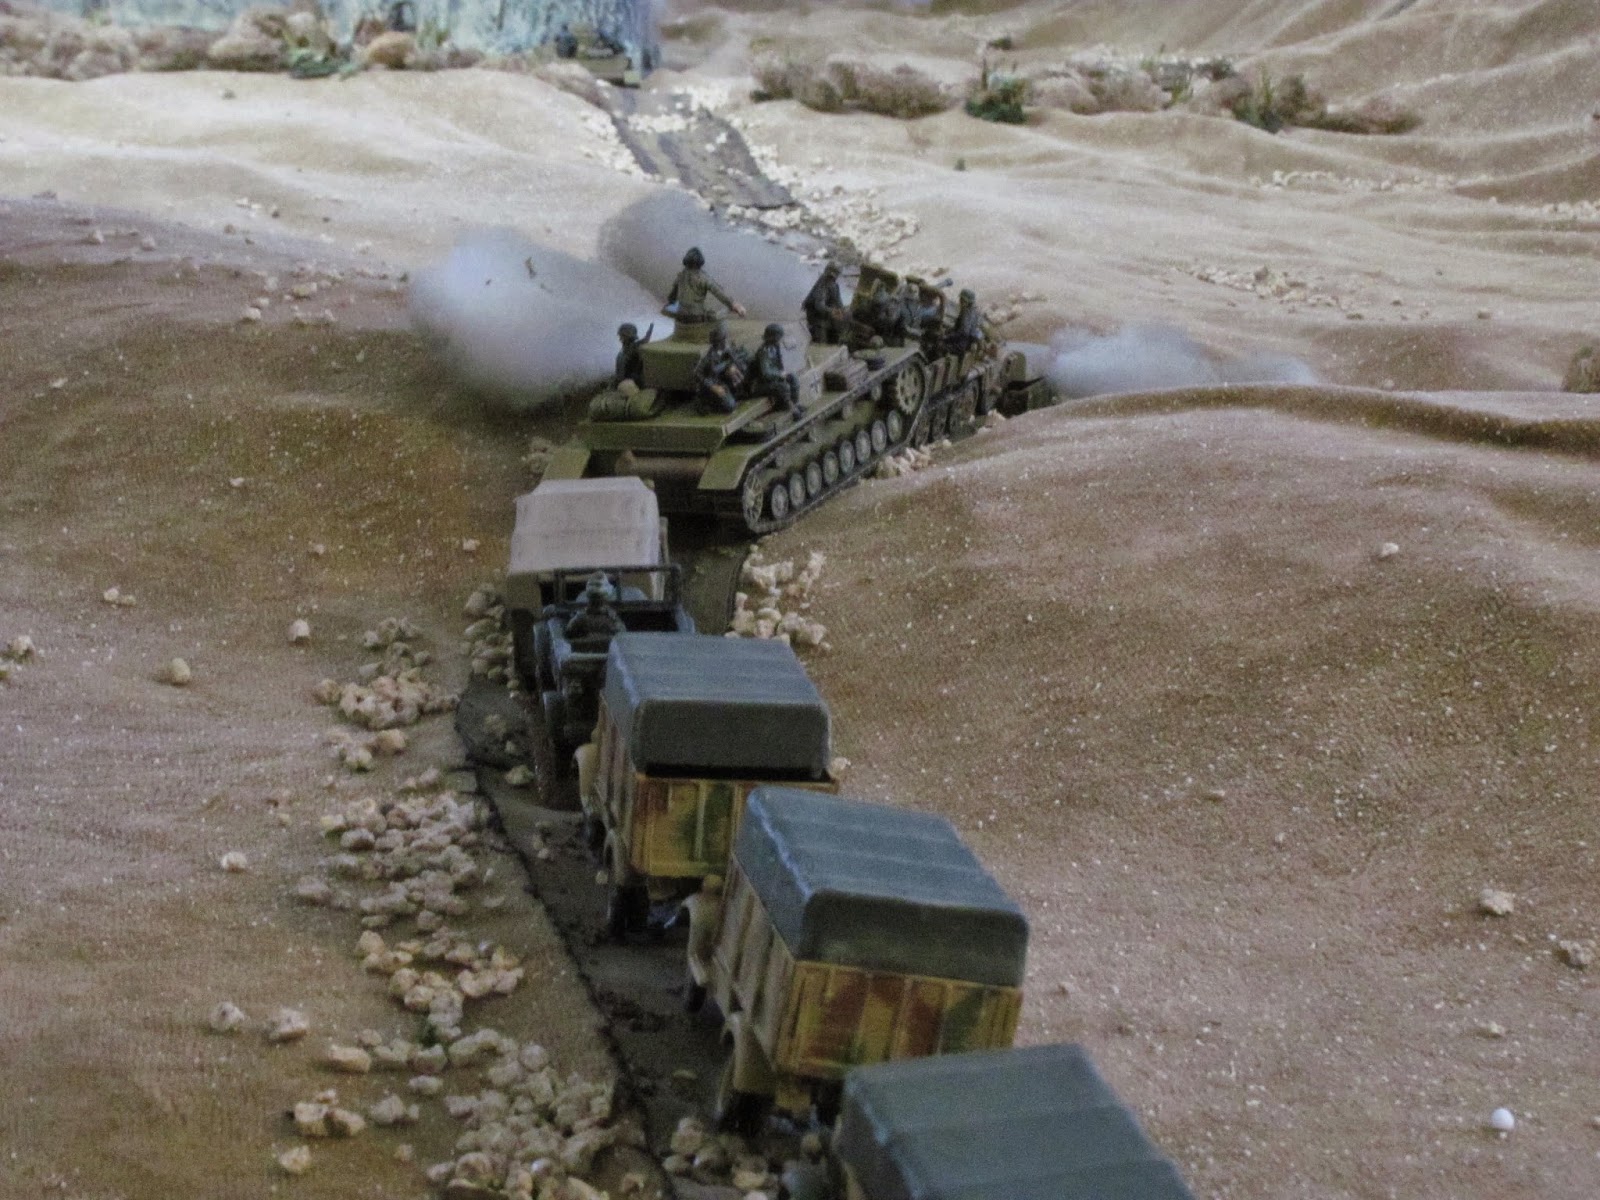
The Germans arrive from the west in convoy along
the road below the escarpment. As they crest a low hill they see the
fort further down the road ,as well as spotting the enemy armoured
cars descending the ridge.
 5. Recce arrive at fort
The
Humbers run the gauntlet down to the fort, taking some sporadic fire
from the German tanks but arriving safely. They find the Australians
preparing their positions in the fort, with the portees holding fire
until the approaching German armour comes within range.
 6.
Germans spread out to enter first wadi
6.
Germans spread out to enter first wadi
With the arrival of the
armoured cars, the attackers suspect the fort is defended. The lead
tank rolls forward, inviting enemy fire while the remainder of the
column breaks from the road, spreading out to occupy a wadi that
spans the road at right angles. In the foreground can be seen the
Australian infantry, hunkered down in the smaller wadi close to the
fort and still undetected.
 7. Australians engage lead
panzer
7. Australians engage lead
panzer
The portees open fire on the lead Panzer IV, suppressing it
but doing no real damage. But the 2 pdrs.' locations are now
marked…
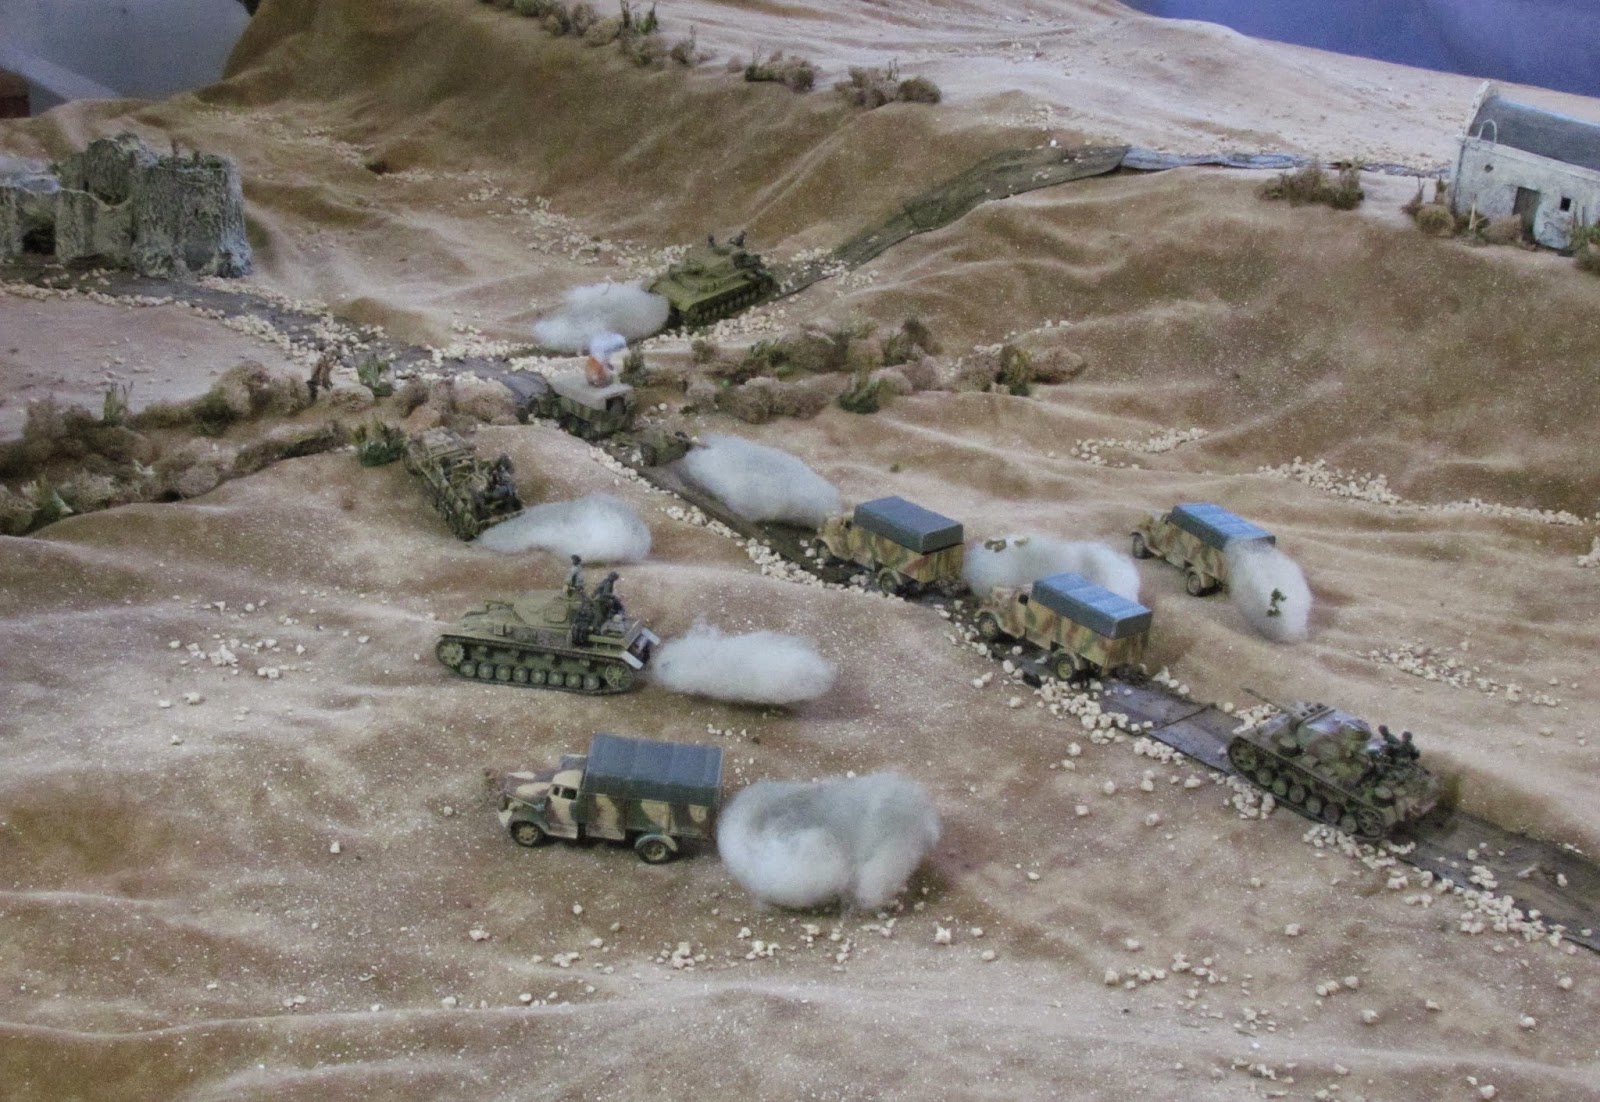 8. View of attack from German side
The German
vehicles roll off the road and approach the wadi. Their AT gun takes
some mortar fire where the road crosses the wadi, but soon recovers,
with the crew unlimbering and hand hauling the gun into the wadi
where it emplaces. In the background the lead Panzer IV withdraws
from the fight, reversing towards the ridge.
 9. View from
German commanders' position
9. View from
German commanders' position
From his location on the crest of a
low hill, the German battalion commander watches his troops move up
the road towards the first wadi. The enemy portees positions' as they
fire are marked by the commander, who passes on the information to
the German 80mm mortars now emplaced behind the hill and ready to
fire. Their first shoot knocks out one of the two portees.
 10.
Attackers enter wadi
10.
Attackers enter wadi
The Germans enter the wadi, with troops
dismounting from their transport and taking up positions.
 11.
Cavalry arrive
11.
Cavalry arrive
The British tanks finally arrive, at a time and
place randomly generated. But their arrival is delayed considerably
and their entry point ends up being at the corner of the battlefield
furthest from the fight, both factors which will prove crucial to the
outcome.
 12. Waiting for the storm
Down one portee, the
Australians nervously hunker down in their positions, desperately
trying to improve them as best as possible before the enemy attacks.
The armoured cars and remaining portee trade long distance shots with
two of the German tanks, which are now making their way up the
escarpment road.
 13. German tanks crest the ridge
The
German commander, having seen the British AC's descend from the
escarpment and knowing enemy armour is prowling in the area, worries
that there may be more and dispatches two of his tanks up to the top
of the escarpment. A hill blocks the sight of the approaching
Valentines, although their dust clouds can be seen as they
approach.
 14. Stuka!
Before the Valentines even come
within sight of the enemy a Stuka sweeps out of nowhere (a 10% chance
for random air support per turn for each side), catching the tanks in
close formation and knocking out one while disordering and
suppressing two others.
 15. Attack rolls in
While this
drama unfolds on the ridge, the German commander sends in his attack.
Under cover of smoke the troops and tank cover the open ground
between their wadi and the fort, concentrating first on ousting the
defenders from the wadi on the Australians' right flank.
 16.
Valentines close in
16.
Valentines close in
Leaving one tank burning behind the hill, the
remaining tanks attempt to close the distance between themselves and
the enemy armour in order to get within effective range of their 2
pdrs.
 17. Humber KO'd
The Germans take some casualties, but
manage to oust most of the defenders from their positions in the
wadi. One of the Humbers falls to fire from the Pz. IV.
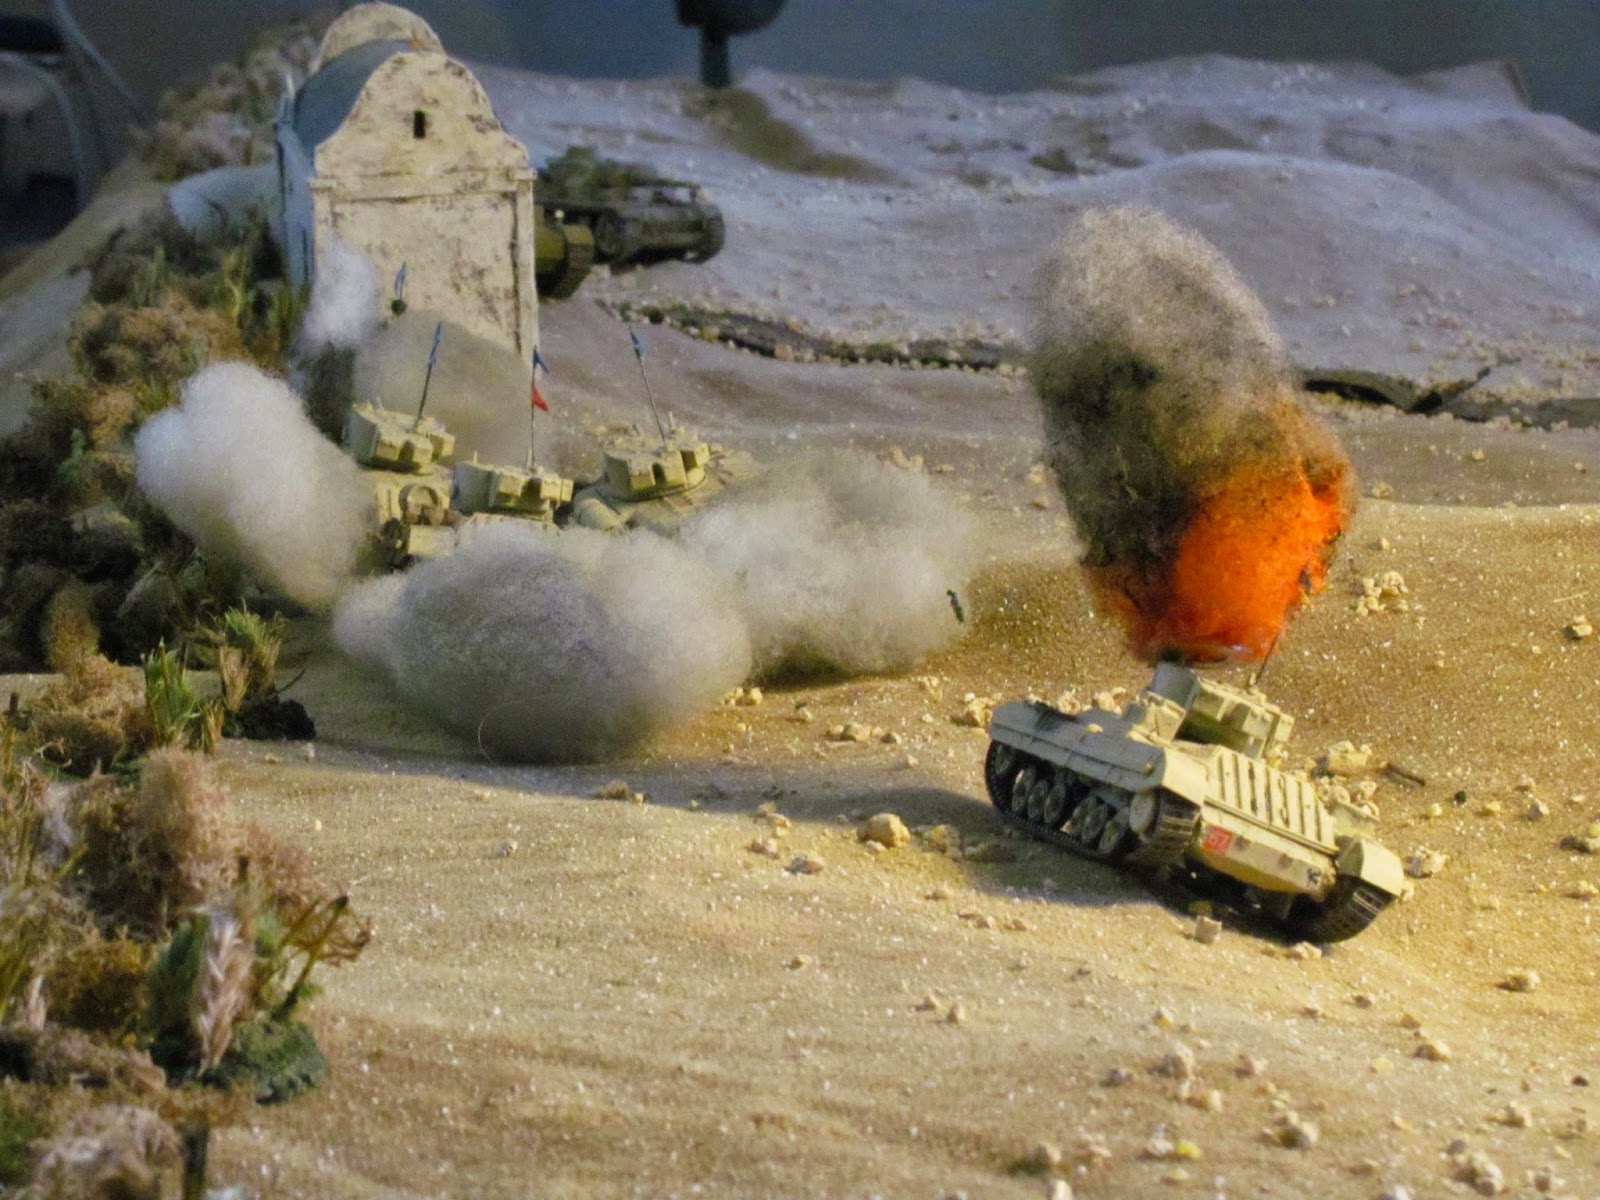
 18. A
second Valentine destroyed
18. A
second Valentine destroyed
With time running out and in a
desperate attempt at close assault with his tanks, the command
Valentine is knocked out and a second driven back. Shortly afterwards a
third is destroyed and this part of the battle is over, with the two
British tanks left withdrawing. With the German tanks prepared and in
position at the top of the ridge when the enemy arrived, and a lot of
ground to cover in order to close, the British armour had little
chance of success.
 19. Fort besieged
Things are going no
better for the Allies below the escarpment. The wadi falls to the
enemy completely, and the Germans establish a fire base here as a
second attack goes in (background) under cover of more smoke. The
walls of the fort are breached in close combat and some the Germans
now enter the fort.
 20. Cat among the pigeons
The Panzer IV
rolls around into the unwalled back of the fort, knocks out a second
Humber during a failed and Quixotic close assault and is in among an
enemy with no capacity left to defend itself. The Australian
commander, with less than half his troops left, a tank in his
backyard, enemy soldiers within the walls and all help of succour
brewed up on the escarpment, tosses in the towel and surrenders.
Great photos. I love the overall look. Thanks.
ReplyDeleteThanks, Vexilla! Glad you enjoyed it.
ReplyDeleteGreat looking scenery and kit Bill, nice one
ReplyDeleteThanks, Al. I was trying to get some of the feel of the open-ended chaotic nature of a lot of the desert warfare.
ReplyDelete