We
played Nigel Perry's excellent scenario, Second Time Lucky, written
for the Battlefront WWII rule set and based on the German paratroop
attack on the isle of Leros on November 12th, 1943. An
earlier attempt at taking the island had ended in fiasco, but later
in the day German Fallschirmjaegers were dropped on the island and
managed to achieve enough success that the invasion of the island
went ahead and was eventually successful.
The
scenario is one of two based on the parachute landings. We hope to
play the second scenario in the future. The dynamics of the game were
interesting as the Germans had specific objectives to seize with full
capacity to operate as they saw fit, but tended to be outnumbered by
the defenders. However they were able to move relatively unimpeded
from their drop zone while the British had serious restrictions
placed on their ability to respond. We opted for shortening the game
to 12 turns, as suggested, and this seemed to work well as it reduced
the advantages the British had if the game had gone on longer. It was
played in 20mm on a 4.5' X 7.5' board.
 |
| Map of the battlefield showing deployment of British forces and German drop zone. Cos. A, B and D as well as the HQ company and attachments (mortars, carrier platoon and FOO) were committed to this scenario. The antitank platoon and one stand of Bofors AA, as well as the two commando units (SBS and LRDG) and the late-arriving reinforcing company of infantry were also committed as optional reserves to be split between the two scenarios as seen fit by the British commander. |

The Battlefield
The British set up first and then the Germans chose their drop zone. All units were placed on table as aerial recon had previously pinpointed the placement of the British positions. The four objecives in the battle were: Germano Hill (just out of the picture at top), Quaranta (just off picture to right top), the coastal battery on Raahi Ridge (center of picture) and the peak of Mt. Meraviglia (rocky outcropping center bottom).
FOO on Mt. Meraviglia
The
British FOO on the peak of Mt. Meraviglia had an ideal view of
virtually all the battlefield. He could spot down both sides of Raahi
Ridge with a clear view of Germano Hill, and the villages of
Constantino and Quaranta. The British mortars were placed nearby with
a similar line of sight.

Carrier platoon on the mountain
The
carrier platooon and B Company were positioned on the spur running
west from the peak, but not dug in, giving them free reign to advance
once their units were released.

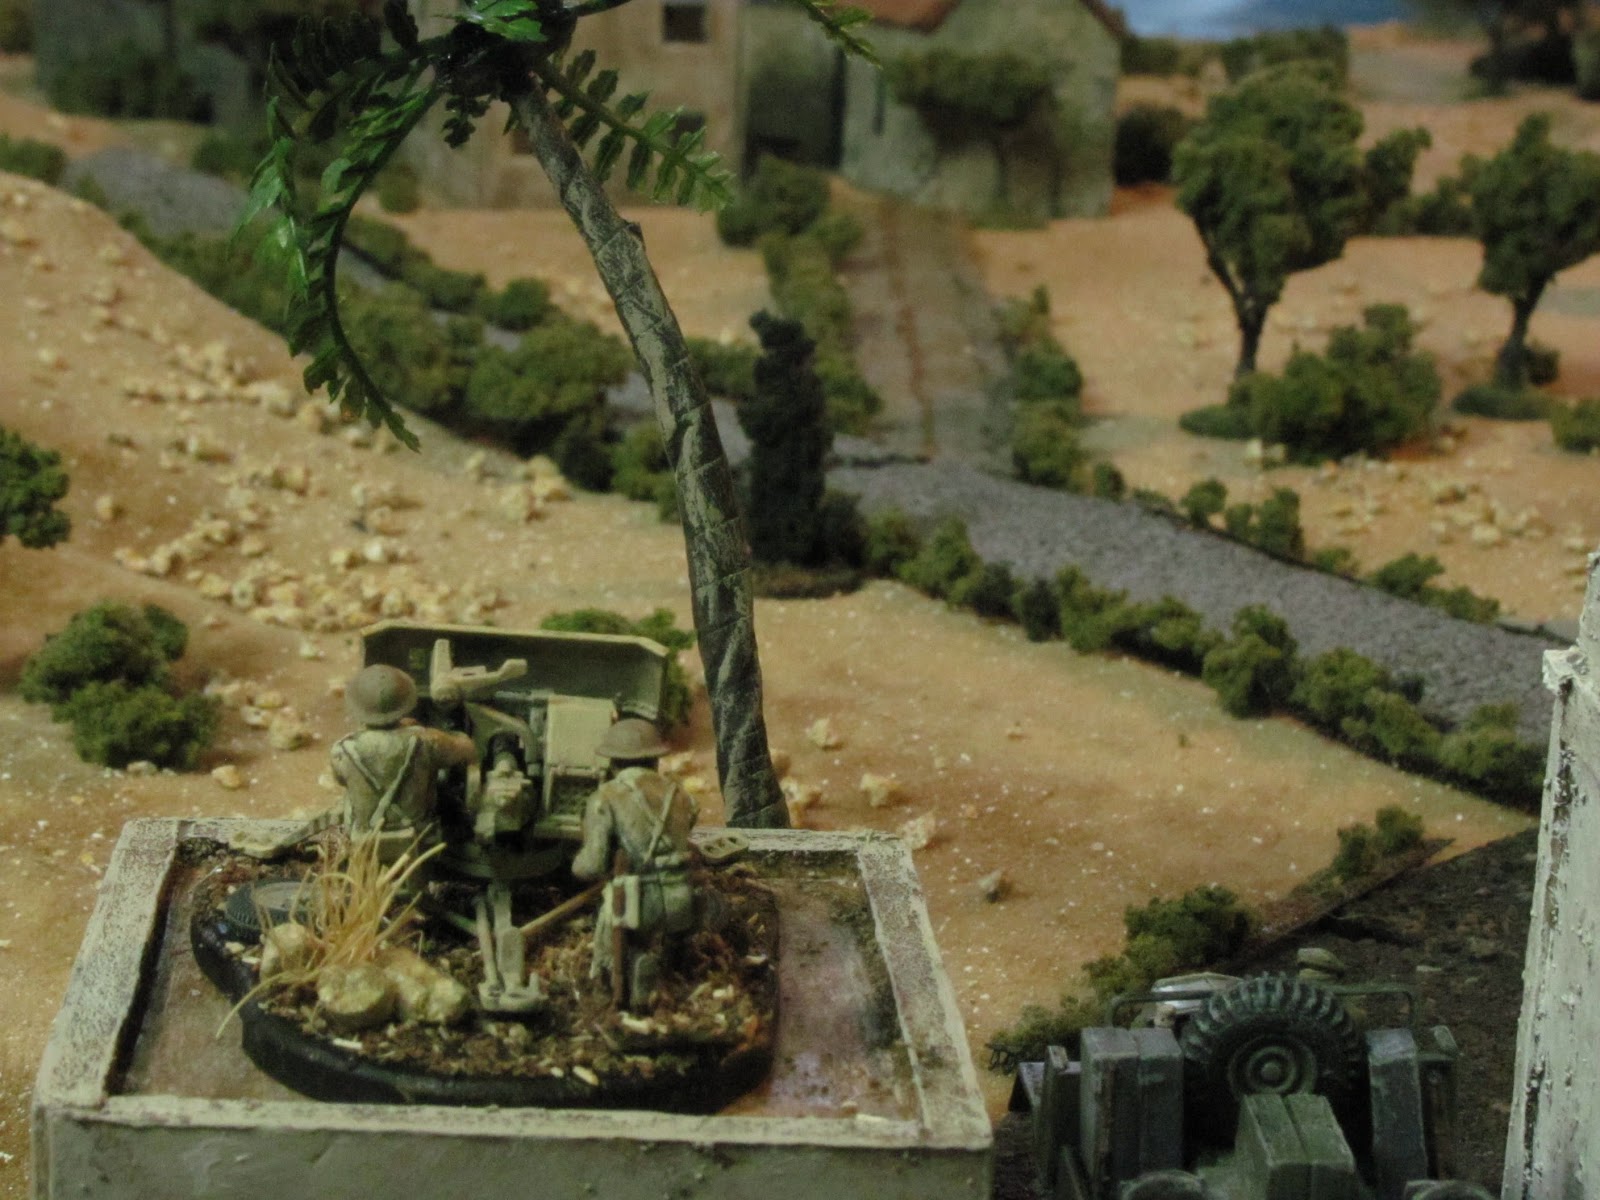
The coastal battery on Raahi Ridge
On
the high ground on Raahi Ridge was positioned the coastal battery
which became the focus of the most furious fighting during the
battle.

View from Germano Hill looking south towards Mt. Meraviglia
D
Company, reinforced by one of the two 2 pdrs. began dug in around
Germano Hill and in the forest next to the sea. The British commander
opted for a “prepared defence” which meant the unit could start
dug in but could not leave its deployment zone. At least two of the
platoons (six units) had to begin the battle within 3 inches and
facing the sea as their primary role was to repel a seaborne
invasion.

A Company dug in along the east shore
Bolstered
by AA assets, A Company also chose a “prepared defence” which
allowed them to dig in. Like D Comapny, their primary role was to
repel any seaborne invasion as well as defend Quadrata. The British
commander chose the “prepared defence” as there was little cover
here and he was afraid they would be devestated by any Stuka and
mortar attacks. As it turned out the German commander chose to ignore
this objective, which meant A Company stayed out of the fray,
resorting to the occasional pot shot at any Germans that ventured
over the ridge line but unable to move from their deployment zone and
help in repelling the German attackers – a crucial and frutrating
situation!
2 pdr. emplaced in Quadrata
With
a view over to Constantino this gun never fired a shot in the battle,
waiting for an attack that never came.

British commandos east of Mt. Meraviglia summit
The
only units that began the battle released and able to operate freely
were two platoons of British commandos, one SBS and the other LRDG,
which began along the road running east of Mt. Meraviglia's summit.

The Drop
The
Germans chose a drop zone just south of Constantino. The drop was
remarkably tight and casualties not too severe – about two sections
for each of the three companies. Sorting themselves out 1 Kp.
immediately pushed to secure the undefended Raahi Ridge coastal
battery (top right) while 2 and 3 Kps. moved south towards Germano
Hill (beyond Constatino to the left).

Strafing run
The
two commando units, eagerly pushing down the road to beat the Germans to the Raahi Ridge objective are caught in the open by a Stuka and
strafed. The attack had the effect of driving the commandos off the
road into steep rocky terrain and slowing their advance to the
battery. The Luftwaffe was very active throughout the battle.

B Company comes down from the mountain
Remarkably
the British commander was able to release D and A Companies on the
second turn and B Company on the third (a 1 or 2 in 10 chance). A and
D are confined to their deployment areas but B can move freely and
quickly advances towards the woods below and west of Raahi Ridge to
ouftlank the German 1 Kp. already on the objective.

German Fallschirmjaeger move through Constantino
The
German 2 and 3 Kps. quickly move through the undefended village of
Constantino, setting up their fire base in the houses as other units
move around the flank in prepation for the assault on the Germano
Hill defences.

B Company attacks through woods
B
Company quickly presses home its attack through the woods below Raahi
Ridge, driving out the German paras by attacking across the stream
and into their flank.

Commandos move into the woods on east side of Raahi Ridge
On
the other side of the ridge the commandos enter into the woods below
the battery, but not without casualties as they cross the open ground
and take enfilading fire from the Fallschirmjaeger now well emplaced
on Raahi Ridge. A Company welcomes their arrival but explains
apologetically that they have standing orders and cannot help in the
assault, as much as they would like to. But they will see what they
can do in keeping the Germans' heads down with supporting fire.

Mid-battle Overview
At
the top of the picture can be seen 2 and 3 Kps. pressing home the
attack on Germano Hill and the nearby woods. After taking some intial
casualties they quickly clear out the British positions and seize this
objective.
In
the middle is Raahi ridge with its coastal battery. The Germans are
in firm possesion of this but are taking a beating in the woods as B
Company (left) attacks from the flank.
Off
picture to the bottom are the HQ units, mortars, carrier platoon and
FOO on Mt. Meraviglia, all still confused as to what is exactly
happening and unable to enter the fray. Both the brigade and
battalion commander are present in this group, which may explain the
lack of coherent leadership.
German paras clear Germano Hill
The
last defenders on Germano Hill are wiped out and as a couple of
sections clear out the remainder of the British in the forest the
rest of 2 and 3 Kps. move to support embattled 1 Kp. on Raahi Ridge.

Germans pushed back
Under
attack both from C Company to the west and the Commandos to the east,
the remnanats of 1 Kp. are slowly pushed back off the ridge in bitter
hand to hand fighting.

C Company cut off
However,
just as 1 Kp. was breaking and fleeing from Raahi Ridge, the German 2
and 3 Kps. fight their way into the woods from the north, cutting off
the rest of C Company from joining the Commandos above and quickly
wiping out the remainder of the company.

Commandos dig in on objective
With
the enemy evicted the Commandos, reduced to platoon strength, dig in
on the objective in anticipation of the next German attack.

Germans stonked as they try to retake the ridge
Just
as the German Fallschirmjaeger emerge from the woods under cover of
smoke to attack the Commando positions, the British brass on the hill
finally wake up, shake the ground hogs out of their mortar tubes and
make contact with the 25 pdr. battery. A devestating barrage catches
the Germans in the open and thins out their numbers, but some units
still manage to make it up the hill and seize a toe hold in the rocky
area at the summit of the ridge.

Mortars and 25 pdrs. finally go into action
Taking
advantage of their excellent observation position on the top of the
mountain the British 3” mortars and FOO lay down a wall of fire on
the attacking Germans.

Carrier platoon moves to reinforce Commandos
As the battalion commander looks on the
carrier platoon, now also released, quickly moves down the mountain
to suppport the embattled Commando platoon, reduced to two sections
and slugging it out on Raahi Ridge.

Stuka attack on mortars
With
the mortars in action the Stukas now have a new target and dive bomb
their positions.

Battle
at close quarters
The
fight for the battery devolves into a blood bath. The Commandos
defend badly and the Germans drive them off, getting a significant
foothold on the ridge before the carrier troops arrive, leaving the
British hanging on at one end and the Germans the other. A seesaw
battle breaks out with both sides pummelling each other with mortar
and artillery stonks in a nasty game of King of the Hill, with even
the British battalion commander thrown into the action.

A Company strafed
Throughout
the battle Stuka attacks continue but with little result outside of a
nuisance factor. The British AA does a stellar job of diminishing the
Stukas' effectiveness, other than on this occasion where the Stuka
brasses up A Company at the foot of Raahi Ridge in a strafing run,
knocking out two sections of infantry in the process. Throughout the
battle A Company has had to sit on its hands and watch the battle
raging just to the west of them, but their “prepared defence”
orders keep them from exiting their deployment zone.

Fallschirmjaeger 3 Kp. in full retreat
The
strongest German company, 3 Kp., breaks and runs and never comes
back, leaving about two platoons (the remnants of the other two
companies) of Germans to slug it out with the British carrier
platoon.

Final attempt by British to retake the objective
By
the gritty end only two stands from either side are left on the
ridge. It all came down to a close assault by the British (including
the last Commando, now returned after running away - er - strategic withdrawal) to drive off the
Germans, but the German defenders win the close assault. At the
end three stands were left around the bunker, two Germans and the
British carrier commander, but with none in possession of the objective.

Battle over - or just begun?
The
battle ended with the Germans holding one objective with a second in
dispute. This was close to the historical outcome with Germano Hill
and Raahi Ridge falling to the Germans after bitter fighting.
Although the final chapter won't be written until the second scenario
is played, at the moment the Germans hold the advantage in victory
conditions. Ironically a reinforcing company committed to this
scenario (the British commander had to decide what reserves would be
allocated to either scenario) finally was released and entered the
south end of the battlefield with two turns to go. Racing down the
mountain road, lead elements of this company were within a move of
reaching the battery objective, but the game came to its conclusion
before they coud get there! C'est la guerre.