Alan, Phong and I dipped back into the rich treasure trove of WWII scenarios again after playing a couple of smaller games to familiarize Alan with the Battlefront WWII rules. We thought we might move through our scenarios chronologically, starting with the German invasion of Crete in 1941, moving on to North Africa, then Sicily, fight our way up the boot of Italy and conclude with the western front scenarios. At least that is the plan...
In this game Alan and Phong took the Germans while I played the New Zealand defence.
I wrote the Maleme scenario quite a few years ago, based on the Fallschirmjaegar attack on the airfield and attempt to take Point 107, the hill nearby that dominates the airfield. The Maleme assault group was pulled together from several battalions, and was badly scattered and mauled on landing. The defenders, New Zealand's 22nd Battalion, weapon poor as much of their equipment had been left behind during the evacuation of Greece, nevertheless were aware of the impending attack and well dug in, protected behind reams of barbed wire.
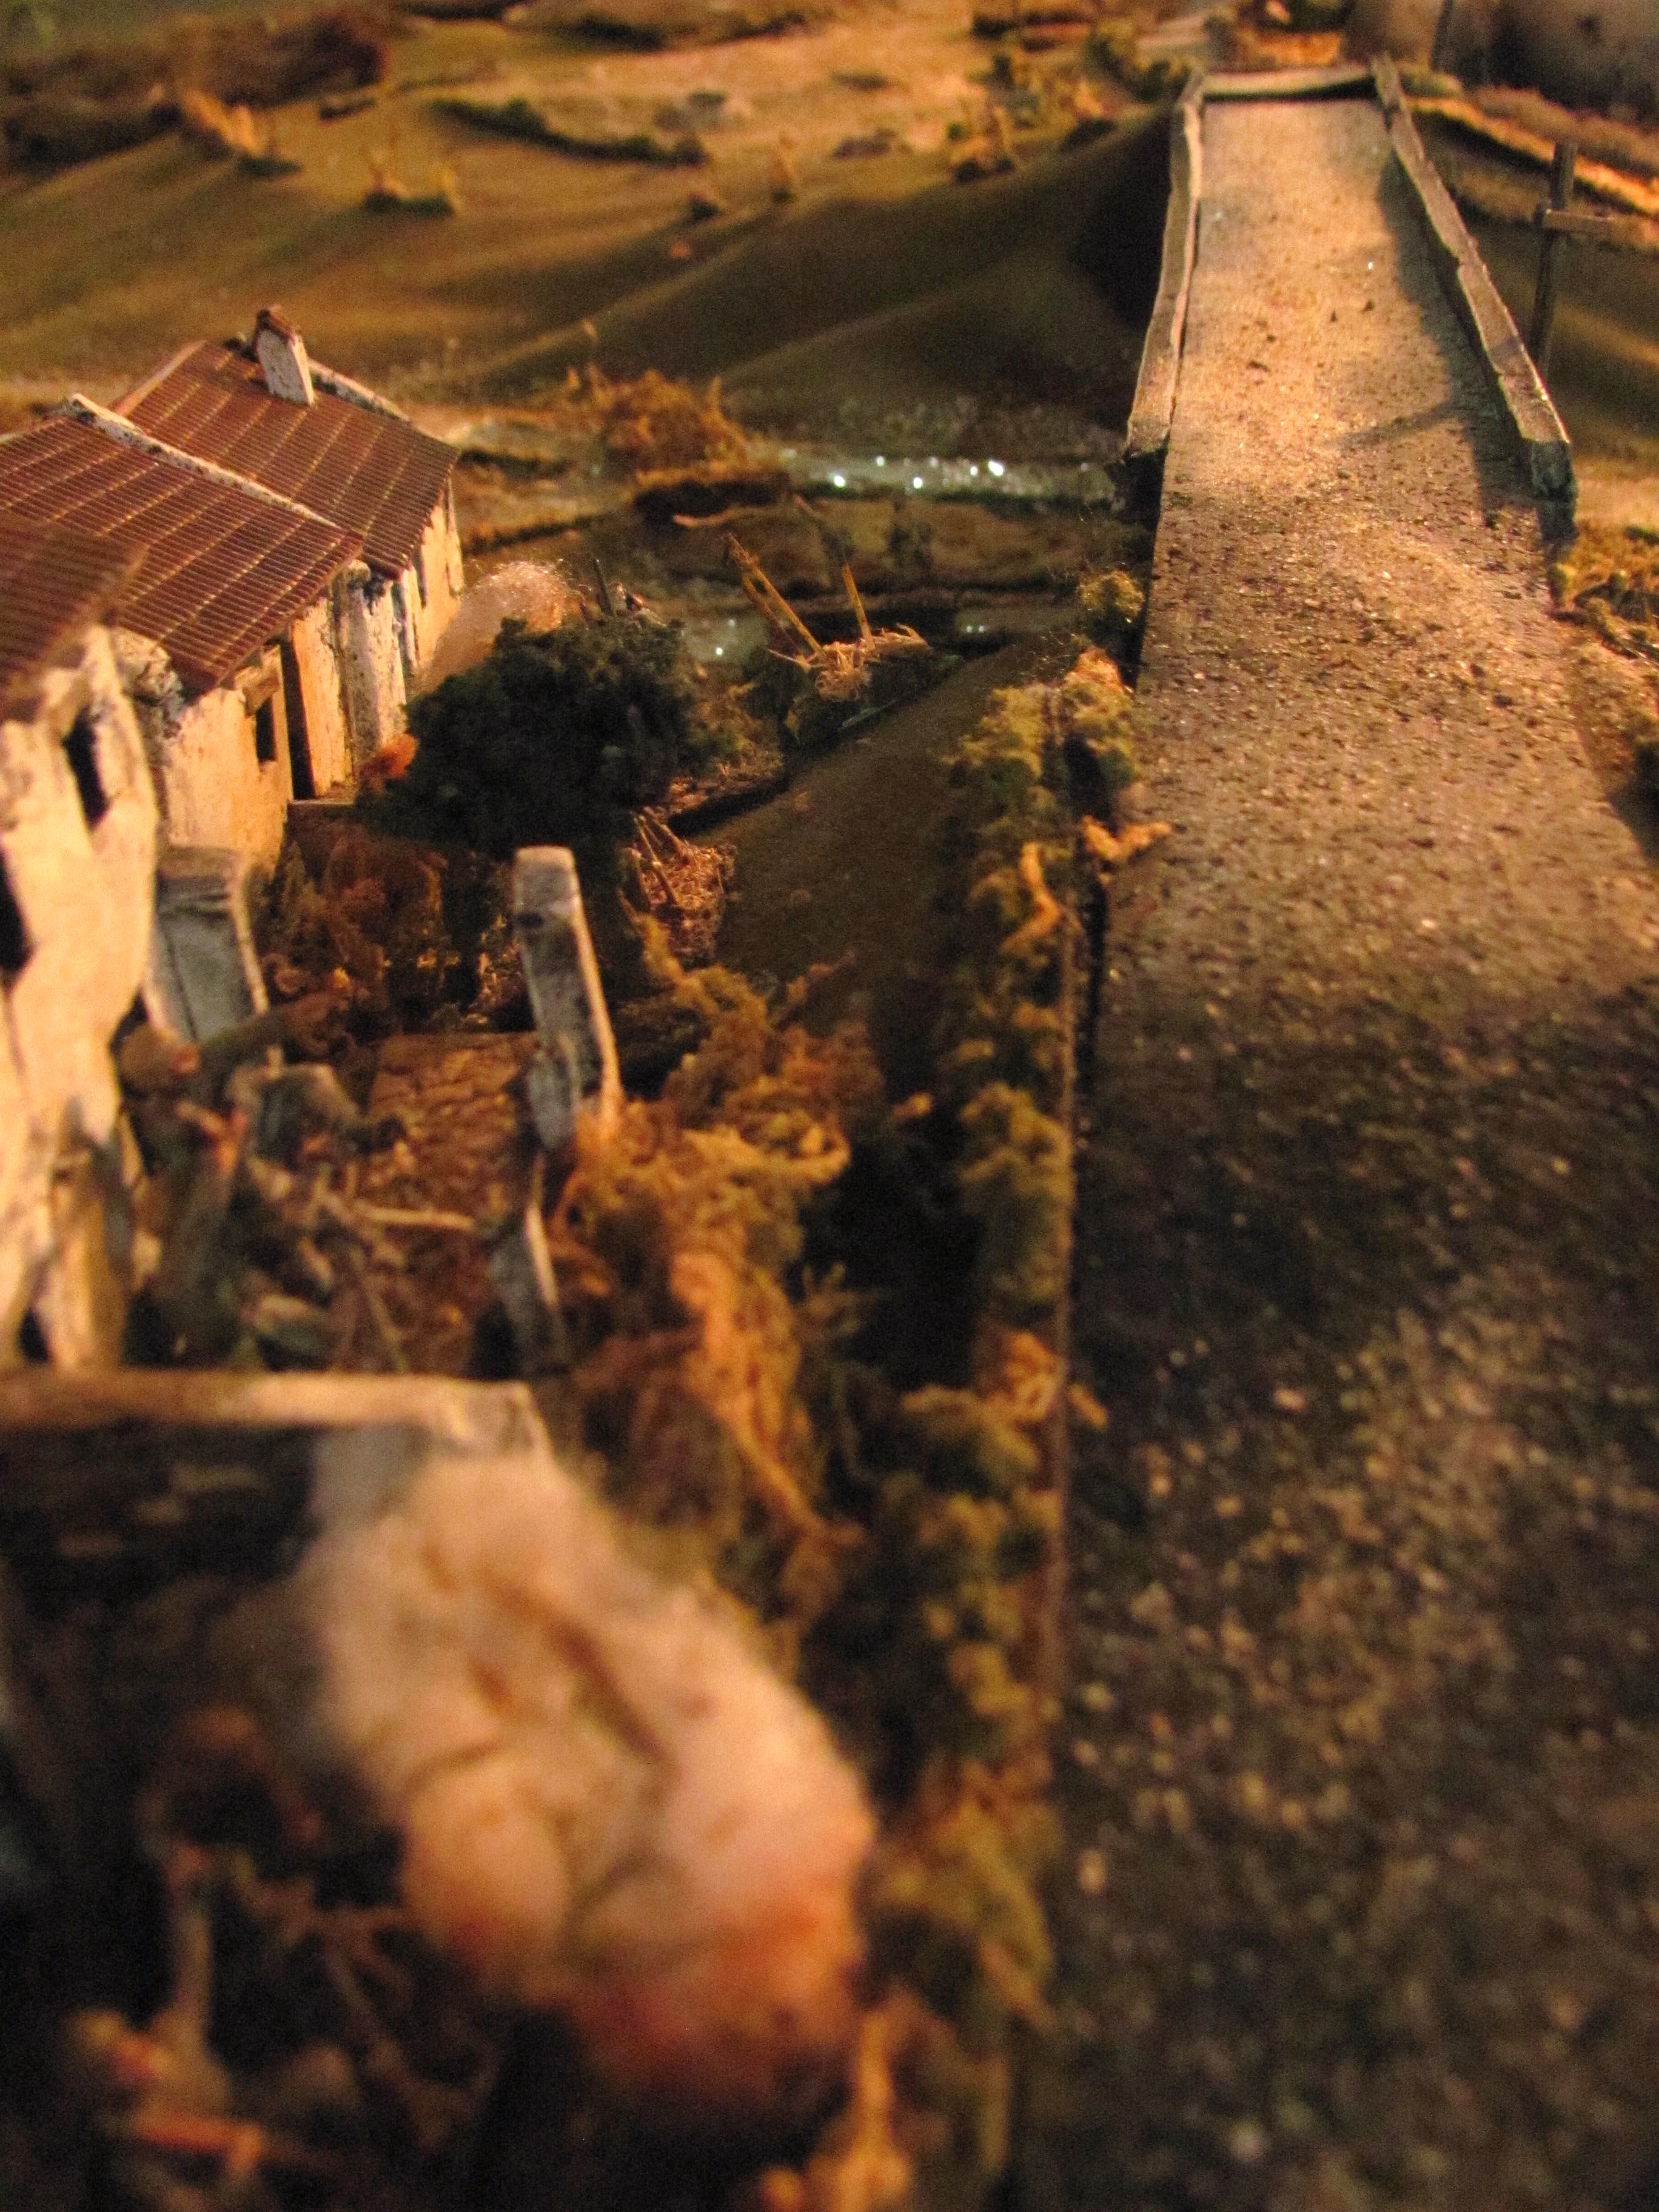
Starting positions for the Kiwis had C Company dug in around the airfield along with the Bofors batteries, D Company along the edge of the Travontis Valley south of the bridge (with the two Vickers platoons attached) and A company dug in around Pt. 107 along with the Lt. Col. Andrew's headquarters, FO and 3" mortars. A small contingent of RAF personnel guarded the RAF compound and the battalion's carrier platoon and an attached and not too road worthy Matilda were held in reserve on the east side of Point 107.
It was played on a 6'X6' table, and the toys were from my 1/72nd collection.
 |
| The scenario map showing NZ positions and landing areas for the initial assault group. |
1. Opening bombardment
A massive aerial bombardment followed up by dive bombing and strafing attacks raises a huge dust cloud over the airfield and Pt. 107.
2. Airfield pounded
Although many of the markers here are dummies, NZ C Company and the three Bofor batteries are well dug in around the airfield and protected by wire.
3. Pt. 107
Pt. 107, covered in olive orchards is also attacked from the air. The effect of the bombardment was reflected in that for the first two turns of play all the NZ forces were disordered and spotting capability was reduced, allowing the Fallschirmjaeger to arrive and form up unhindered.
4. Fallschirmjaegar form up
The German players (Alan and Phong) elect to land both of their initial assault force, arriving by gliders, south of the bridge in the Travontis Valley. The Travontis River is mostly dry at this point and presents no obstacle to movement.
5. Moving towards Point 107
3 Kp. 1 Battalion rapidly form up and sprint for the cover of the embankment at the edge of the valley.
6. Overview
In this overview smoke and dust continue to cloak the area east of the valley as the Fallschirmjaeger move forward to the right of the bridge, undetected by the defenders.
7. 3 Kp. reaches embankment
Most of 3 Kp. reach the shelter of the embankment. Barbed wire is spotted stringing the edge of the valley here. The enemy is certainly close by.
8. Specialstrosstrupp Brucke on left
Some of Specialstrosstrupp Brucke were lost on landing so a diminished unit also makes it to the embankment, hunkering down and waiting for the air assault to conclude.
9. Erratic fire from the defenders
As the dust begins to clear some of NZ D Company, still rattled from the bombardment, spot a few fallschirmjaeger in the valley and fire off a few rounds, unaware there are others metres away lurking behind the embankment.
10. RAF compound
Dug in and supported by a Vickers machinegun unit, the raw RAF airmen turned soldiers nervously await the attack in their compound.
11. First foxholes cleared out
Specialstrosstrupp Brucke, unhindered by wire to their front, pour over the bank and overrun some NZ positions. But a recovered D Company, dug in beyond the road, open fire.
12. Mortar fire!
On the German left 3 Kp. begin to breach the wire and engage, but a platoon on the right, caught in the open, are spotted and receive some punishing mortar and off board battery fire.
13. 8 Kp. II Battalion arrives
As 3 Kp. and Specialstrosstrupp Brucke take a pounding (the defensive fire was surprisingly effective!) 8 Kp. arrives on the far side of the valley, accompanied by the Fallschirmjaeger's heavy weapons and AT companies.
14. Fallschirmjaeger gain foothold on 22nd Battalion's left
On the NZ far left German paras breach the wire and clear out some of D Company from their foxholes as troops from C Co., repositioning from the airfield, begin to take up reserve positions in a dry canal that runs behind D's position.
15. Overview
In the foreground (bottom) 8 kp. arrives at the far edge of the valley while above the first para landing group still struggle to make headway. But with the arrival of the German FOO and mortar company the Germans gain the upper hand in indirect fire support.
16. Smoke
Mortars lay down a heavy smoke screen as Specialstrosstrupp Brucke breaks from the cover of the valley's edge and attempts to storm the airfield's compound.
17. Battling it out in the olive groves
At top some of Specialstrosstrupp Brucke encounter another line of barbed wire around the compound and take a beating from the stubborn RAF personnel dug in there. Others drift through a gap to their right but run up against the second line of defence on the far side of the road. With the arrival of C Co.'s troops the area in front of the compound turns into a killing ground and Specialstrosstrupp Brucke is annihilated!
18. Germans repelled
On the German right 3 Kp. has more success, meeting little resistance as their commander and a handful of soldiers push to within striking distance of Point 107. But here they meet A Co.'s line at the summit and are pushed back.
19. From the far side of the valley
The German battle group commander watches the initial attack collapse from the far side of the valley as 8 Kp. makes its way across the dry bed of the Tavronitis. He sends in his battalion heavy machineguns and support troops from the AT company to bolster 8 Kp.'s attack.
21. German mortars take fire from Bofors
The German battalion mortars, emplaced in the small hamlet west of the valley, take harassing fire from the NZ Bofors emplaced around the airfield.
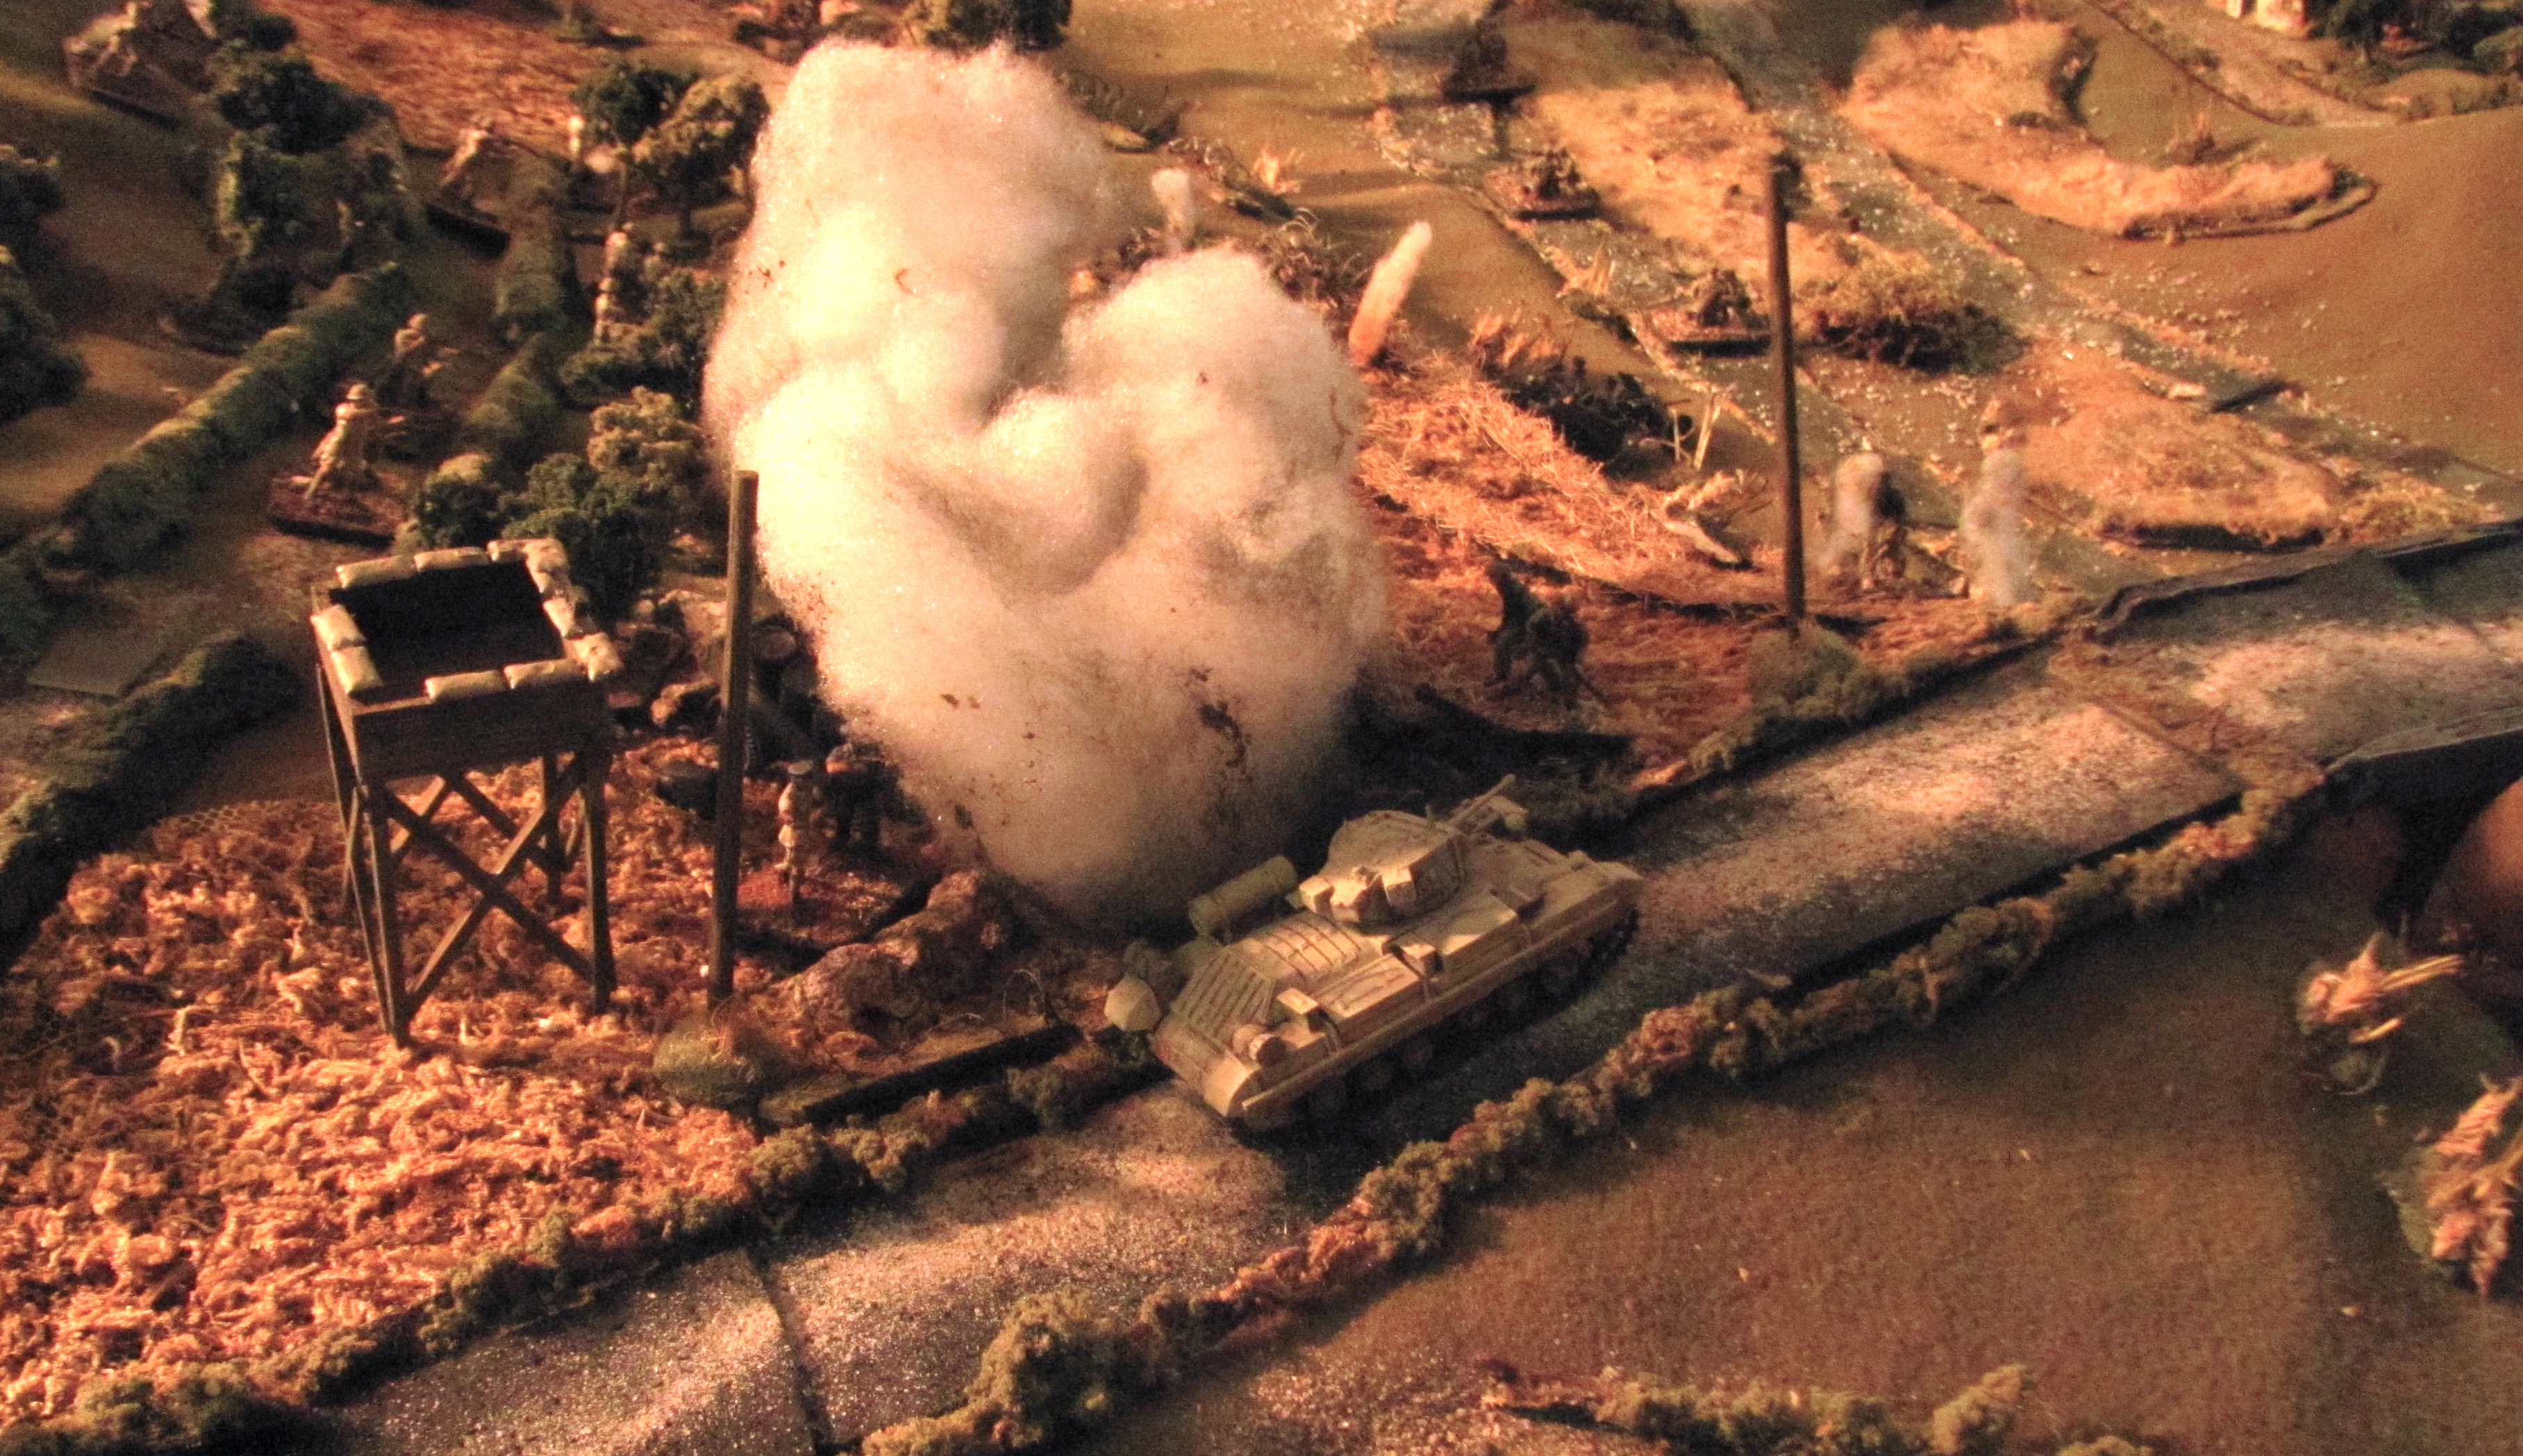
20. Matilda released
The NZ commander, Lieut. Col. Andrew, judges it time to let lose his small armoured reserve. A Matlida chugs down the far side of the hill and past the Bofors, attracting enemy mortar fire. (Our game had a mechanic in it that would give an ever-increasing chance for the dodgy Matilda to break down as it did historically.)
22. What ho, lads! The cavalry!
It gladdens the hearts of the sore-pressed airmen as it trundles past the RAF compound, arriving just as 8 Kp. makes the safety of the embankment.
23. What ho, lads? No cavalry??
The Matilda rolls into the valley, knocking out some of the attackers slow to arrive at the valley edge. But most of 8 Kp. had already pushed on, and as the tank re-emerges from the valley it falls in close combat to a Pak36 which had just had time to emplace in the orchards.
24. Battle in the canal, carrier platoon counterattack
Now supported by heavy mortar and artillery fire, 8 Kp. quickly overwhelms D and C Co., who desperately try to form a secure line in the canal, They are joined by the RAF men, who, outflanked, have abandoned the compound and are also falling back. A vicious hand to hand fight breaks out in the canal and with the Germans getting the upper hand, Andrew throws in his mobile reserve, the carrier platoon (which are mounted in scrounged Bren carriers, not their own, abandoned in Greece!) But the German mortars spot their movement down the road bordering the airfield, knocking out one of the carriers as the platoon scrambles to dismount into the RAF compound while under enemy fire.
25. Carrier KO'd, counterattack shattered
The second carrier also takes a direct hit from enemy mortars and the NZ counterattack is quickly mopped up by the German paras, who now have taken the canal.
26. Bofors take direct hit
The German mortars turn their attention to the Bofors who have been giving them grief with long distance fire from the airfield. One is knocked out with a direct hit.
But as the Germans now move on Point 107 it's all hands on deck! Even the NZ FOO, losing contact with his battery of 75's, grabs up arms and takes up a position in the orchard - just in time to KO an enemy Kettenkrad hauling up the 37mm in support of the German attack. The vehicle explodes, taking the gun with it!
28. Fallschirmjaeger push towards Point 107
The Germans unleash the full fury of their heavy mortar and rocket battery on the remaining defenders.With NZ D and C Companies wiped out along wth the carrier platoon, only A Company is intact, still dug in around the summit of Point 107. But the fallschirmjaegers have also suffered badly, their ranks steadily thinned as they fight their way uphill. And with the sun setting, time is running out to take the vital hill controlling the Maleme airfield.
29. A second Bofors is KO'd
Back on the airfield a second direct hit takes out another Bofors, leaving only one still in position around the airfield.
30. Germans move to take airfield
Sensing that he may not be able to take the hill in time the German commander dispatches some of his command to attempt to at least try and secure the airfield.
31. Battling it out in the olive groves
The battle rages in the olive groves as the sun touches the horizon. Remarkably, the FOO still survives!
32. German high water mark
A Company's commander goes down to a German close assault, but this will be the last enemy success of the day.
Down to a handful of men the paras brave attempt falters and a bad morale roll sends some fleeing down the hill in retreat on the final turn of the game.
At game's end Point 107 holds, but just barely! With the third Bofors on the airfield failing to recover from a disorder, the NZ player (me) fails to hold the airfield, so the game ends with a draw. This was the second time I have played this scenario, and both ended in a nail-biting finale. Historically Lieut.-Col. Andrew, radioing his brigadier looking for direction, is told to do what he "thinks bes" and abandons Point 107 during the night, surrendering control of Maleme to the Germans. A counterattack attempt the following day failed to retake the airfield and as more German troops and supplies poured into Crete, the balance tipped, leading to the eventual loss of the island. But, as in our game, the German airlanding was a costly venture and proved to be the last time that the German Fallschirmjaeger actually fought in their intended role as airborne troops in the second World War.


Great looking game and pictures! Thanks for sharing!
ReplyDeleteGreetings
Peter
Hey, thanks Peter. It was a fun game to play.
Delete